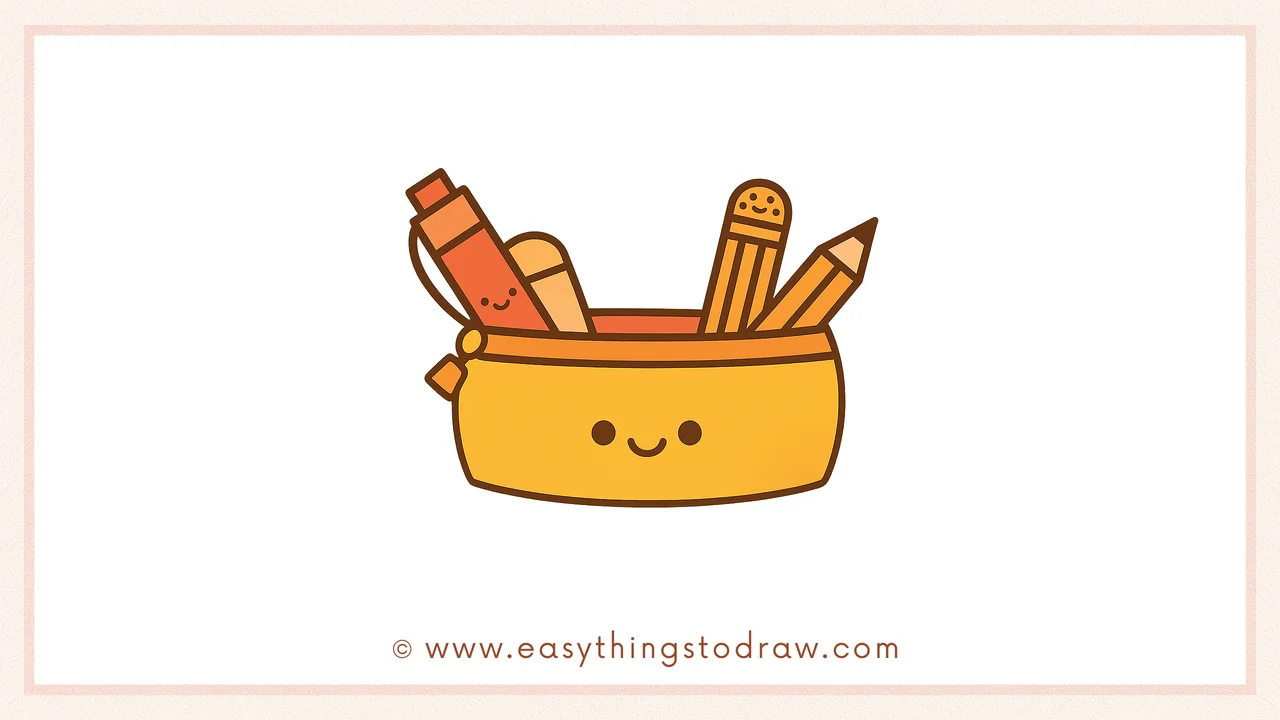
Do you love art supplies? Then you’ll have a blast drawing this adorable open pencil case filled with fun tools! In this easy drawing tutorial for kids and beginners, we’ll walk through how to sketch a cartoon pencil pouch with pencils, markers, and a smiling face. This is a perfect project for back-to-school season or any time you want to doodle your favorite supplies!
What You Need:
- A pencil
- An eraser
- A black marker (for outlining)
- Coloring tools (crayons, markers, or colored pencils)
- Drawing paper
Step by Step Pencil Case Drawing Instructions
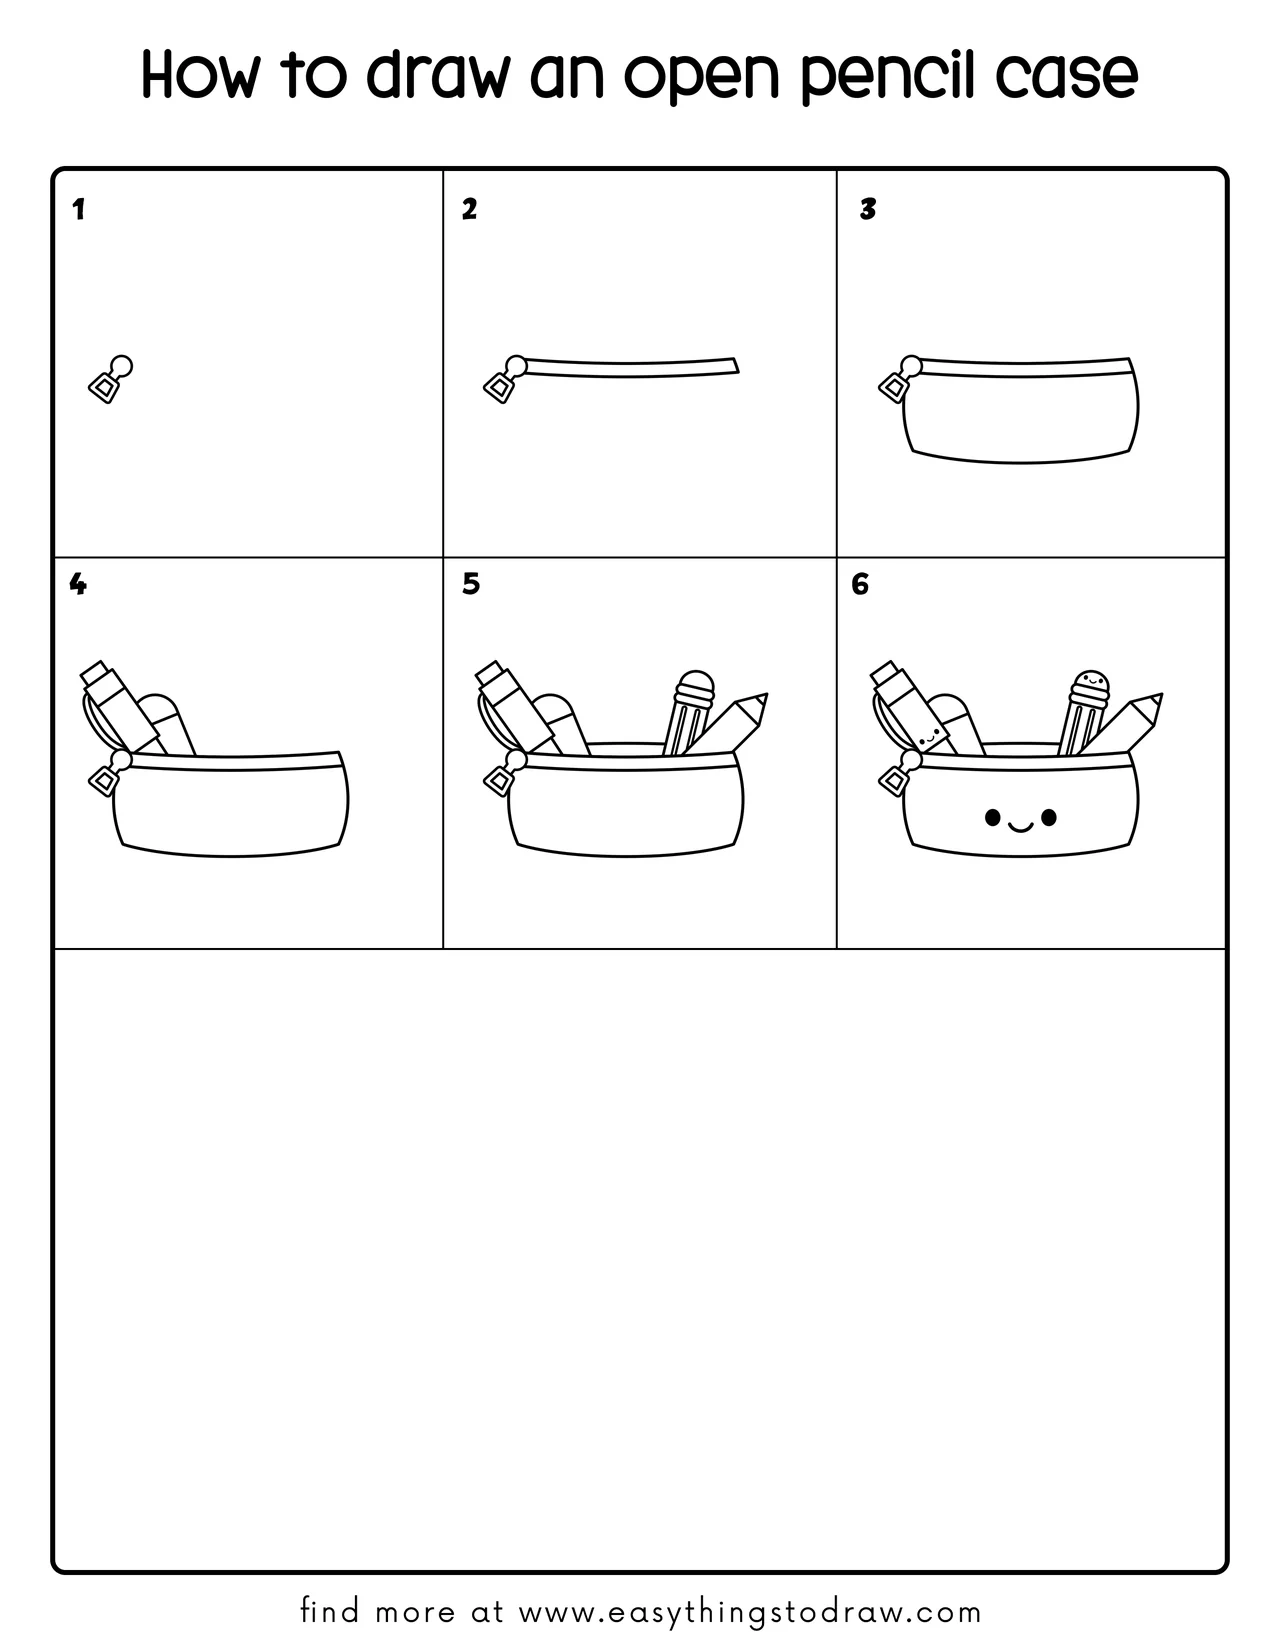
Step 1 – Start with the Zipper Pull
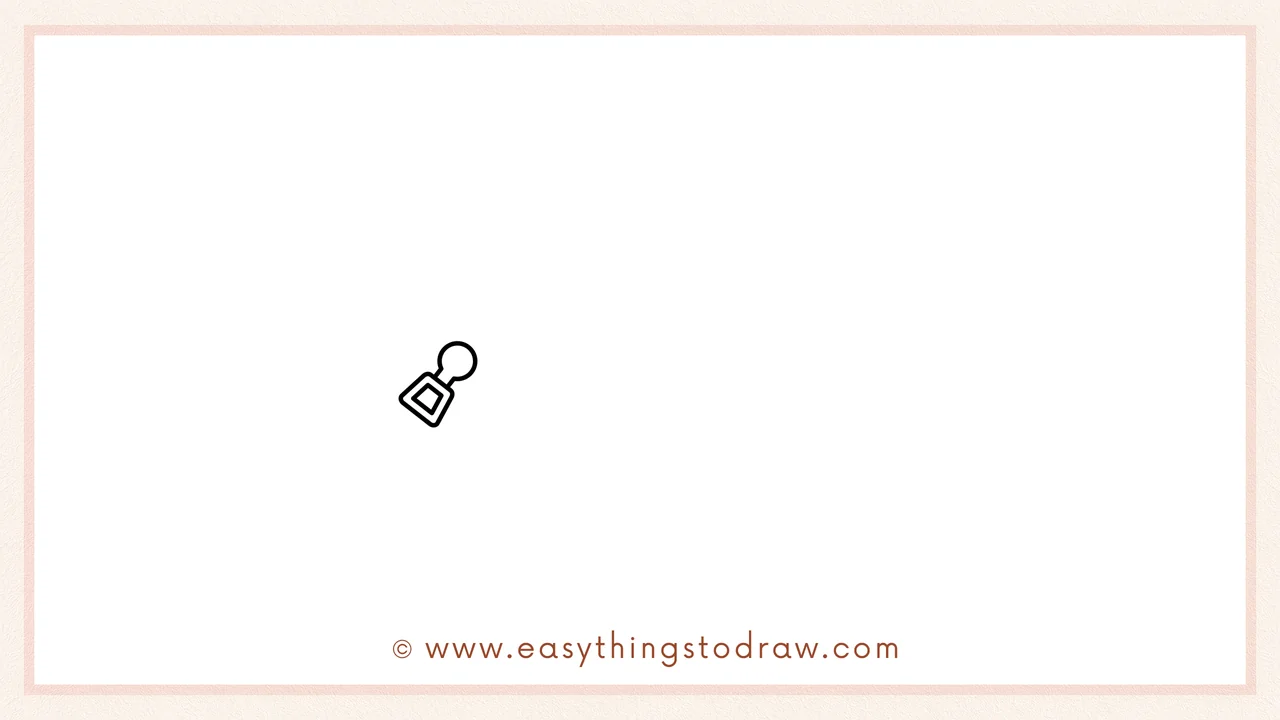
Draw a small zipper pull in the shape of a circle and a hanging diamond. It looks like a tiny charm!
Step 2 – Draw the Zipper
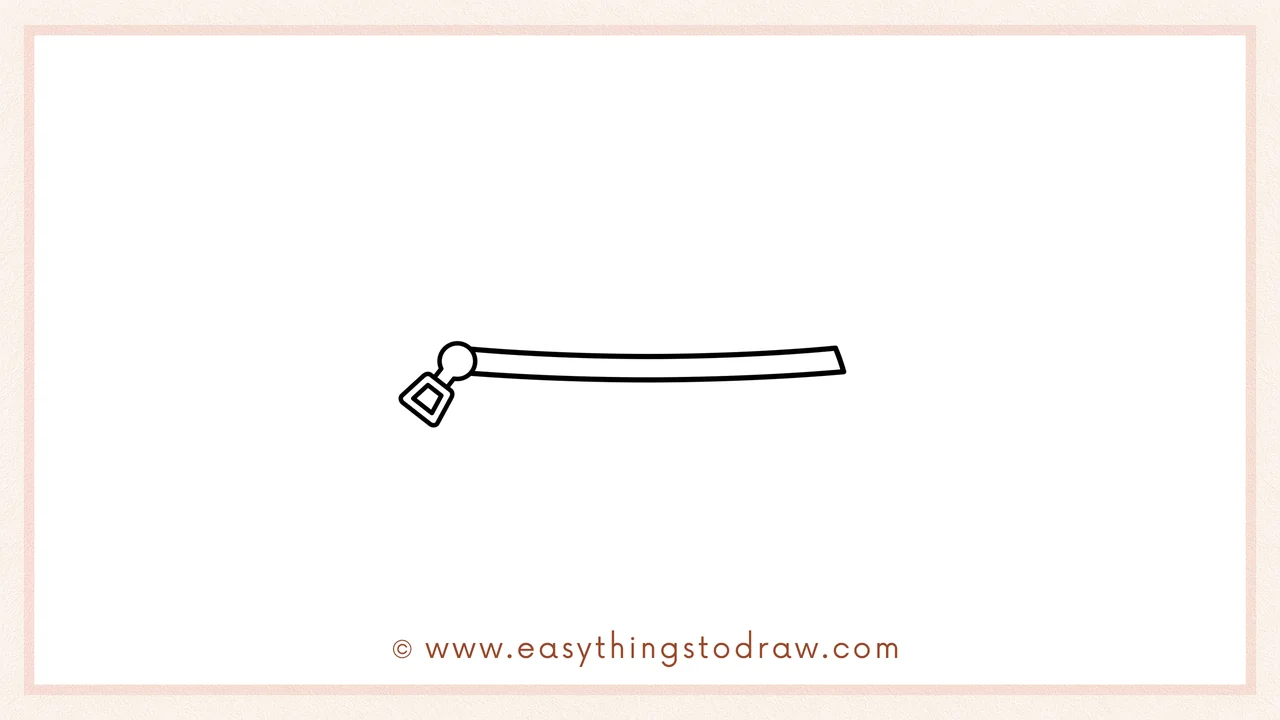
From the zipper pull, draw a long curved horizontal line — this is the open zipper of the pencil case.
Step 3 – Sketch the Case Shape
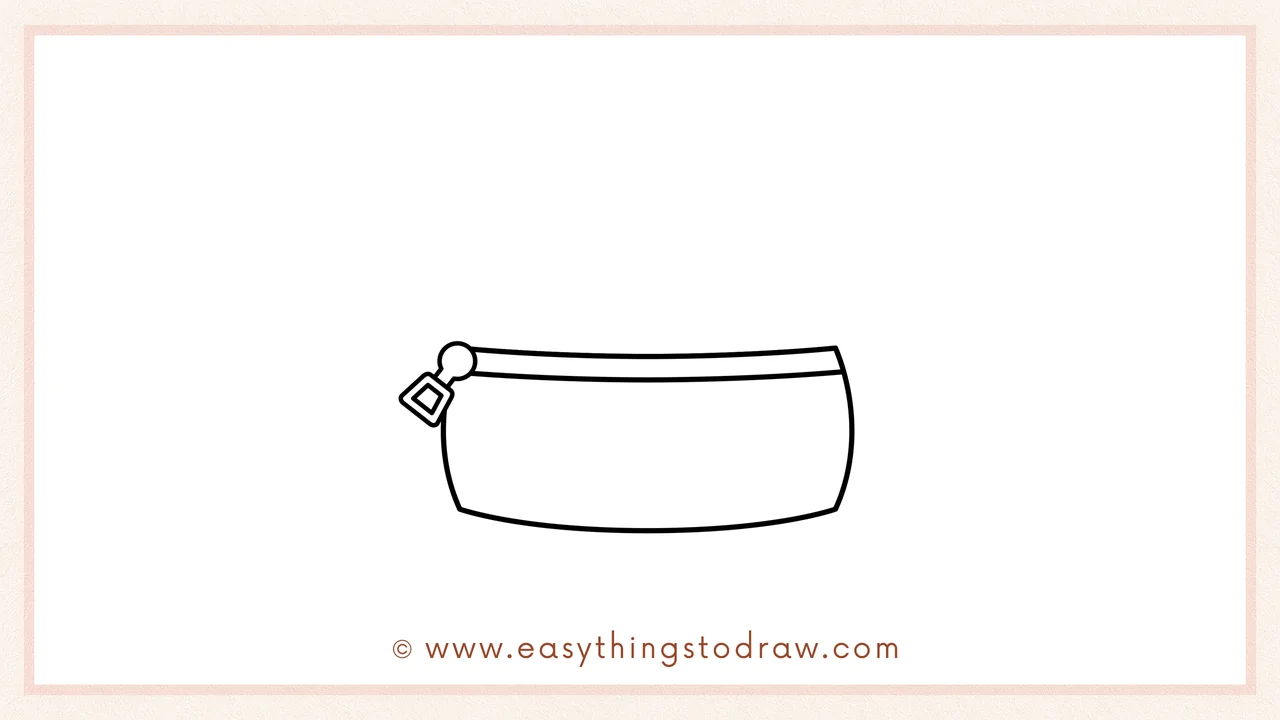
Now draw the rest of the case by connecting the sides with smooth vertical curves and a long curved bottom.
Step 4 – Add Supplies Inside
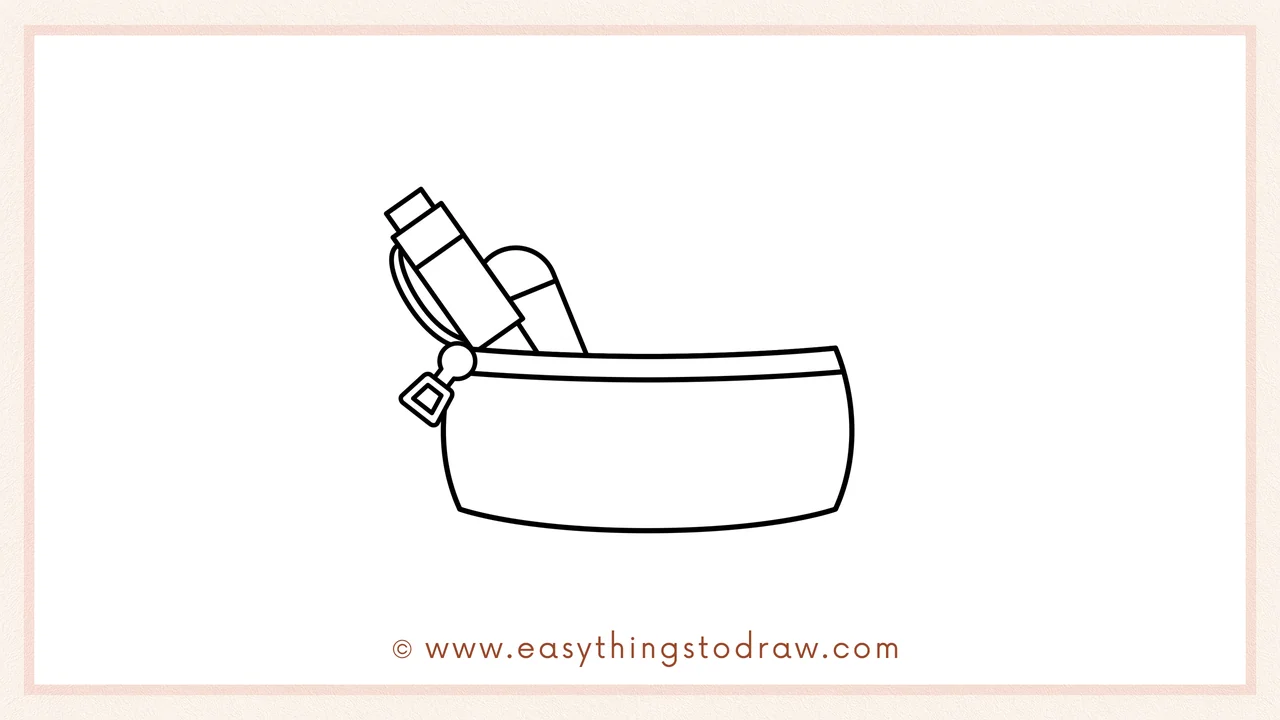
Let’s fill it up! Draw the tops of different supplies poking out — like a ruler, eraser, and marker on the left side.
Step 5 – Draw Pencils on the Right

Now add two pencils to the right side, one with a pointed tip and one with a round eraser top. This makes it look extra full!
Step 6 – Add a Cute Face
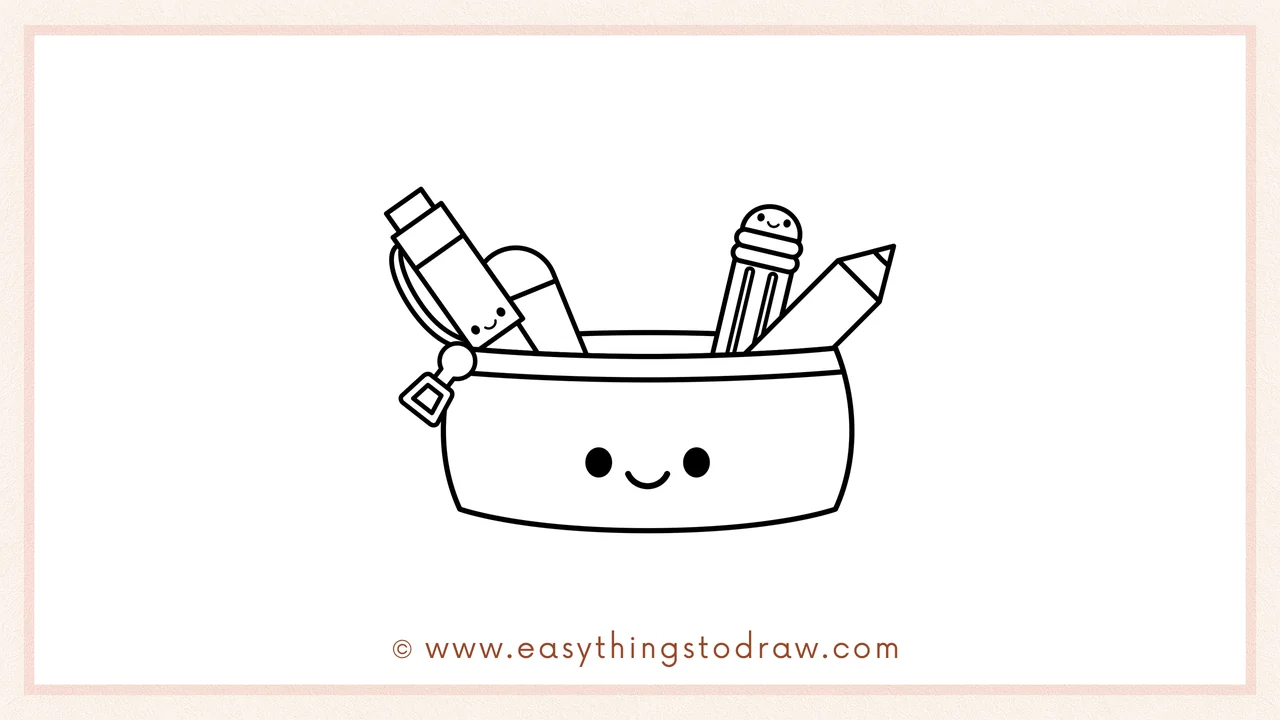
Time to make it adorable! Draw two dot eyes and a smiley face on the case body below the zipper.
Frequently Asked Questions (FAQ)
Can I add more items inside the pencil case?
Absolutely! Try drawing a pair of scissors, a glue stick, or even a mini notebook.
What colors should I use?
Bright and cheerful colors like yellow, pink, mint green, and blue work perfectly for a playful case.
Can I make the face different?
Yes! Try sleepy eyes, a winking face, or even a mustache for fun.
What if I only want to draw the supplies?
You can! Use Steps 4–6 to practice drawing school supplies separately.
Printable Drawing Tutorials
Download Printable How to draw an open pencil case Drawing Tutorials
You Did It!
Amazing job drawing your cheerful open pencil case! It’s filled with fun, color, and school-time spirit. You can personalize it by adding your name on the case, creating a background like a desk or classroom, or even sketching other school supplies to go with it. Keep practicing and let your imagination zip open with more ideas!
