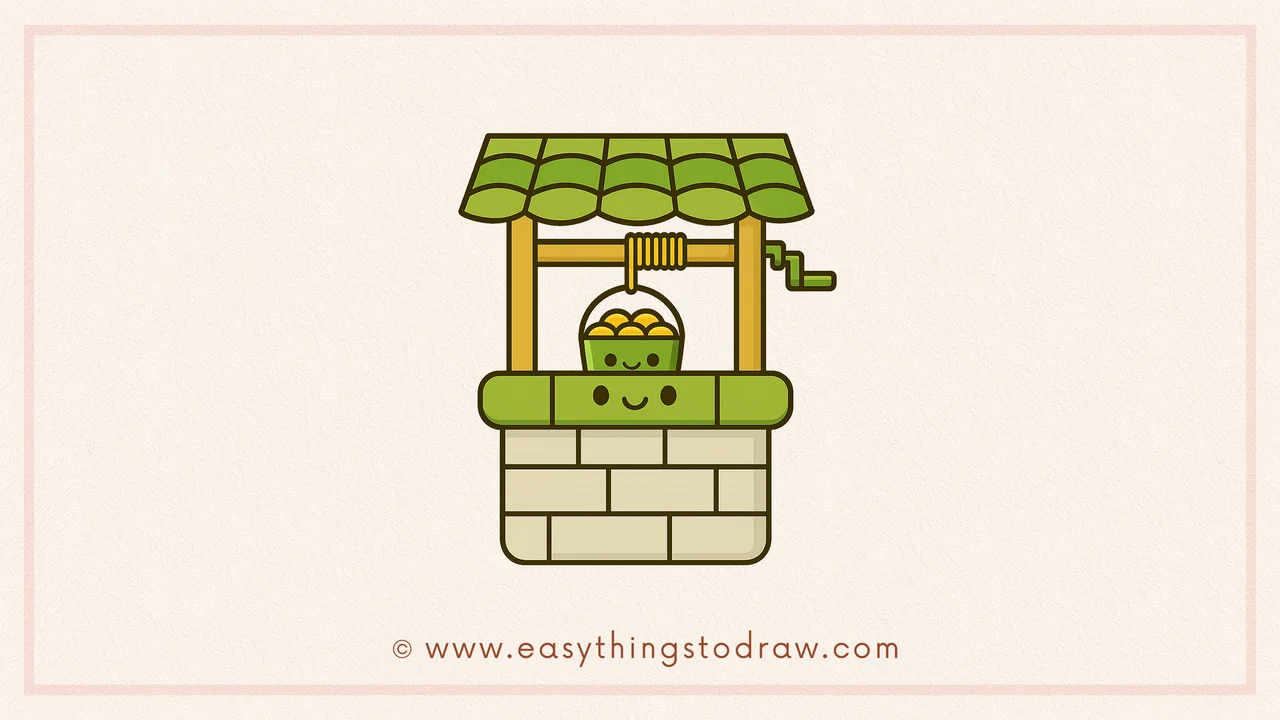
Wishing wells are magical places in legends — toss in a coin, make a wish, and maybe something lucky will happen! This fun drawing tutorial will teach you how to draw your own adorable wishing well, complete with a roof, crank, and a bucket full of treasure.
Perfect for St. Patrick’s Day, this cute cartoon-style well might even have some gold at the bottom! 🍀✨
✏️ Who Can Use This Tutorial?
- Kids learning to draw
- Teachers doing themed art lessons
- Homeschool families celebrating Irish culture
- Anyone who loves making magical drawings!
🎨 What You’ll Need
- Pencil
- Eraser
- Black marker or pen for outlining
- Crayons, markers, or colored pencils
- Drawing paper
🧱 Step-by-Step Instructions
Step 1 – Draw the Roof
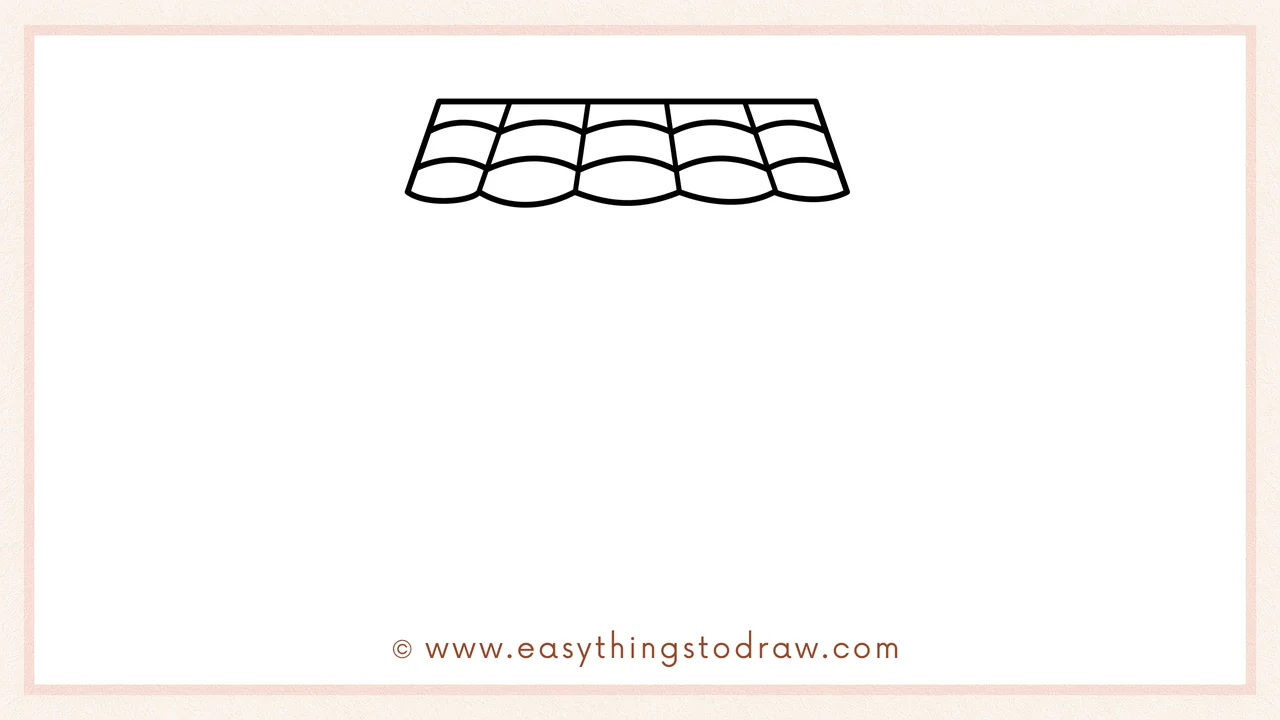
Start by drawing the roof tiles. Make a slanted rectangle, then add curved lines underneath to create the shingle pattern.
Step 2 – Add the Roof Support Beam
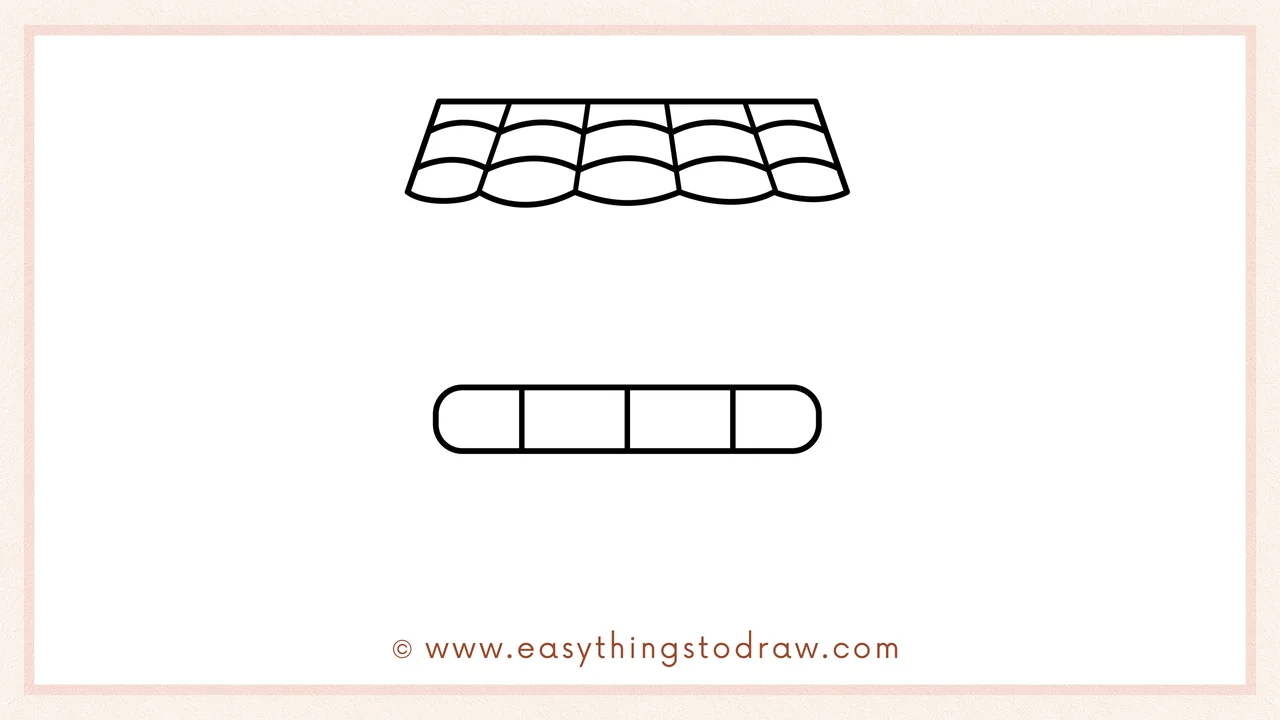
Draw a long rounded rectangle below the roof. Divide it into sections — this will be the horizontal wooden beam that holds the crank and rope.
Step 3 – Build the Brick Wall
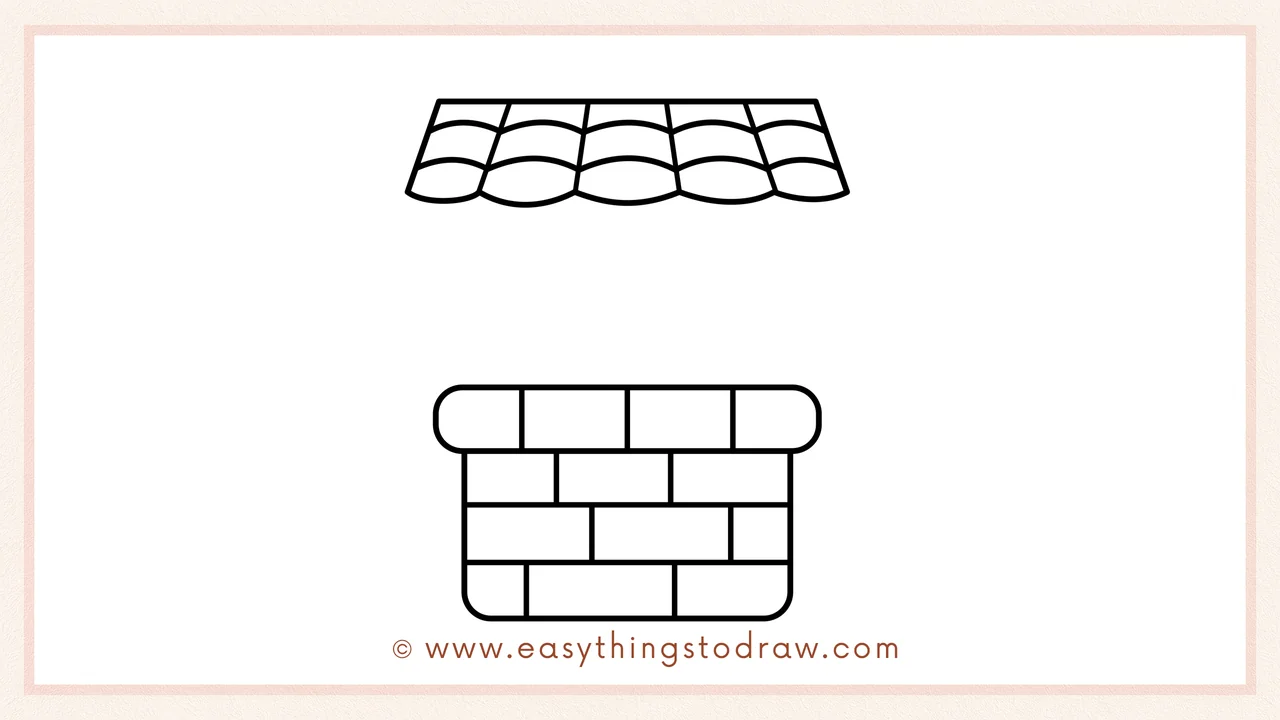
Under the beam, draw the stone or brick well. Use rectangles to make it look like it’s built from bricks or stones. Round the top edges for a soft, cartoon look.
Step 4 – Add Side Posts and Crank
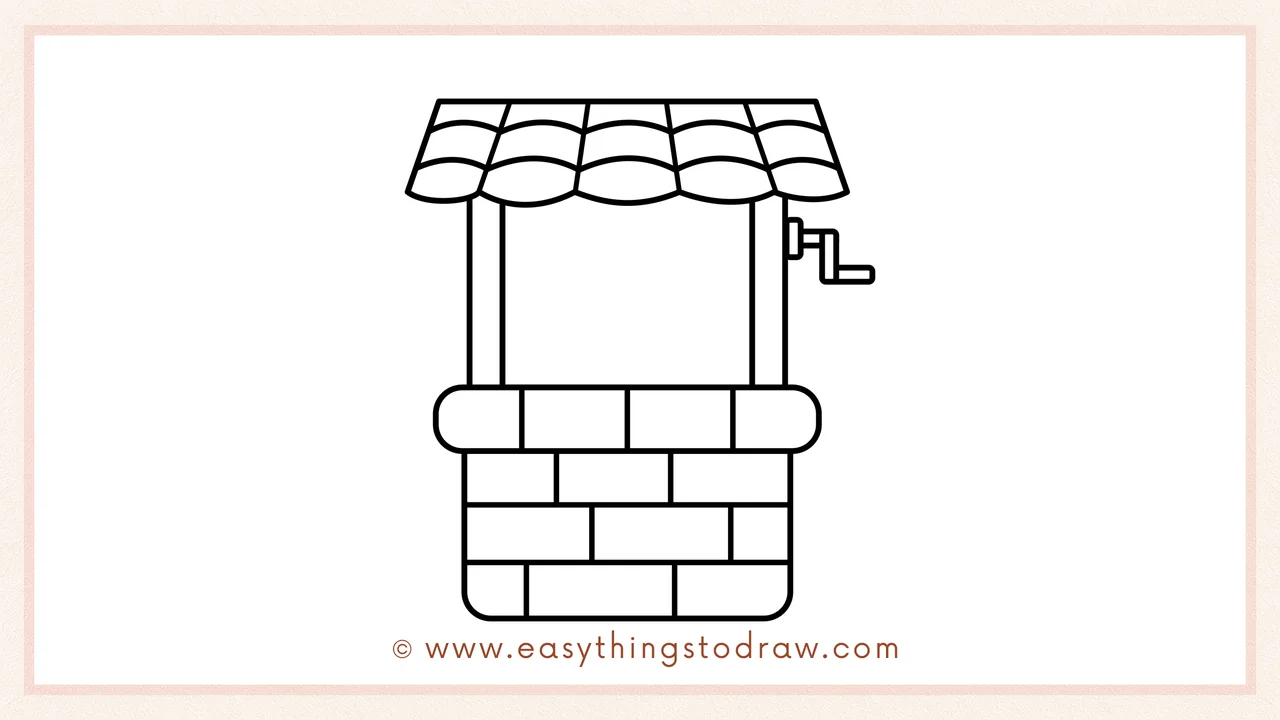
Now draw two vertical support posts going up from the well to the roof. Add a small crank handle on one side — it looks like a sideways letter “E”.
Step 5 – Draw the Bucket and Rope
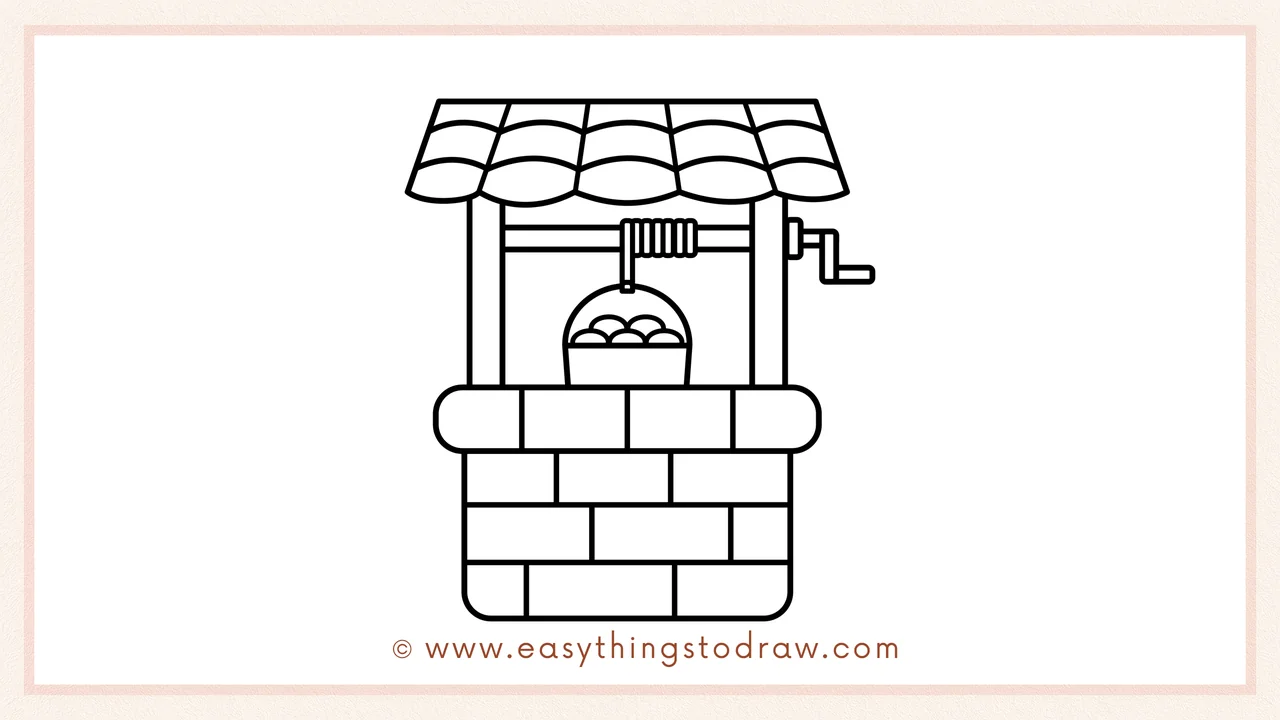
In the center, draw a bucket full of gold or water. Add a spiral rope above it, connecting it to the beam. This is what lets the bucket go up and down!
Step 6 – Add a Cute Face!

Give your well a happy personality! Two dots for eyes and a smiling mouth. Your well is now magical and friendly!
Printable Drawing Tutorials

Download Printable How to draw a wishing well Drawing Tutorials
🌈 Coloring Suggestions
- Roof: Red, brown, or green
- Well stones: Grey or light brown
- Bucket: Yellow for gold or blue for water
- Background: Grass, rainbow, or shamrocks!
💡 Fun Ideas
- Add a rainbow leading into the well — maybe it’s hiding a pot of gold!
- Draw a leprechaun peeking out from behind it
- Write your wish on a paper coin and “toss” it in by taping it on top!
🎉 You Did It!
Now you have your very own cute wishing well drawing for St. Patrick’s Day. With some creativity and color, you’ve turned simple shapes into something magical!
Want to keep the fun going? Try drawing:
– A pot of gold
– A rainbow
– A shamrock
– Or even a leprechaun trap!
Happy drawing and may your wishes come true! 💚🍀
