Looking for a fun Valentine’s Day art activity? Learn how to draw a sweet, two-tier Valentine’s Day cake with this simple, step-by-step tutorial! Perfect for kids, beginners, and festive holiday projects, this cake design is cute, easy, and full of love.
This guide is perfect for:
- Kids who enjoy holiday art activities ❤️
- Beginners practicing simple shapes like ovals, rectangles, and hearts ✏️
- Parents and teachers planning Valentine’s Day crafts 🎨
🎂 Why Learn From Us?
At Easy Things to Draw, we create simple, kid-friendly art tutorials that make drawing fun and approachable. With over a decade of teaching experience, our guides are designed to help children and beginners draw confidently — one step at a time.
✅ What Makes This Valentine Cake Drawing Sweet?
– 🍰 Uses easy shapes (ovals, rectangles, hearts, and scallops)
– 🎀 Fun details like heart decorations and icing patterns
– 🧠 Encourages creativity with decorations and colors
– ✨ Perfect for Valentine’s Day cards, crafts, and posters
🔒 Classroom Ready and Kid Safe
Our tutorials are age-appropriate, safe, and fun for solo learning or group activities.
What You Need
- Pencil ✏️
- Eraser
- Black marker or pen 🖊️
- Coloring supplies (markers, crayons, or pencils) 🎨
- Paper 📄
- Valentine’s Day spirit ❤️
Step by Step Valentine’s Day Cake Drawing Instructions
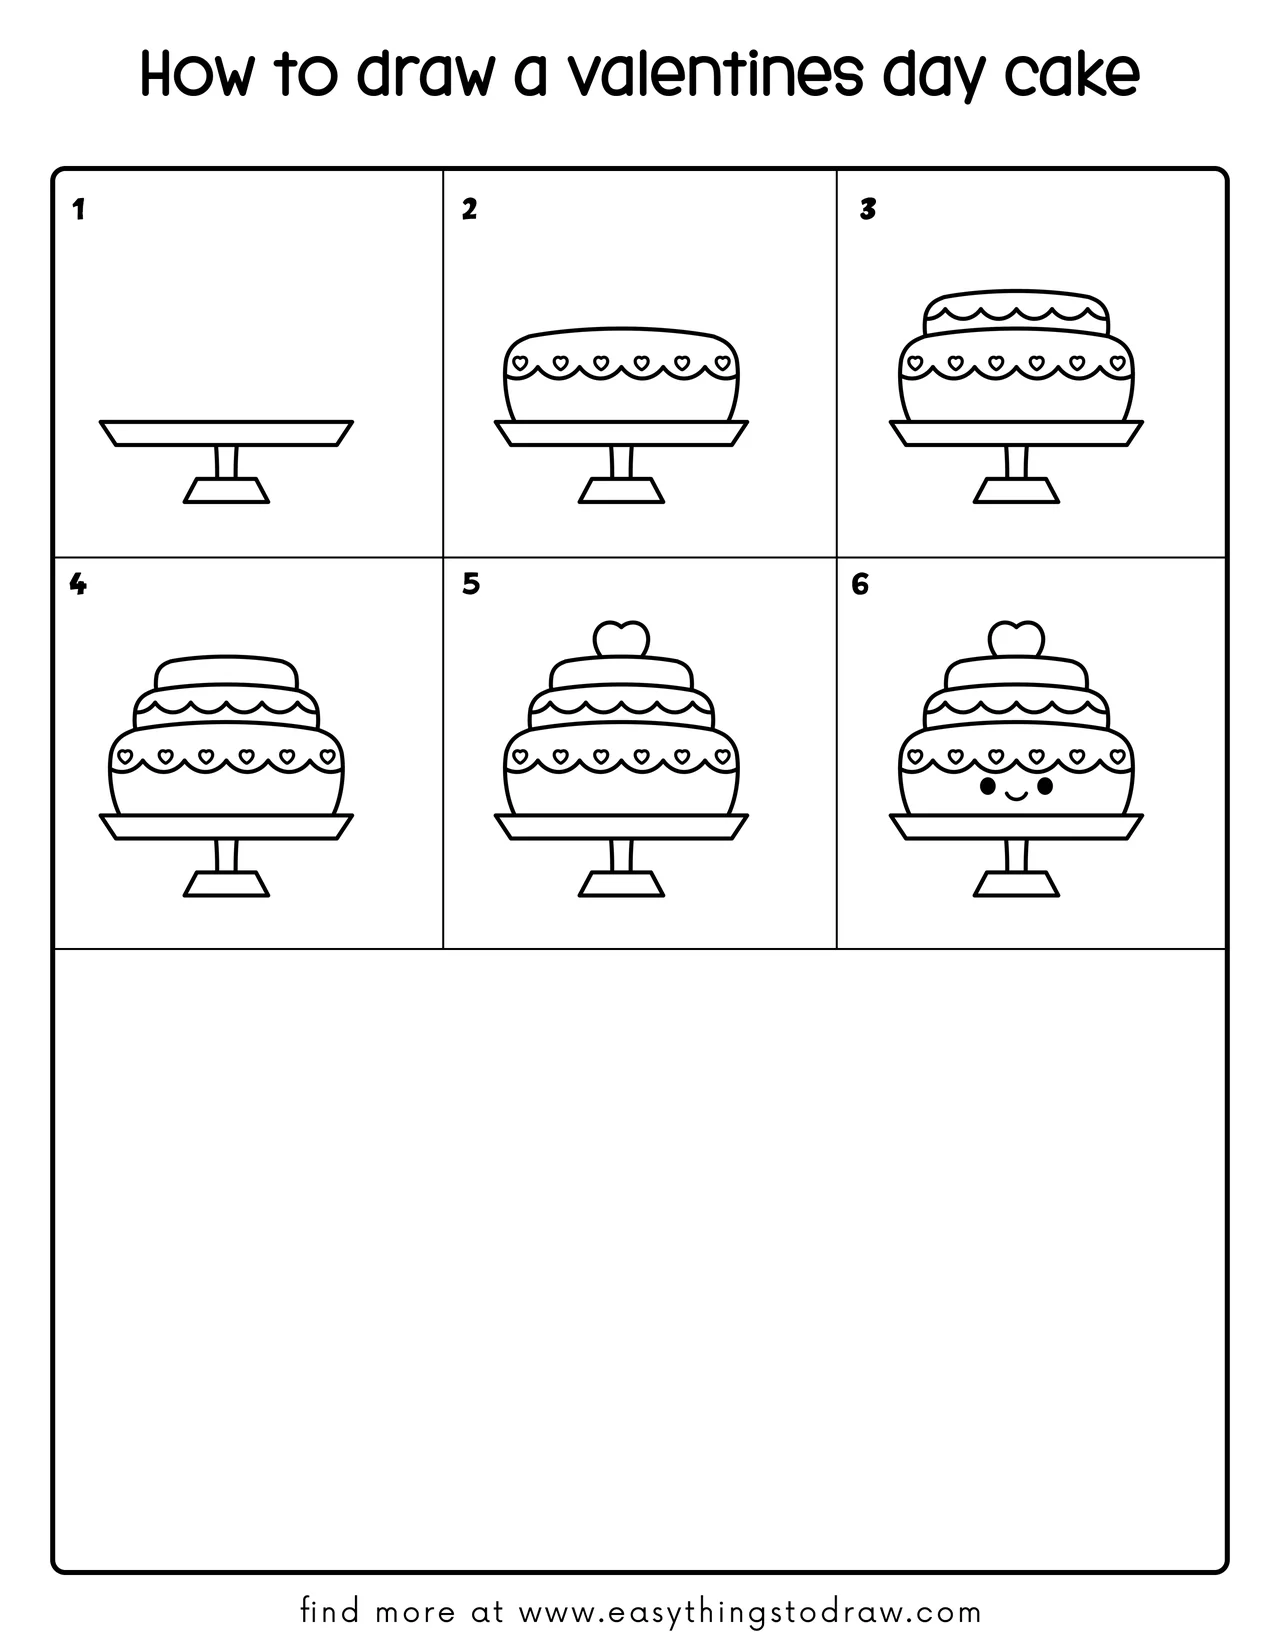
Step 1 – Draw the Cake Stand
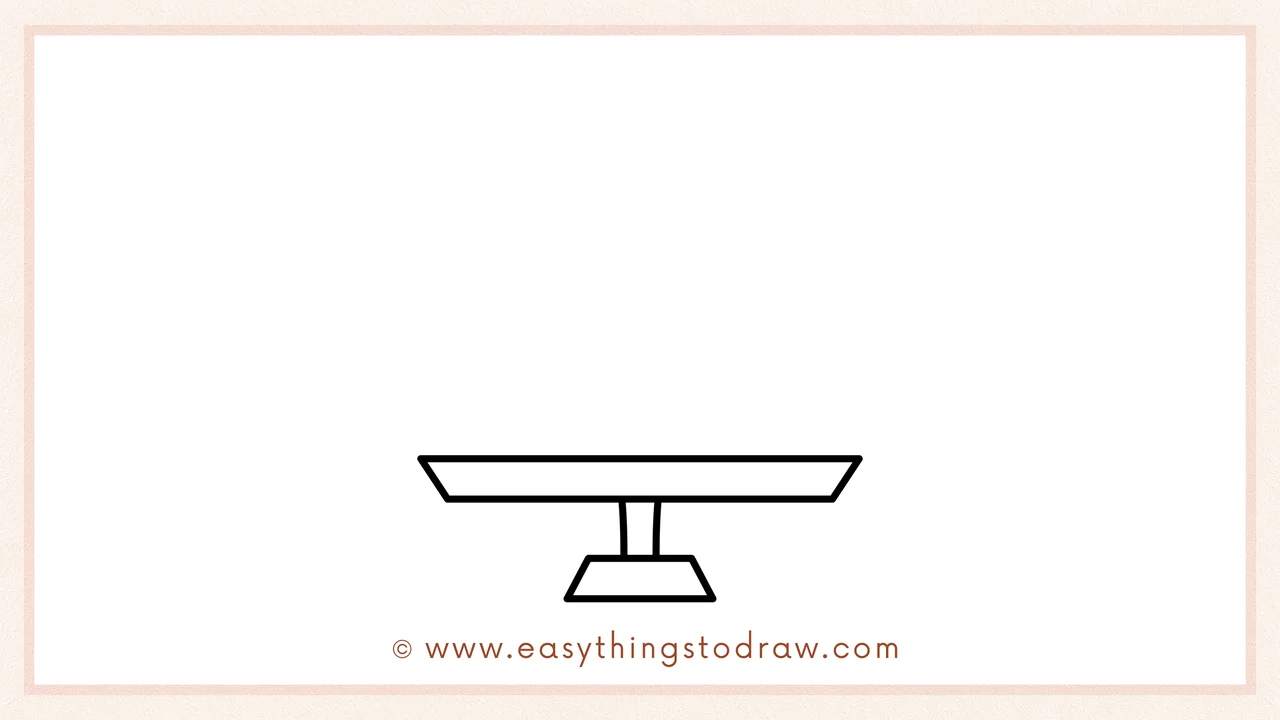
Begin with a wide oval for the cake plate. Add a small vertical stem and a trapezoid base to complete the stand.
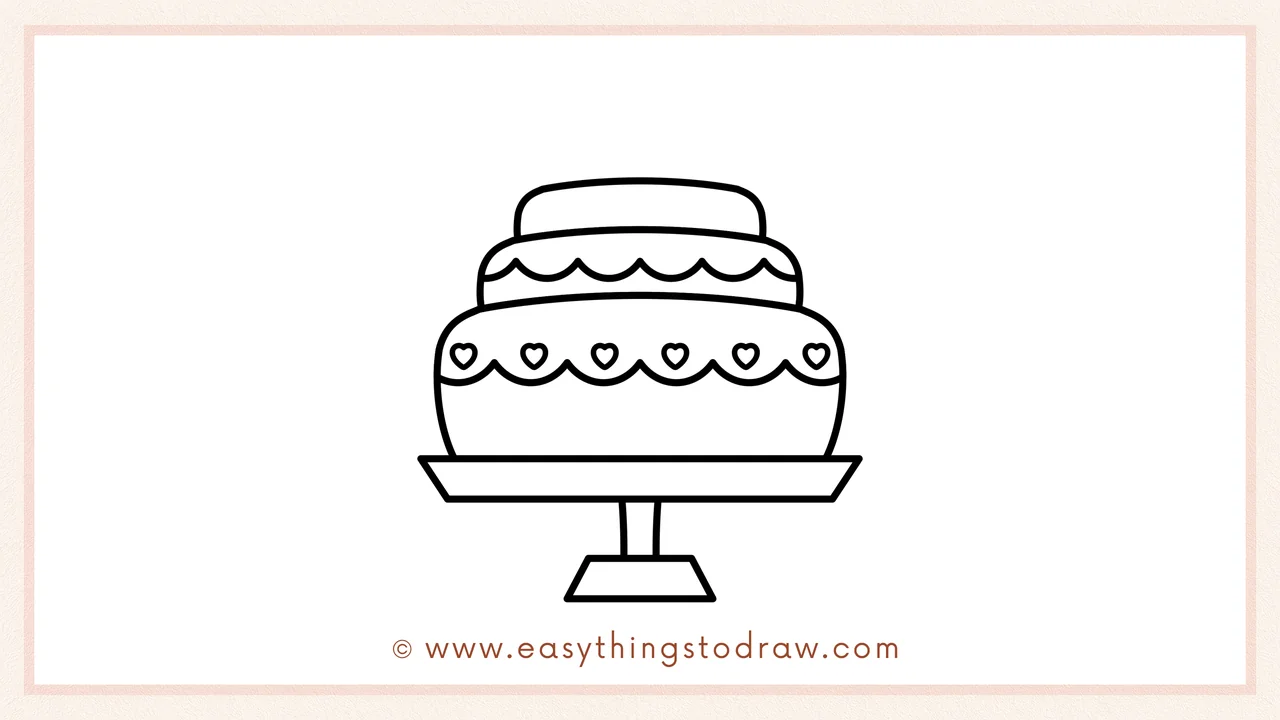
Step 2 – Draw the First Cake Layer
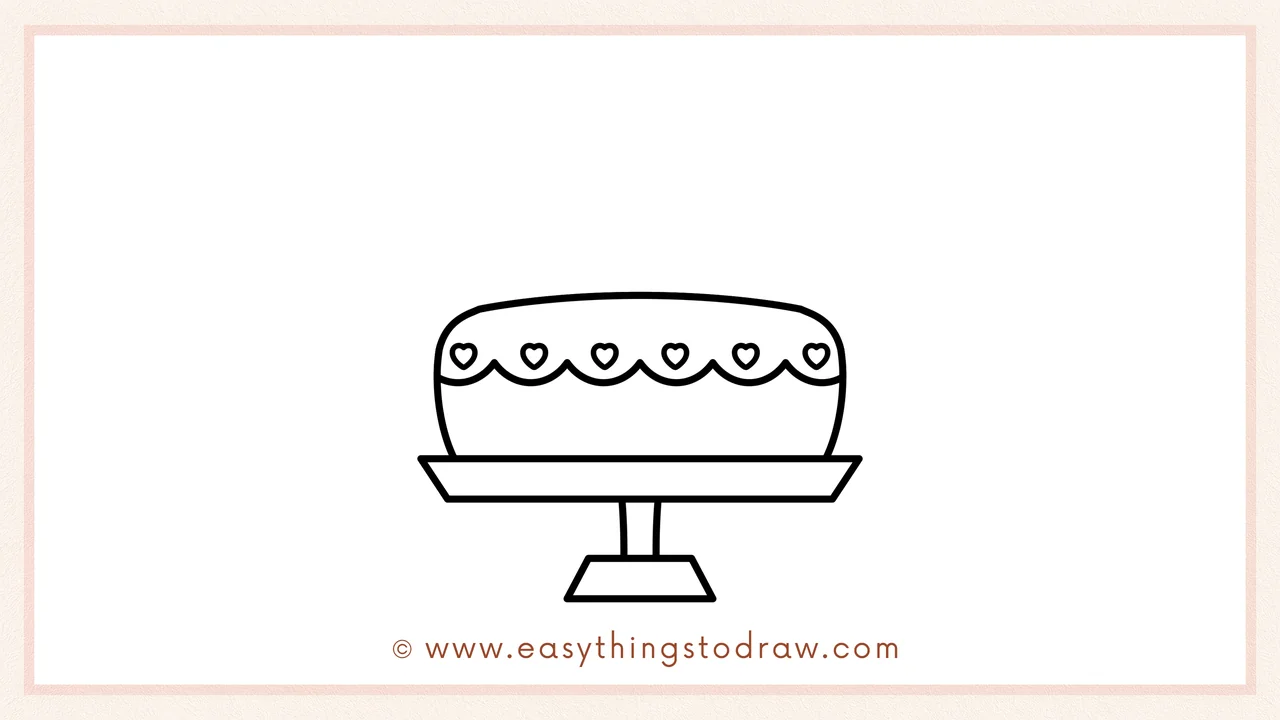
On top of the stand, draw a large rounded rectangle. Add a scalloped line across it with tiny heart decorations to make it festive.
Step 3 – Add the Second Cake Layer
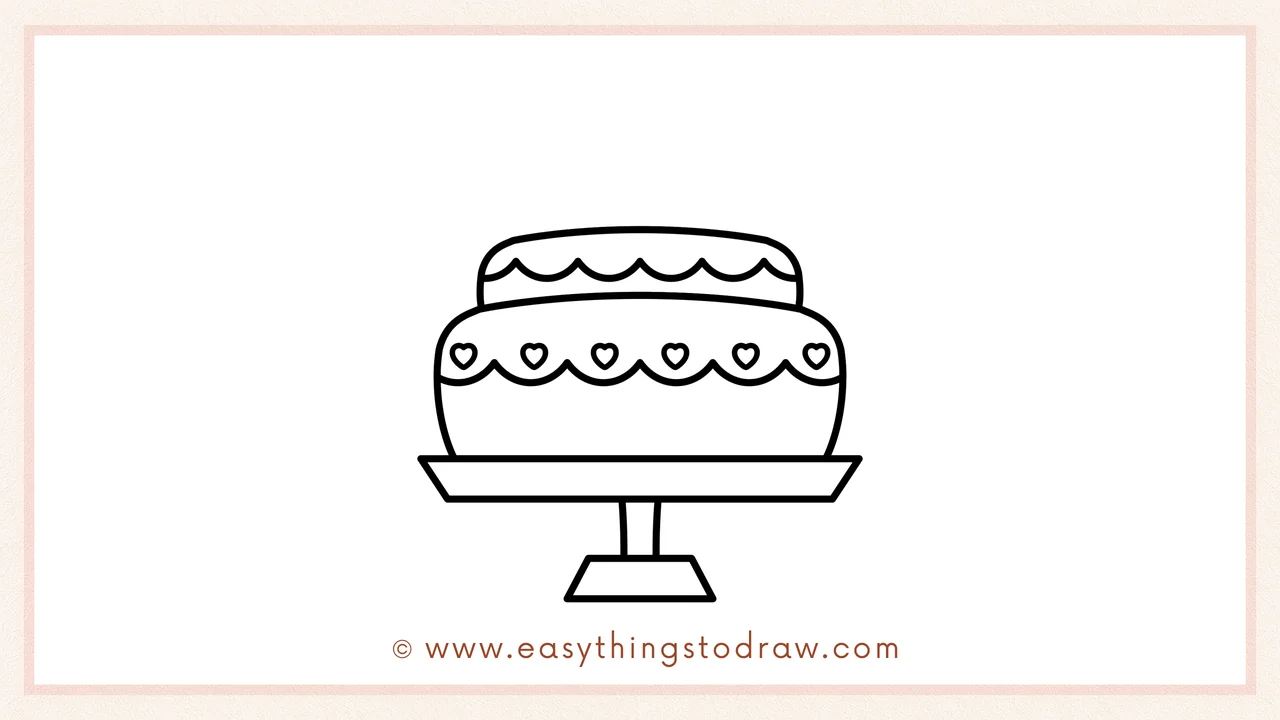
Above the first tier, draw a smaller rounded rectangle for the second layer. Add another scalloped line to show icing detail.
Step 4 – Refine the Shape
Make the layers look smooth and stacked neatly on the stand. Keep the edges slightly rounded for a soft, fluffy cake look.
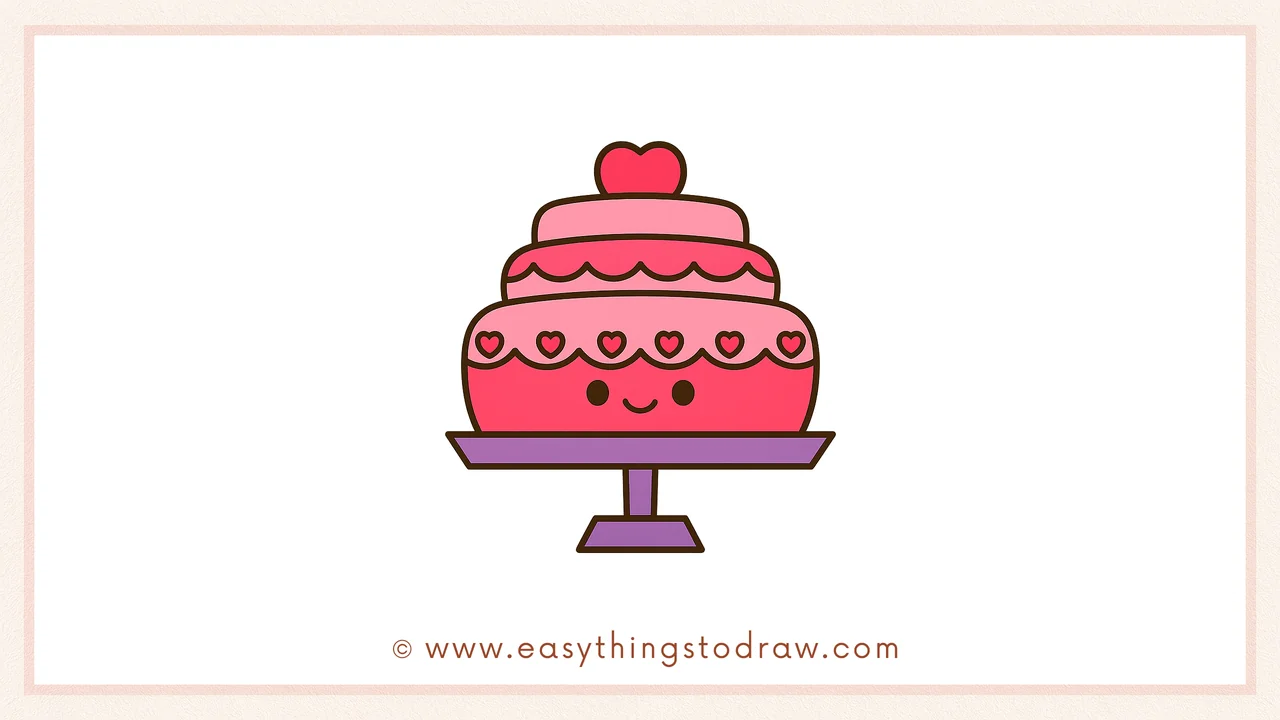
Step 5 – Add the Topper
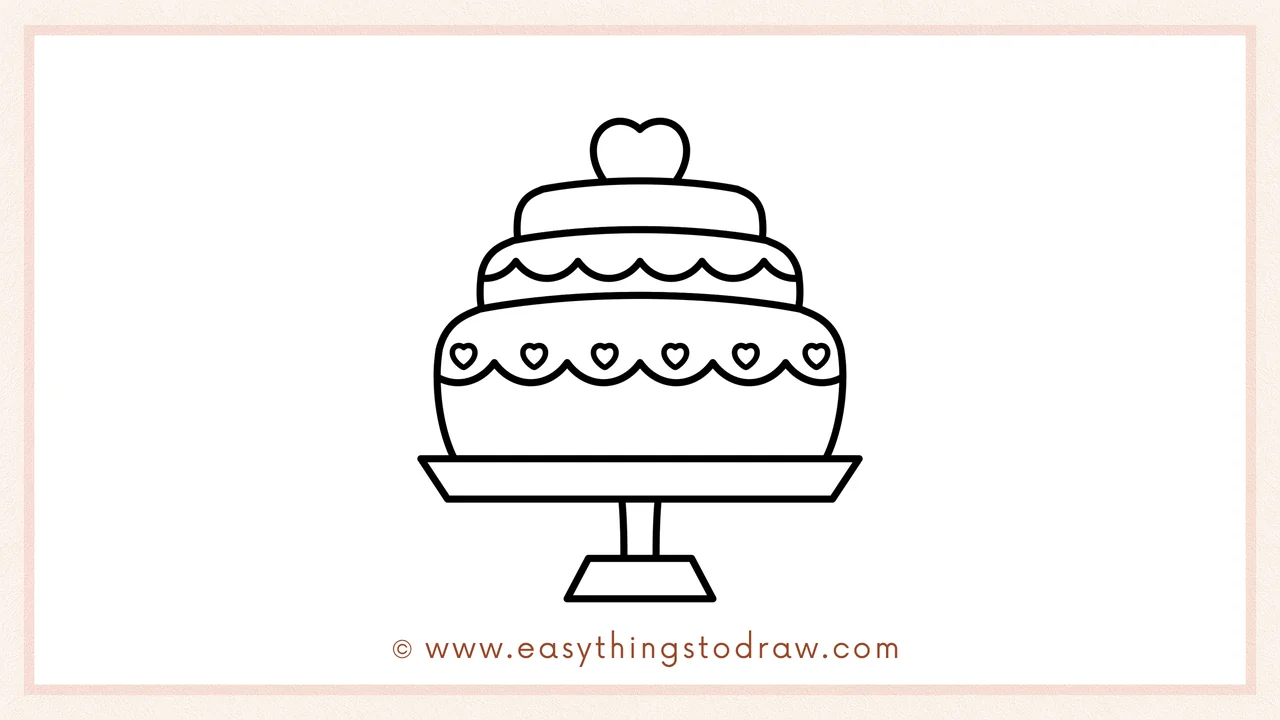
On top of the cake, draw a big heart shape as the topper. This adds a lovely Valentine’s Day touch!
Step 6 – Draw a Cute Face
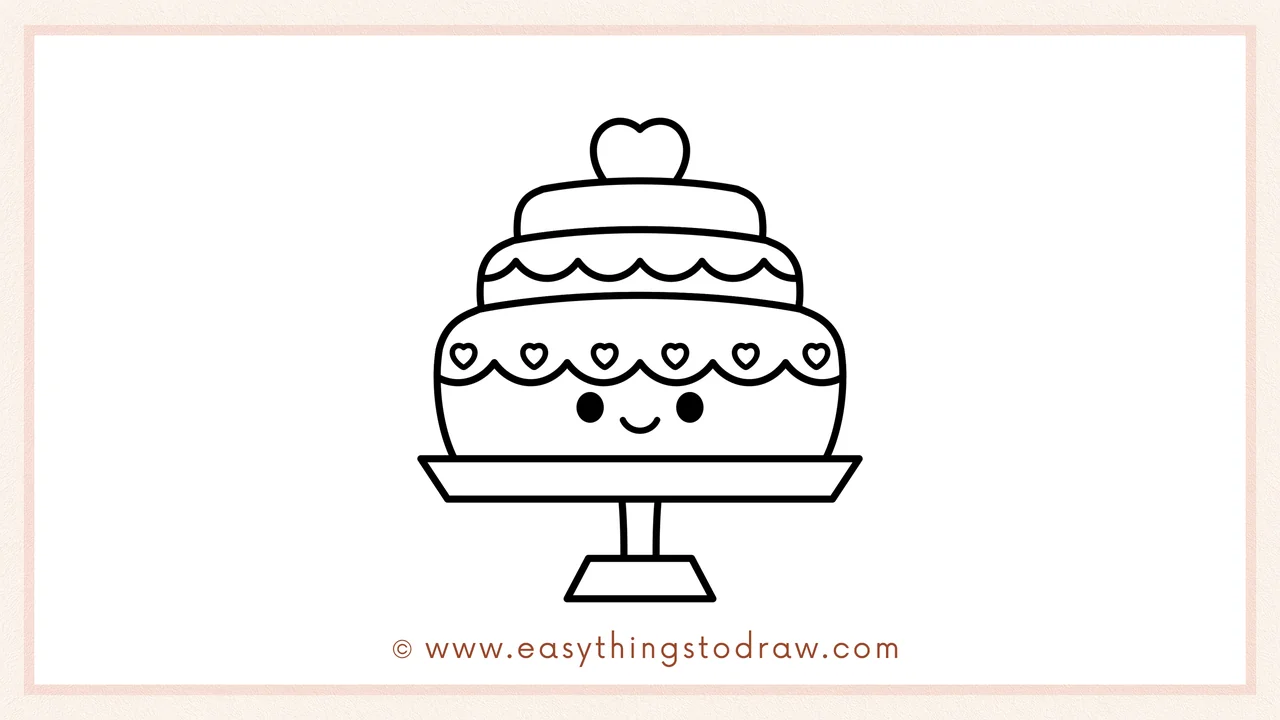
Finish by drawing two small dot eyes and a smiling mouth on the bottom tier. Now your Valentine’s Day cake has a happy personality!
Frequently Asked Questions (FAQ)
What colors should I use?
Classic Valentine’s colors like pink, red, and white are perfect. You can also try chocolate brown, gold, or pastel shades.
Can I add more details to my cake?
Yes! Add sprinkles, candles, flowers, or even a personalized message on the top tier.
Is this activity good for classrooms?
Absolutely! This cake drawing is simple, fun, and perfect for Valentine’s Day bulletin boards or holiday cards.
What if my layers aren’t even?
That’s okay! Cakes come in all shapes and sizes, and your unique drawing makes it special.
Printable Drawing Tutorials
Download Printable How to draw a valentines day cake Drawing Tutorials
You Did It!
Awesome work! You’ve just drawn a super cute Valentine’s Day cake, complete with decorations and a happy face. Whether you use it for a Valentine’s card, holiday art project, or just for fun, your cake is sure to bring smiles.
👉 Want more Valentine’s Day fun? Try our tutorials for heart balloons, chocolate boxes, and rose bouquets to complete your holiday art collection.
Happy Valentine’s Day and Happy Drawing! 🎂❤️
