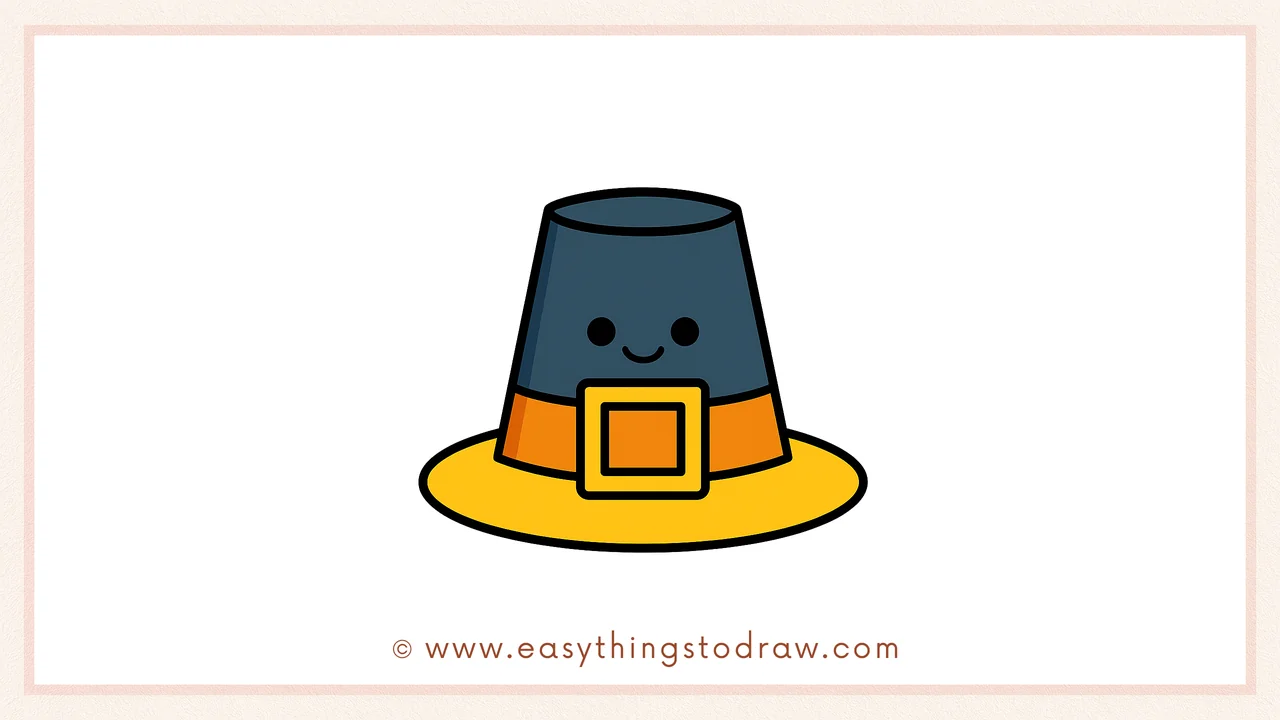
Ready to draw something traditional for Thanksgiving? In this easy and fun tutorial, kids and beginner artists will learn how to draw a cute cartoon-style pilgrim hat—complete with a smiling face! This festive drawing is great for holiday crafts, classroom activities, or adding a cheerful touch to your fall decorations.
What You Need:
- A pencil
- An eraser
- A black marker (for outlining)
- Coloring tools (crayons, markers, or colored pencils)
- Drawing paper
Step by Step Pilgrim Hat Drawing Instructions
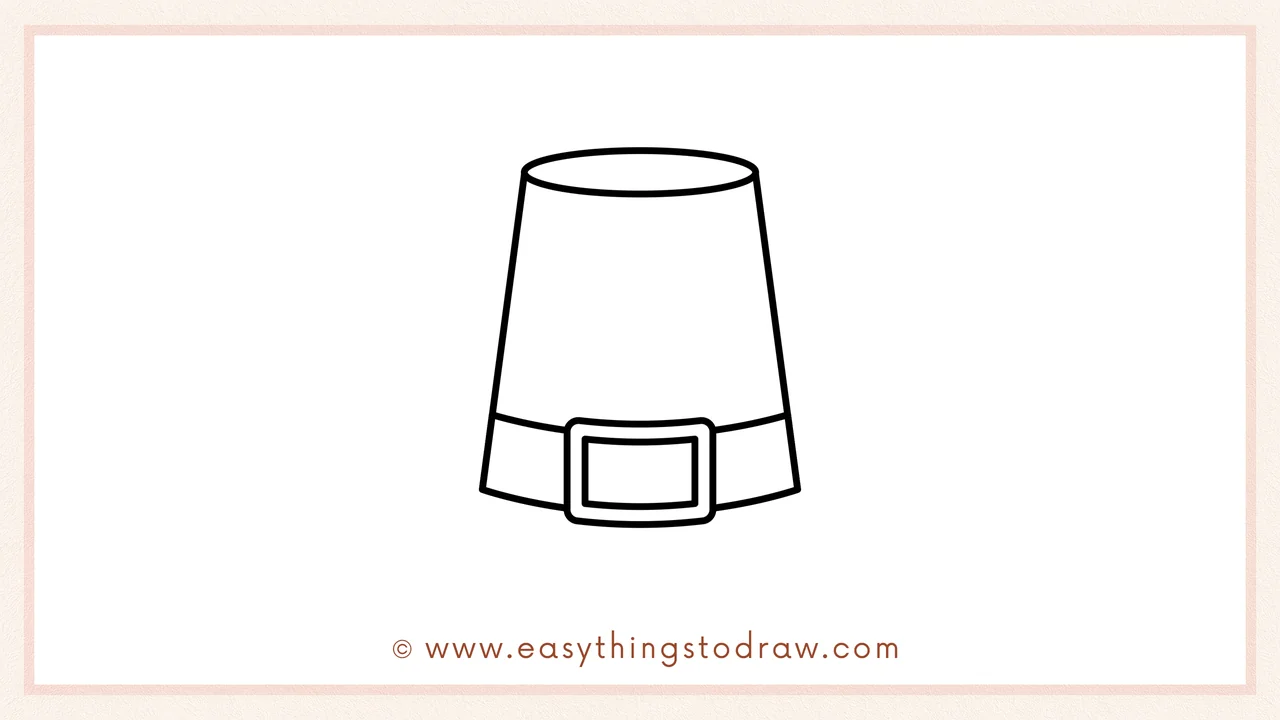
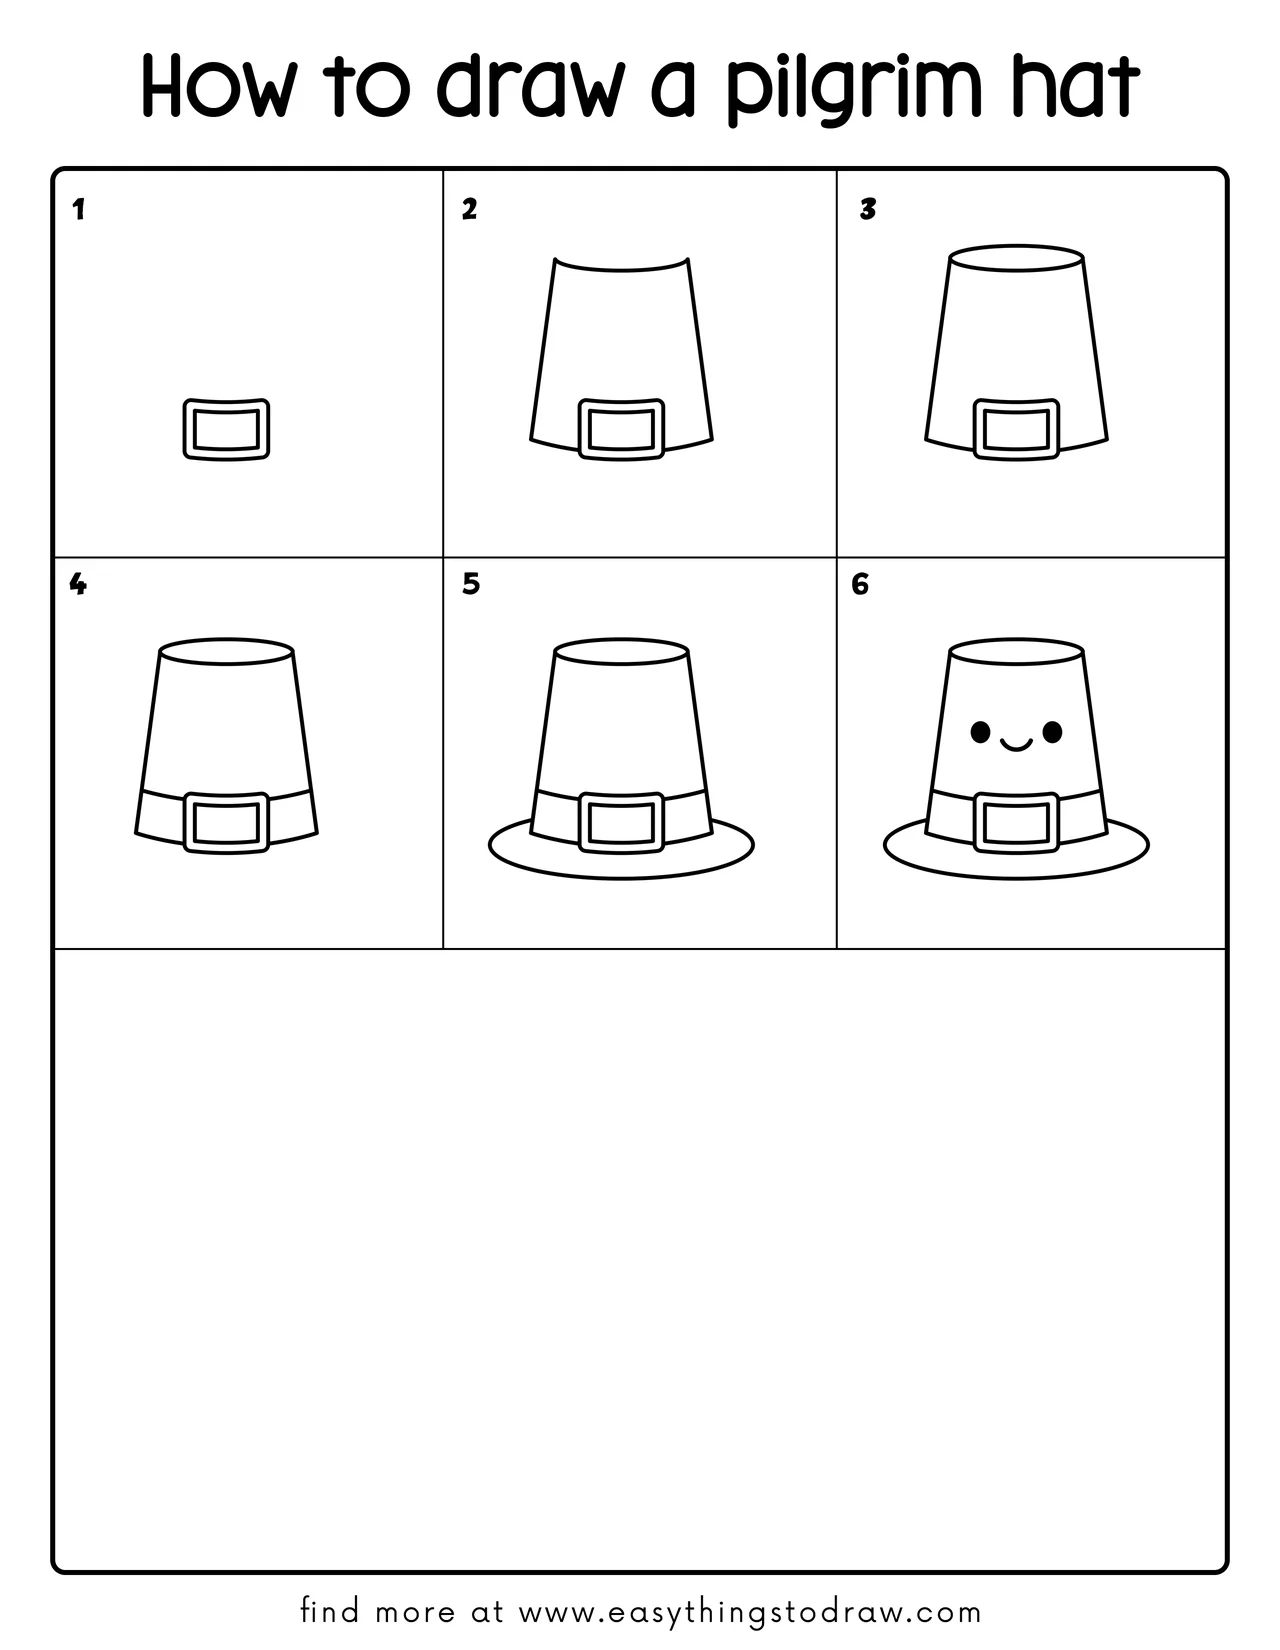
Step 1 – Start with the Belt Buckle
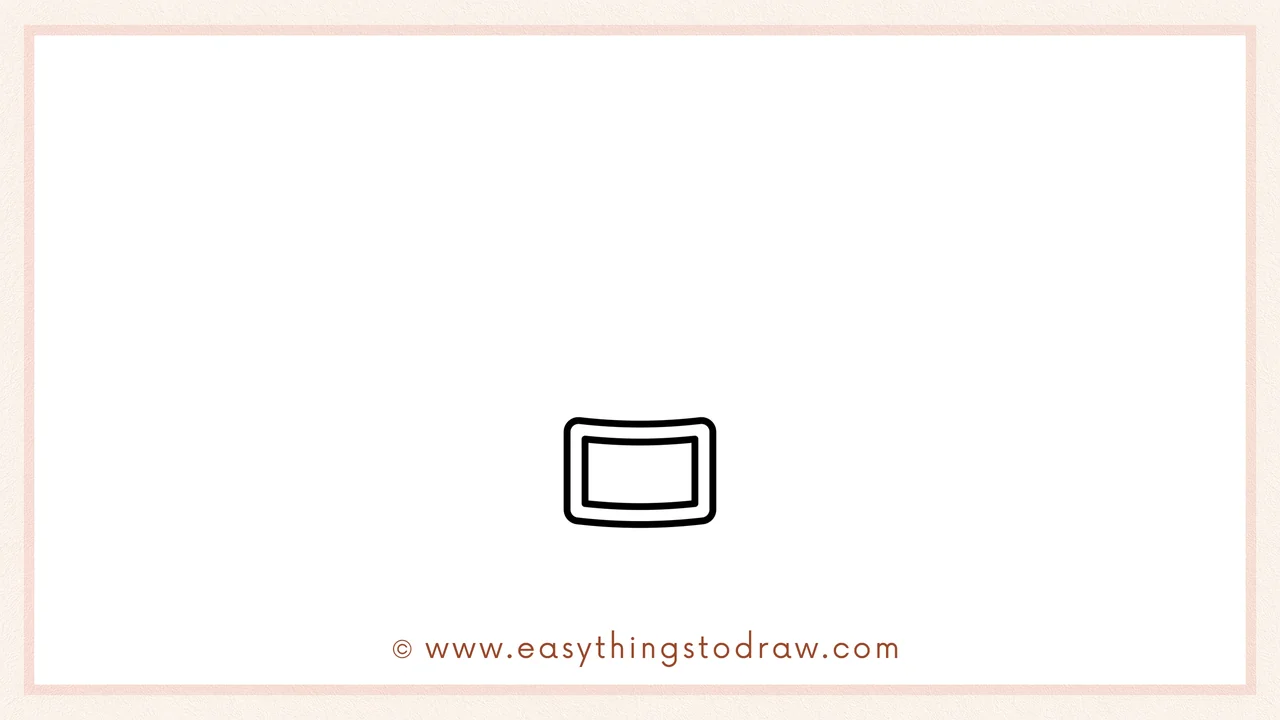
Begin by drawing a small square buckle near the bottom center of your page. Add another smaller rectangle inside to show the belt frame.
Step 2 – Draw the Hat Shape
From both sides of the buckle, draw two slanted lines going up and outward to form the tall part of the hat. Connect the top with a slightly curved line.
Step 3 – Add the Top Oval
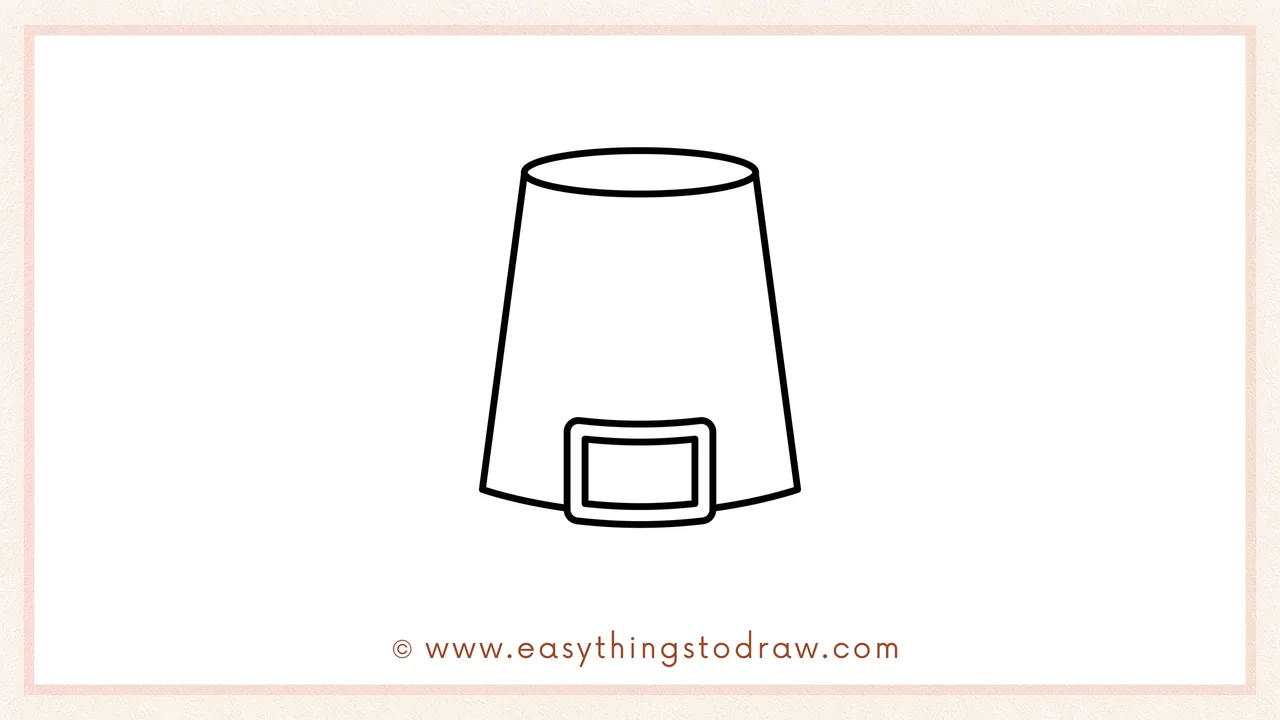
On top of the hat, draw a thin oval to create the top opening. This gives the hat a more 3D look.
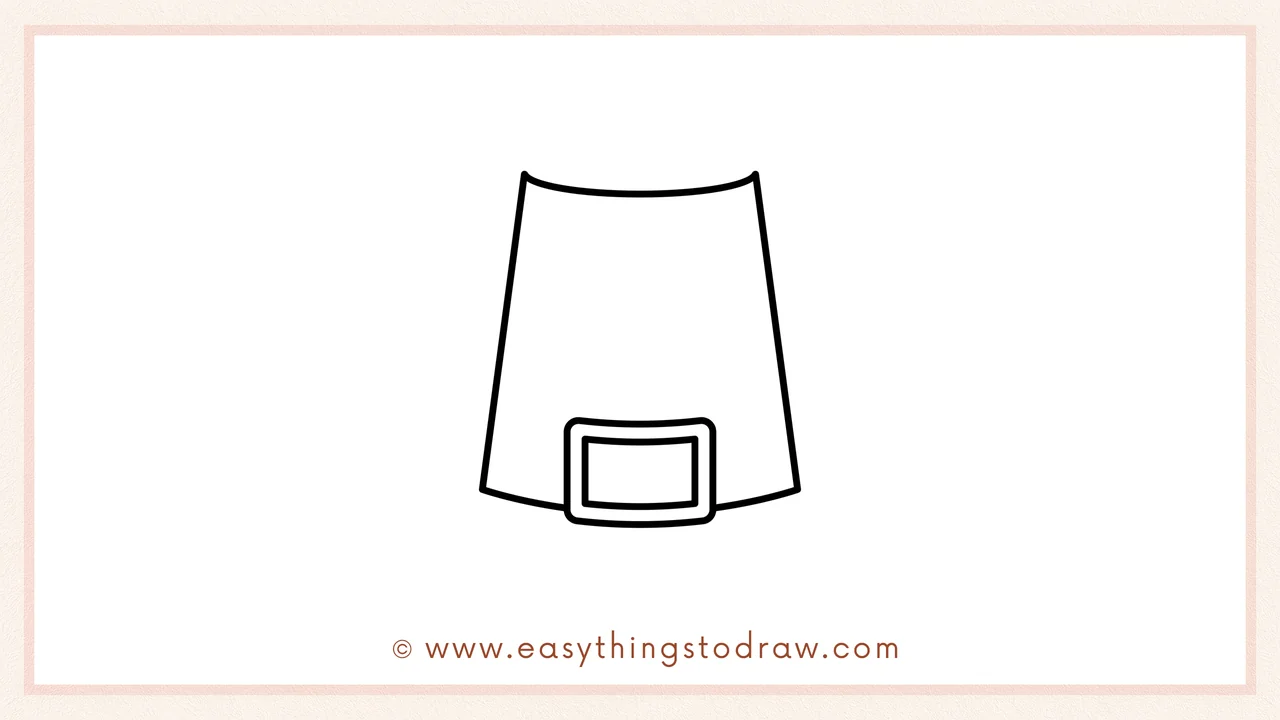
Step 4 – Complete the Belt
Add two short lines on each side of the buckle, curving slightly downward to complete the belt that wraps around the hat.
Step 5 – Draw the Brim
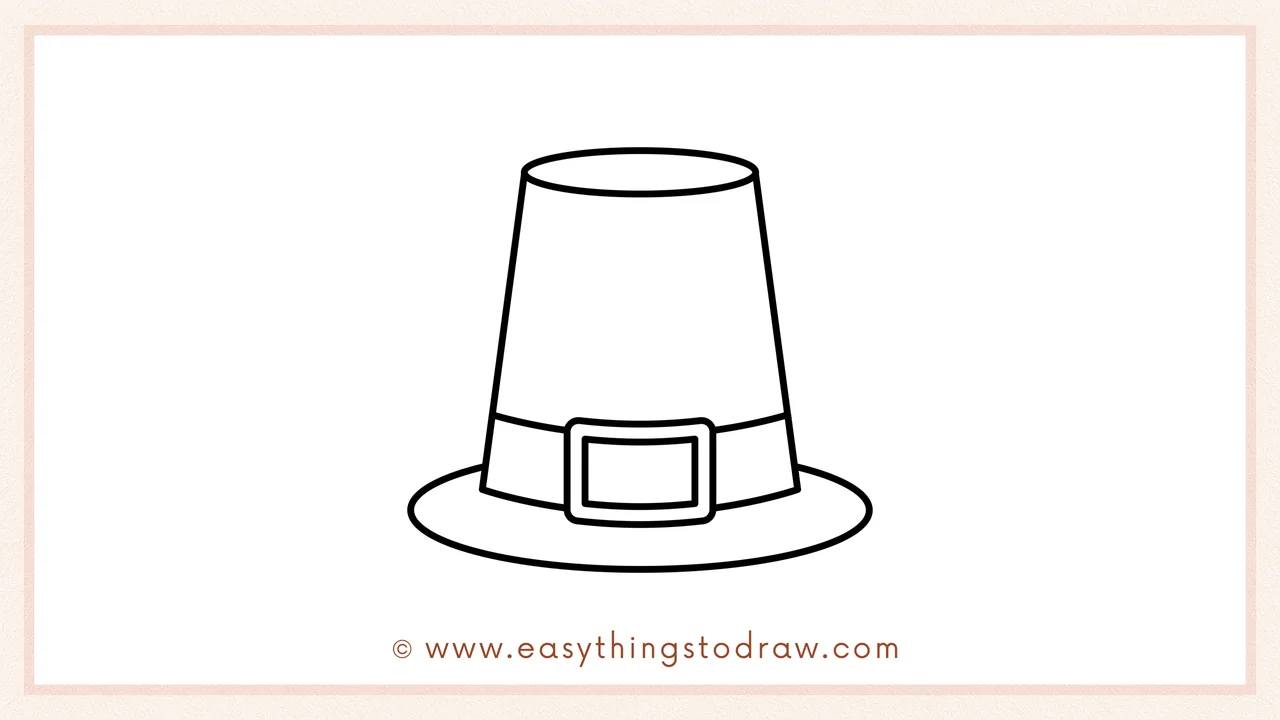
At the bottom of the hat, draw a large, flat oval that sticks out on both sides. This is the wide brim of the pilgrim hat.
Step 6 – Add a Cute Face
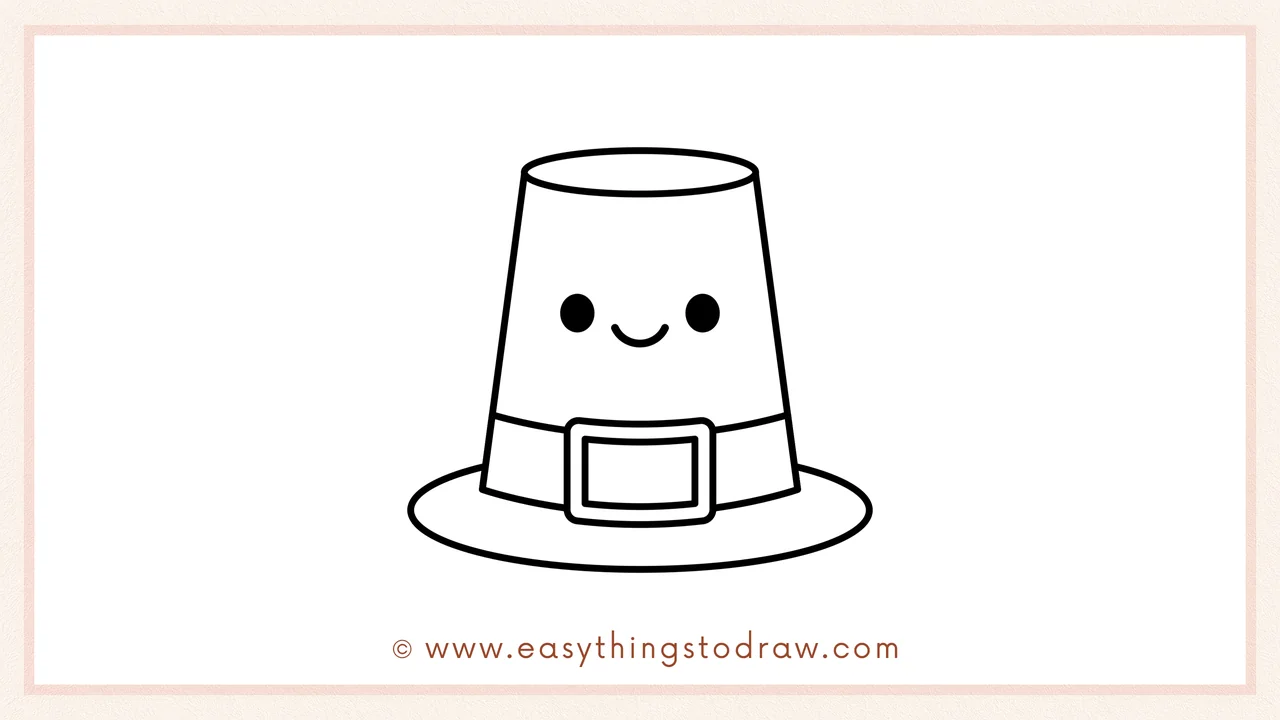
To make your pilgrim hat extra fun, draw two little eyes and a smile right above the buckle. It’s a happy hat for a happy holiday!
Frequently Asked Questions (FAQ)
What color should I use for a pilgrim hat?
Traditionally, it’s black or dark brown with a gold buckle, but feel free to make it colorful and fun!
Can I turn this into a name tag?
Yes! Just write a name across the brim or underneath to use it as a Thanksgiving place card.
Is this project okay for younger kids?
Definitely! The shapes are simple and perfect for preschoolers and up.
Can I add accessories to the hat?
Absolutely! Try drawing leaves, feathers, or a tiny turkey next to it for more Thanksgiving spirit.
Printable Drawing Tutorials
Download Printable How to draw a pilgrim hat Drawing Tutorials
You Did It!
Hooray! You just finished your adorable Thanksgiving pilgrim hat drawing. It’s traditional, cute, and full of holiday cheer! Want to dress it up even more? Add sparkles, write a “Give Thanks” message, or turn it into a decoration for your Thanksgiving table. Great job—your creativity makes every holiday brighter!
