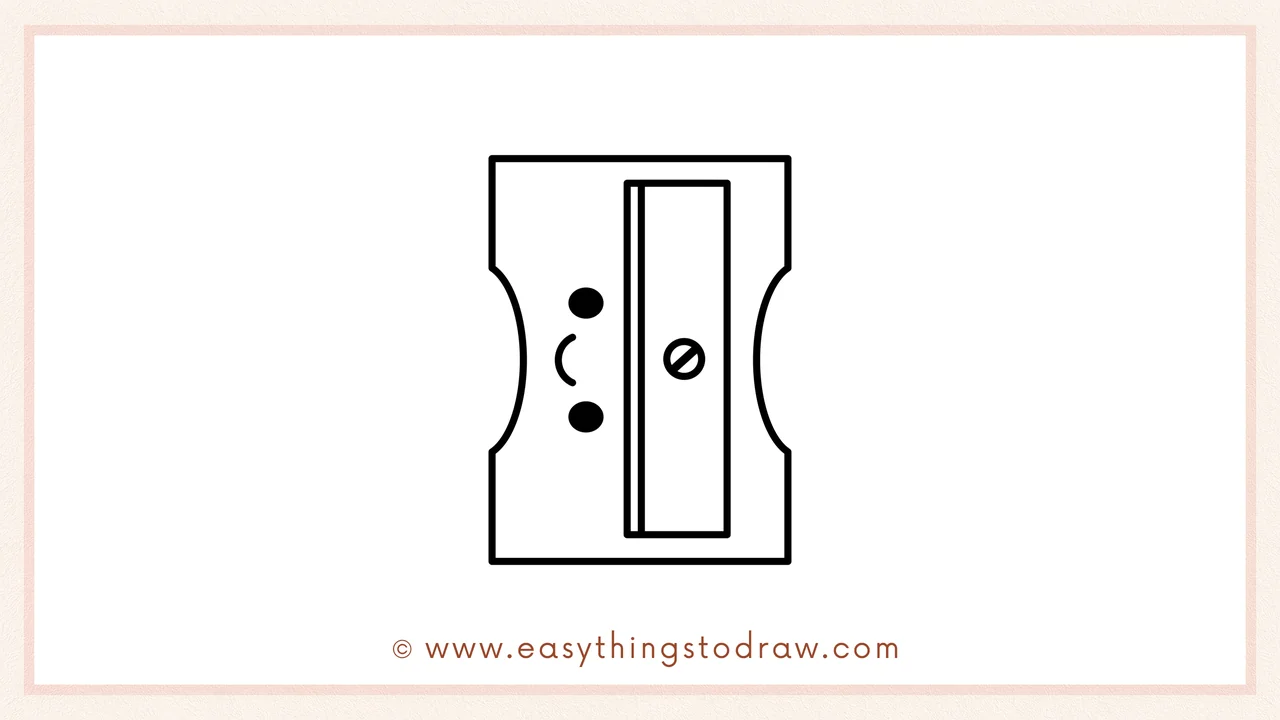
Ever wanted to draw something useful from your pencil case? This fun and easy pencil sharpener drawing tutorial is perfect for kids, beginners, and classroom art time. With just a few steps, you’ll sketch a cool cartoon sharpener that looks neat and detailed. It’s a great way to learn how to draw objects using curves, rectangles, and small details. Grab your pencil—let’s sharpen those drawing skills!
What You Need:
- A pencil
- An eraser
- A black marker (for outlining)
- Coloring tools (crayons, markers, or colored pencils)
- Drawing paper
Step by Step Pencil Sharpener Drawing Instructions
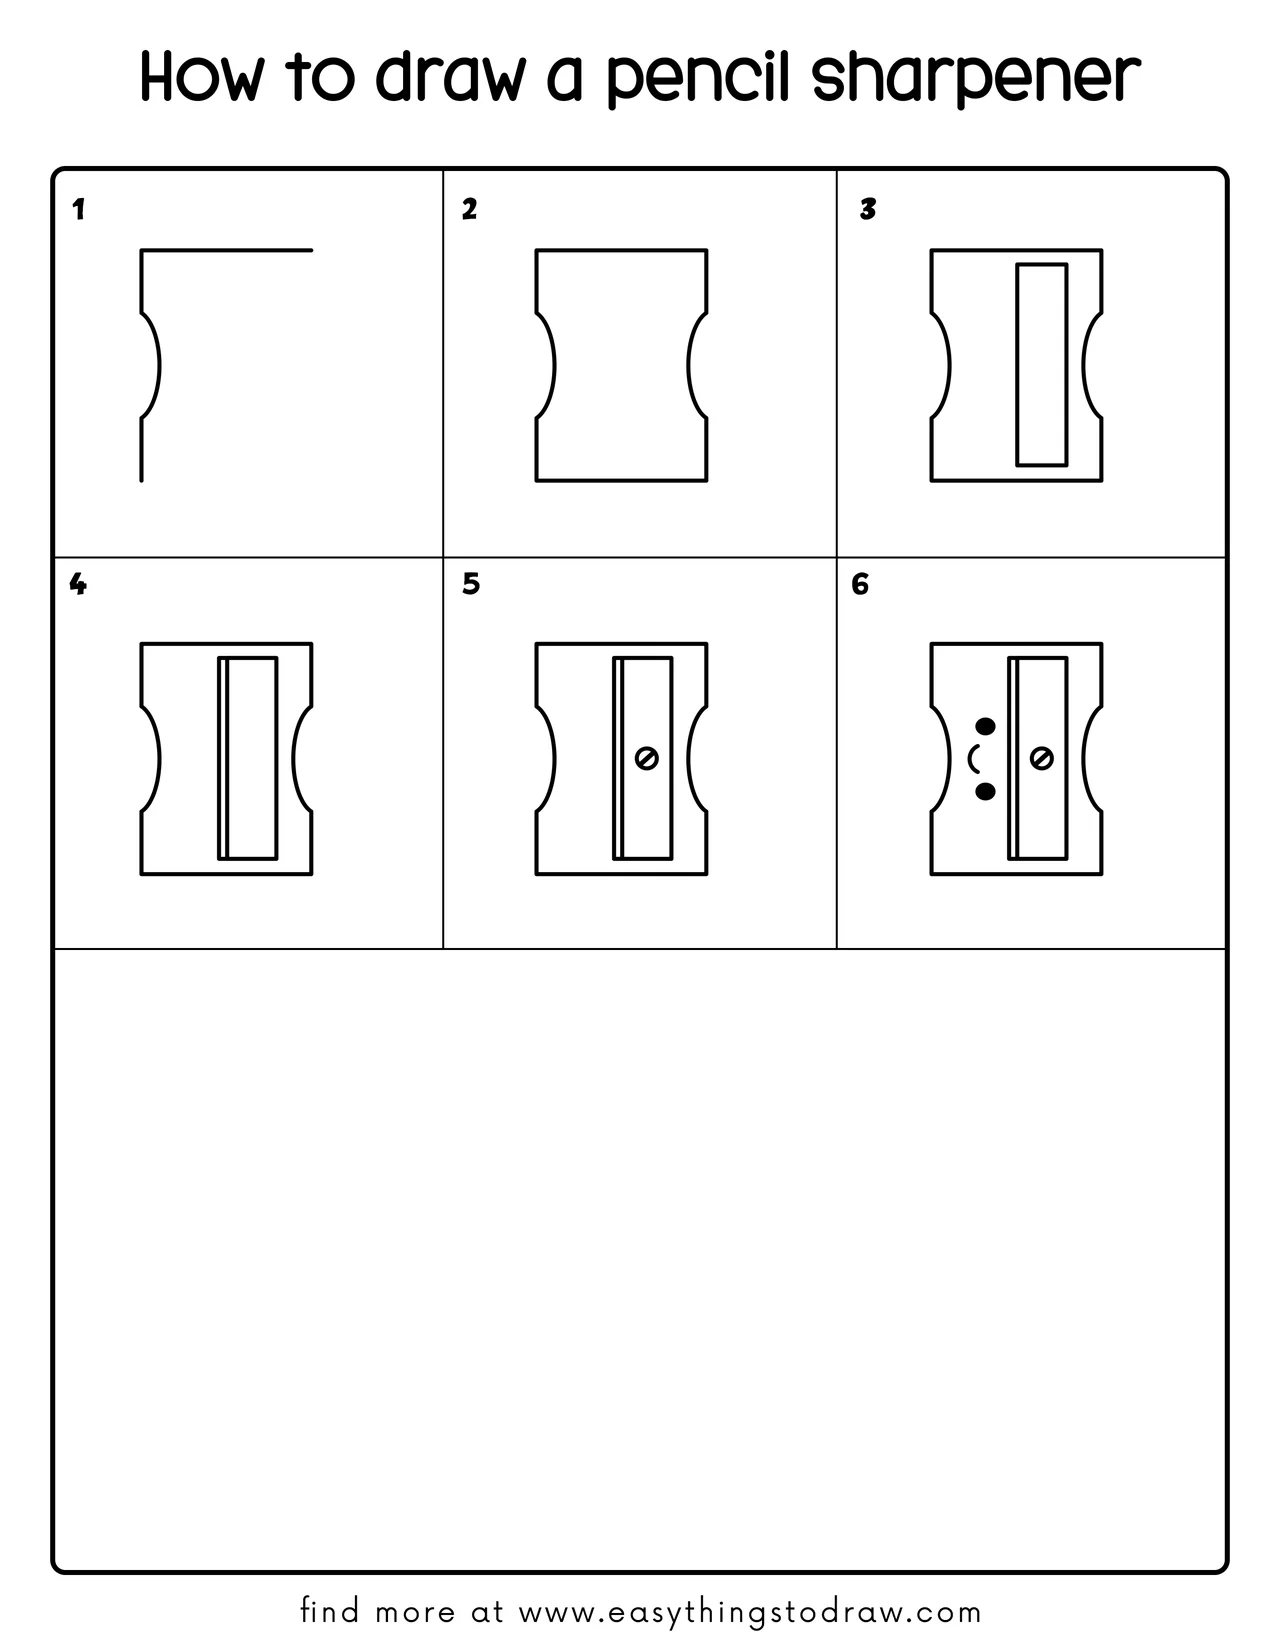
Step 1 – Draw the Left Side Curve and Corner

Start by drawing an open curve on the left, shaped like a bracket “{”. Then add a short line on the top and bottom to make the corner edges.
Step 2 – Complete the Outline with Right Side
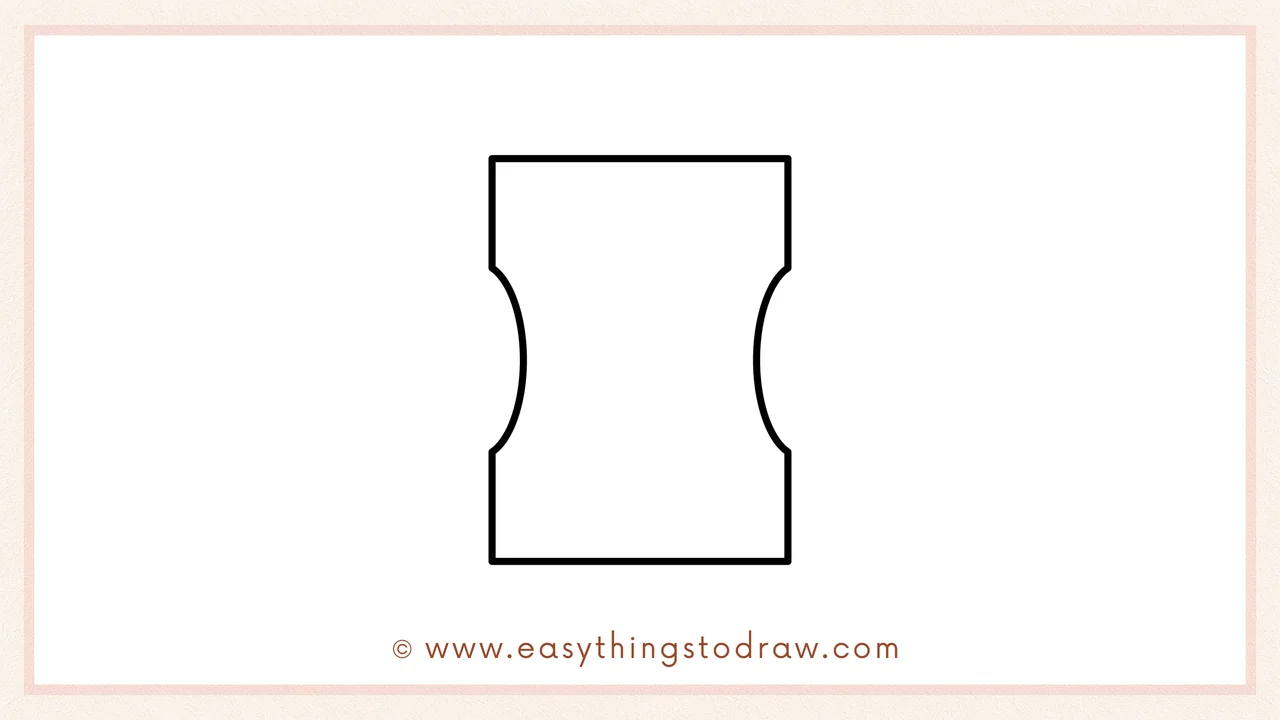
Now mirror that same shape on the right! Connect the top and bottom lines across to make a full outer shape—it should look like a thick rectangle with curvy sides.
Step 3 – Add the Inner Blade Box

Draw a tall, narrow rectangle right in the center. This is where the blade goes inside the sharpener. Make sure it’s evenly spaced from both sides.
Step 4 – Draw the Second Line for Blade
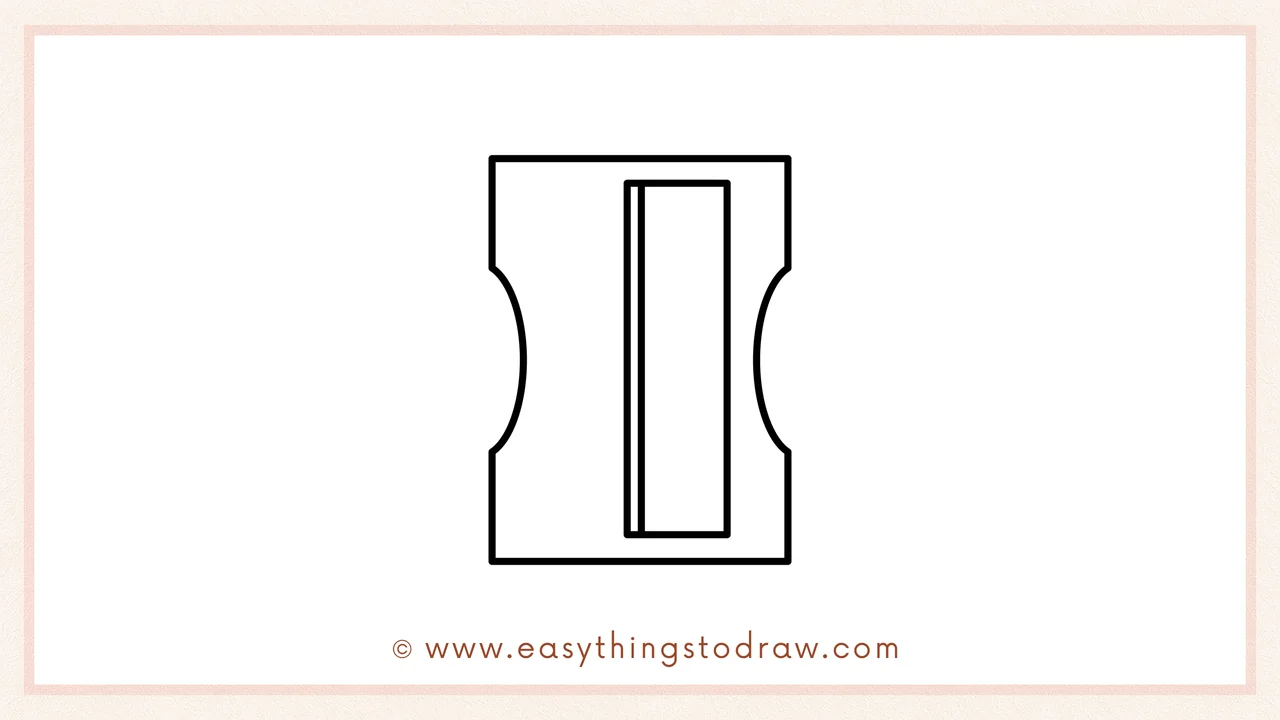
Add a thinner rectangle right next to the first one. This gives it a 3D blade effect, like a slot within the blade box.
Step 5 – Add the Screw
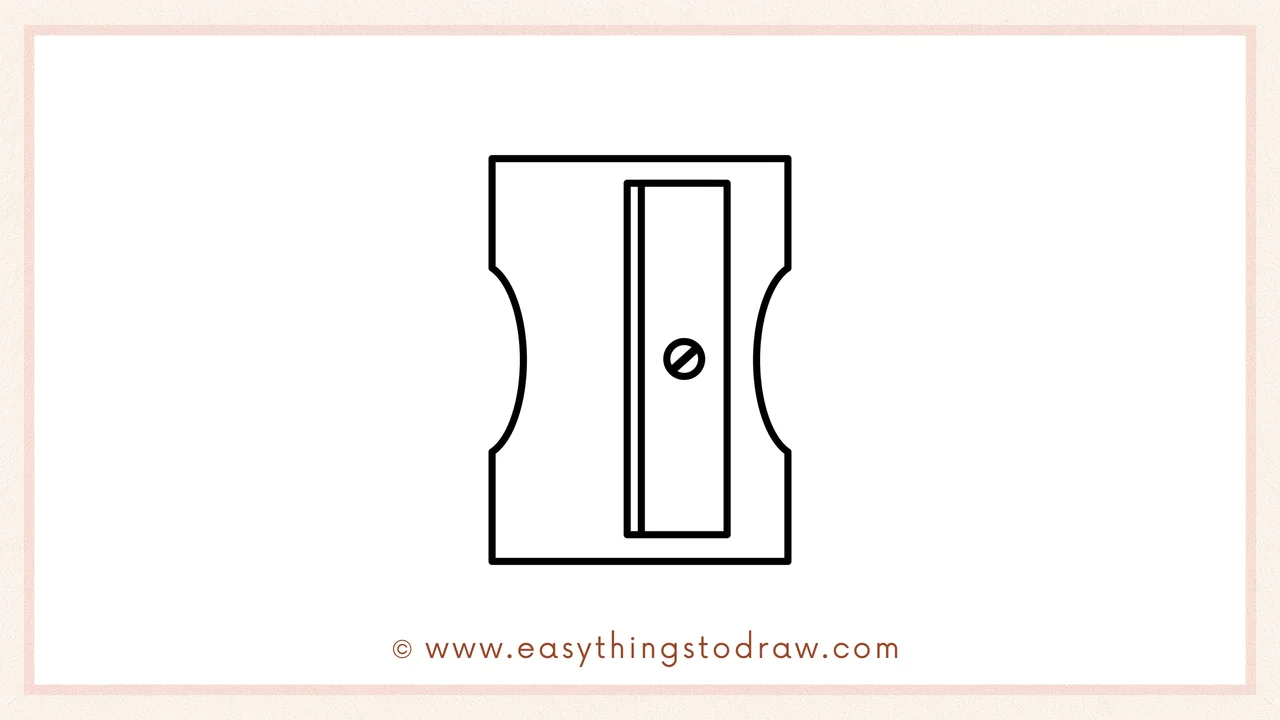
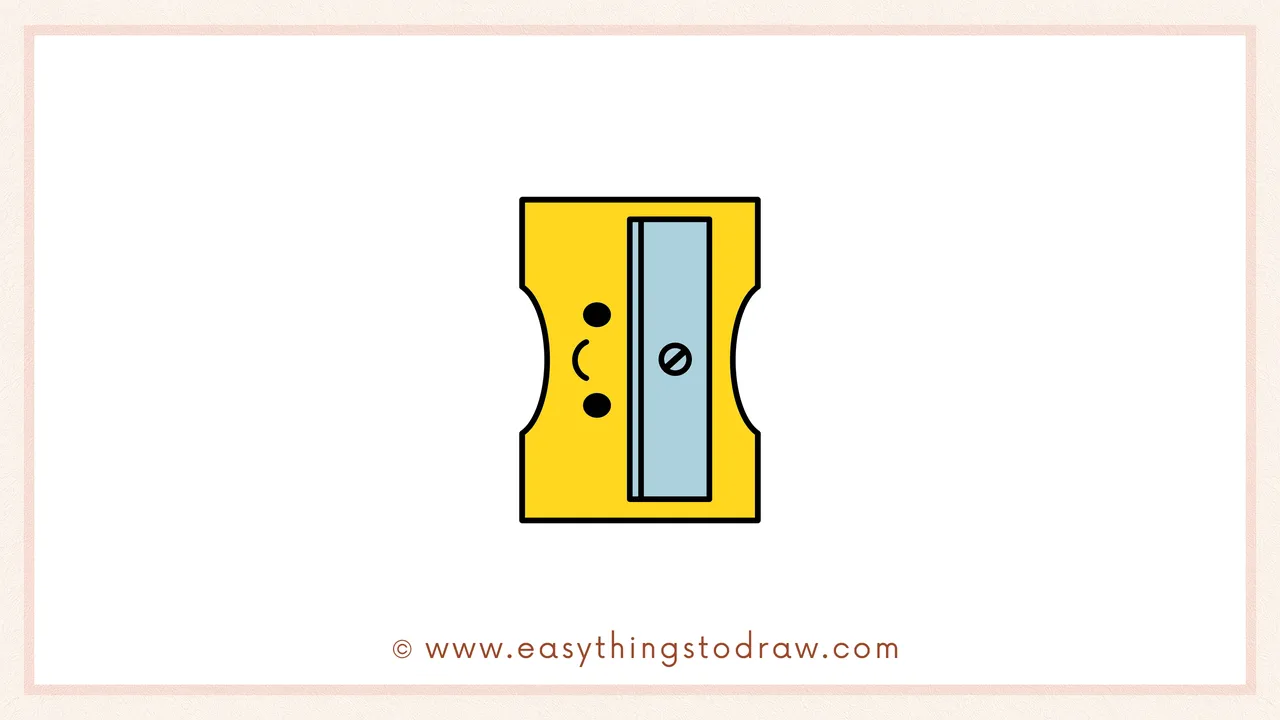
Now draw a tiny circle with a slash inside it near the center of the blade—this is the screw holding the blade in place.
Step 6 – Add Decorative Dots and Details
Time to give it some life! Add two black dots and a small curved line on the left side—these details make the sharpener fun and cartoony!
Frequently Asked Questions (FAQ)
Can I decorate the pencil sharpener more?
Of course! You can add stickers, patterns, or even give it a face to make it extra fun.
What color should I use for the sharpener?
Bright colors like red, blue, or green make it pop! You can also color the blade metallic gray or silver.
Is this pencil sharpener drawing good for school projects?
Absolutely! It’s a fun and simple object to draw and can be used in back-to-school themes.
What if I draw uneven shapes?
That’s totally okay! Practice makes perfect. You can always erase and redraw.
Printable Drawing Tutorials
Download Printable How to draw a pencil sharpener Drawing Tutorials
You Did It!
Awesome work sketching your own cartoon pencil sharpener! You followed each step with care and now you have a sharp, stylish piece of art. Try adding more flair—maybe some sparkles, lightning bolts, or a background like a pencil case. Don’t forget to show your drawing to friends and keep practicing with other school supplies!
