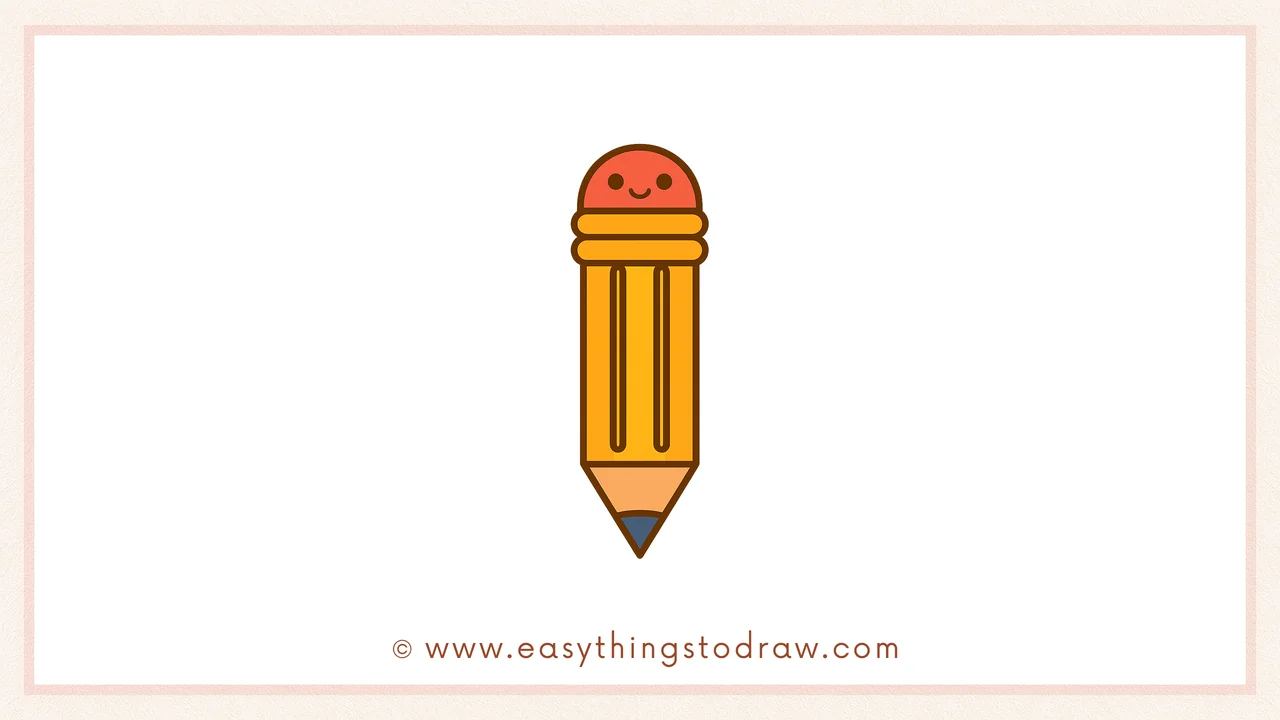
Want to draw a cartoon pencil that’s full of charm? This easy pencil drawing tutorial is perfect for kids, young artists, and anyone just starting out. With simple shapes and clear steps, you’ll be able to create a fun, smiling pencil in no time! It’s a great way to practice basic drawing skills while having lots of creative fun.
What You Need:
- A pencil
- An eraser
- A black marker (for outlining)
- Coloring tools (crayons, markers, or colored pencils)
- Drawing paper
Step by Step Pencil Drawing Instructions
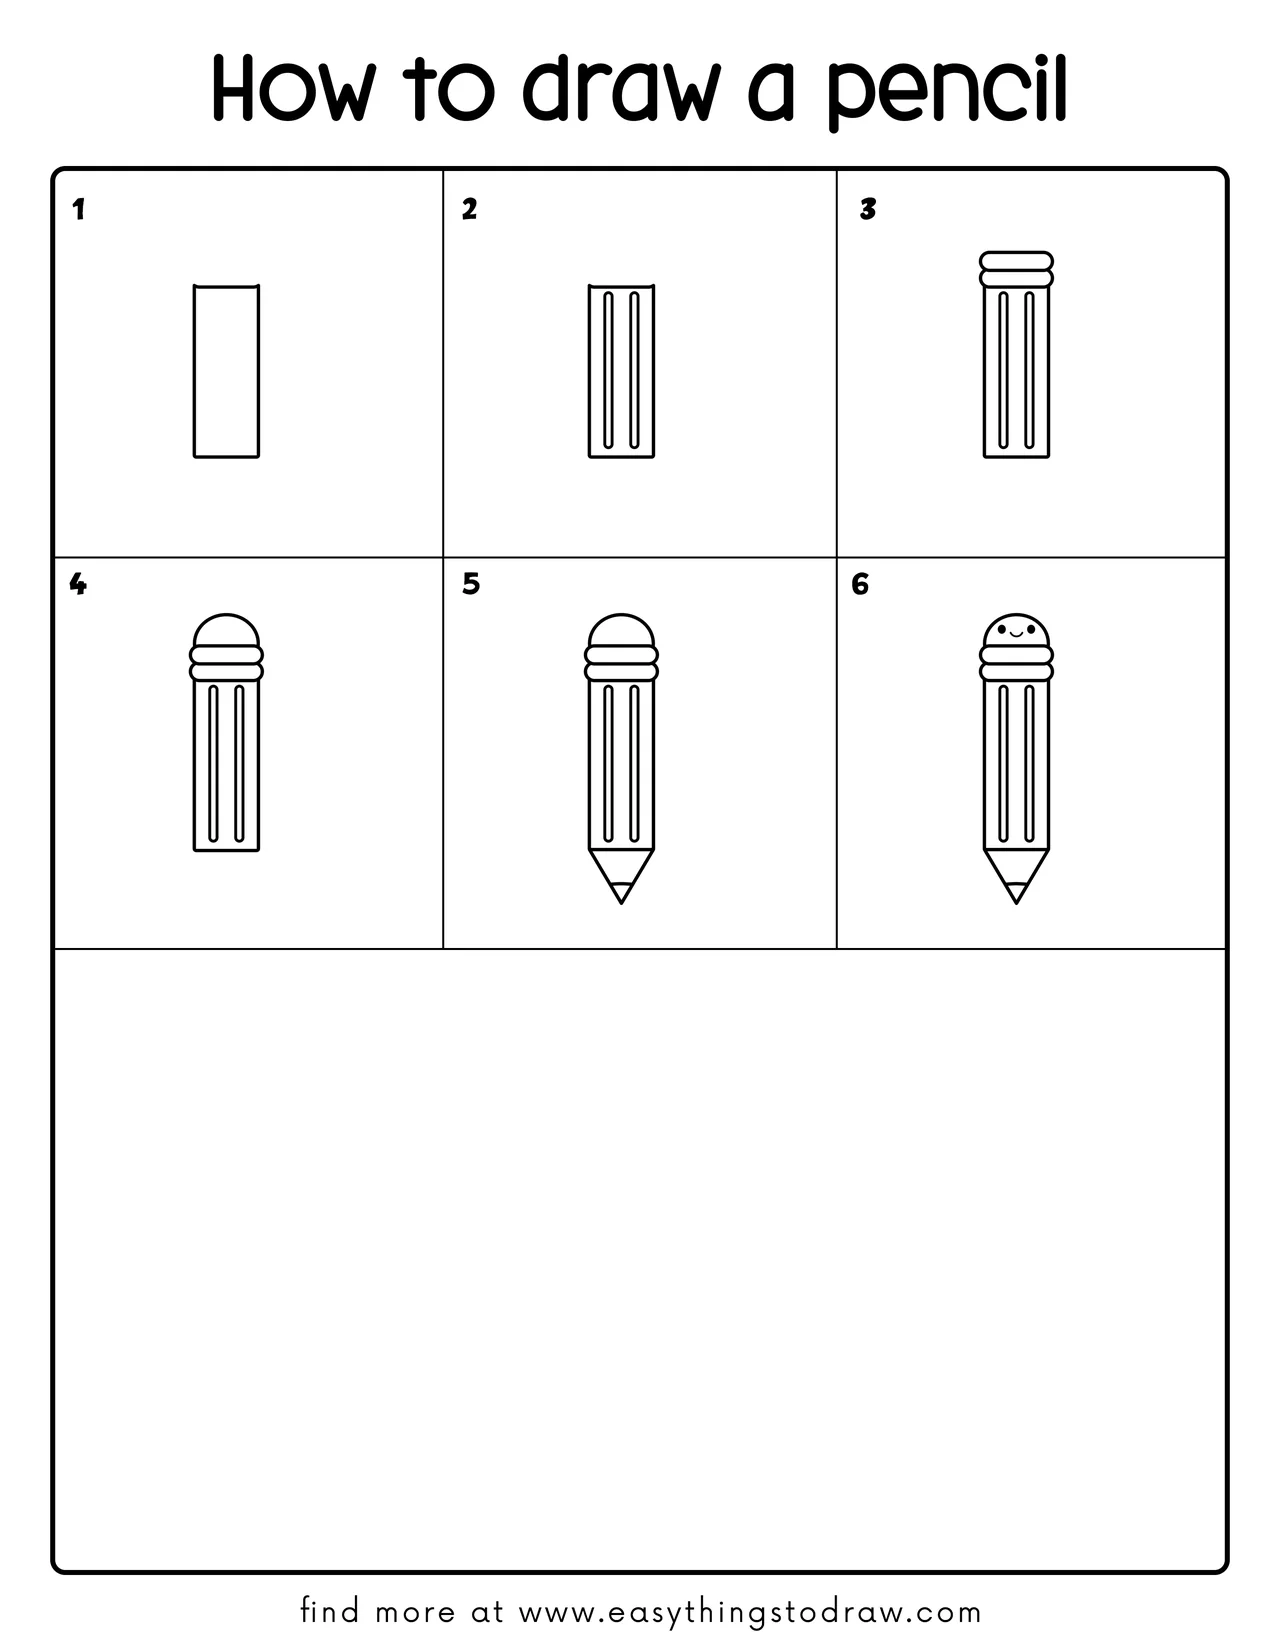
Step 1 – Start with the Pencil Body
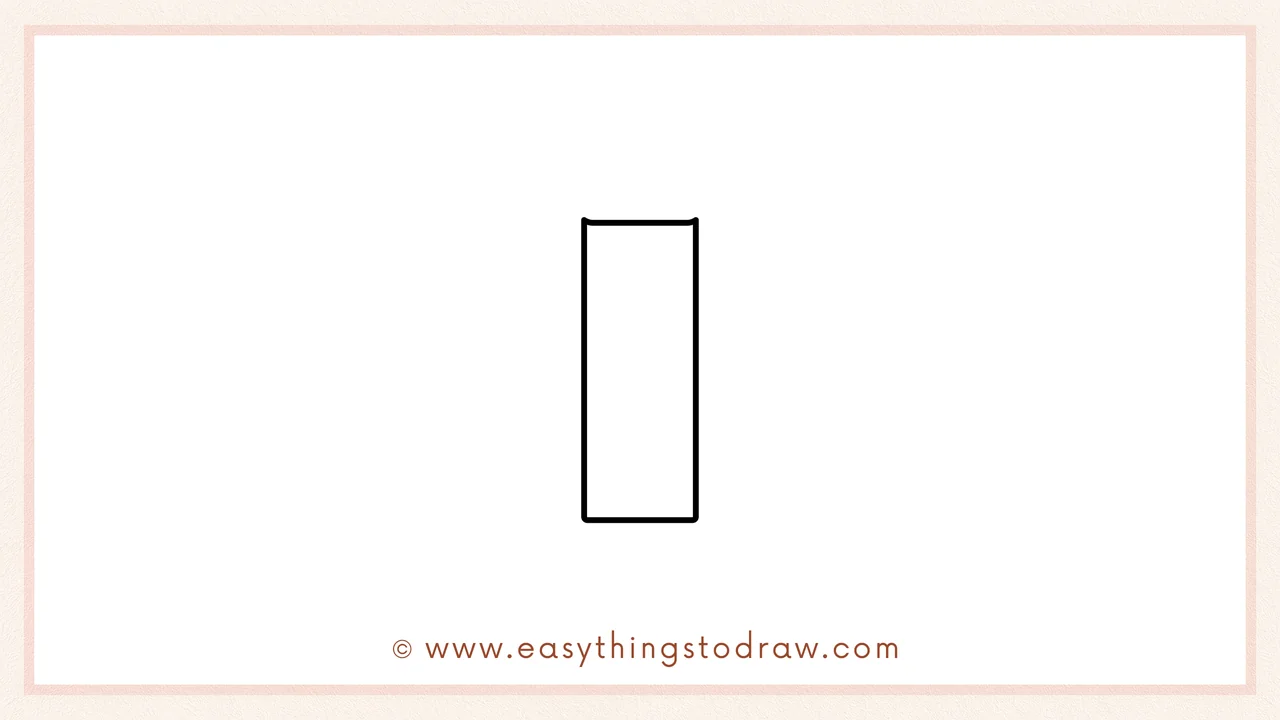
Begin by drawing a tall, narrow rectangle in the center of your page. This is the main body of the pencil—keep your lines straight!
Step 2 – Add Inner Wood Lines
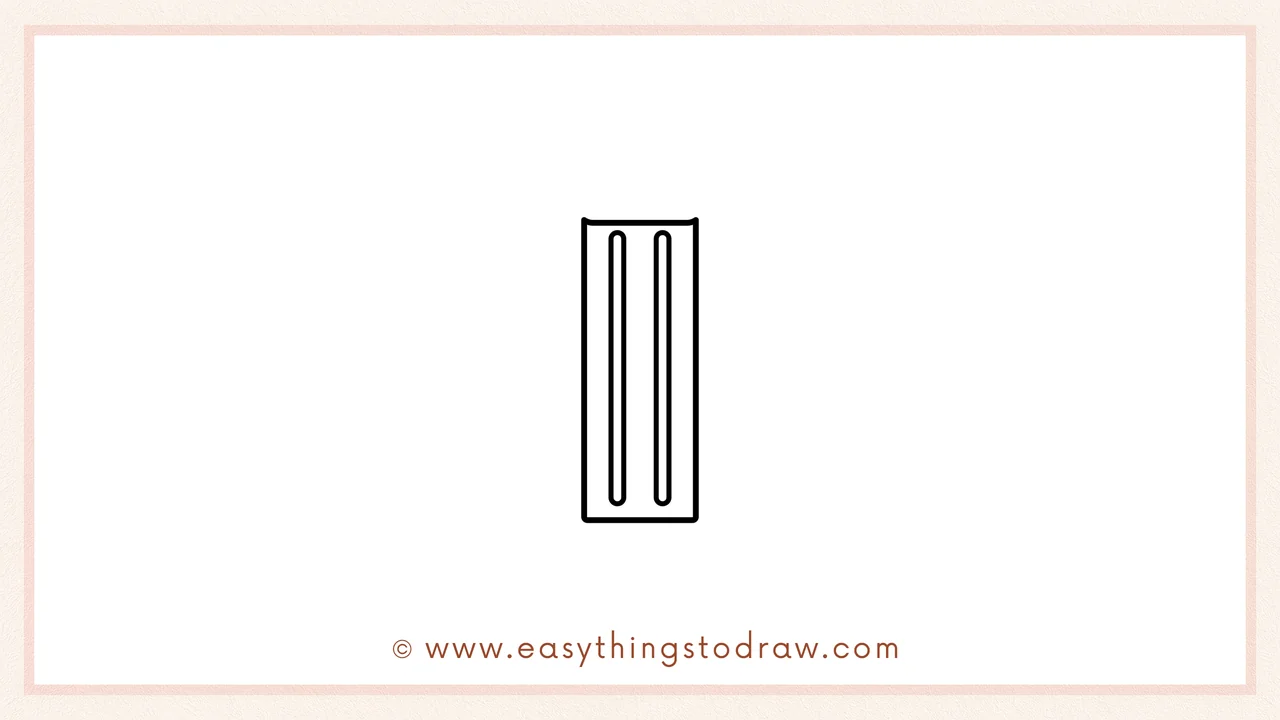
Now draw two long, skinny ovals inside the rectangle. These represent the wooden grooves that run along the pencil’s sides.
Step 3 – Draw the Eraser Bands
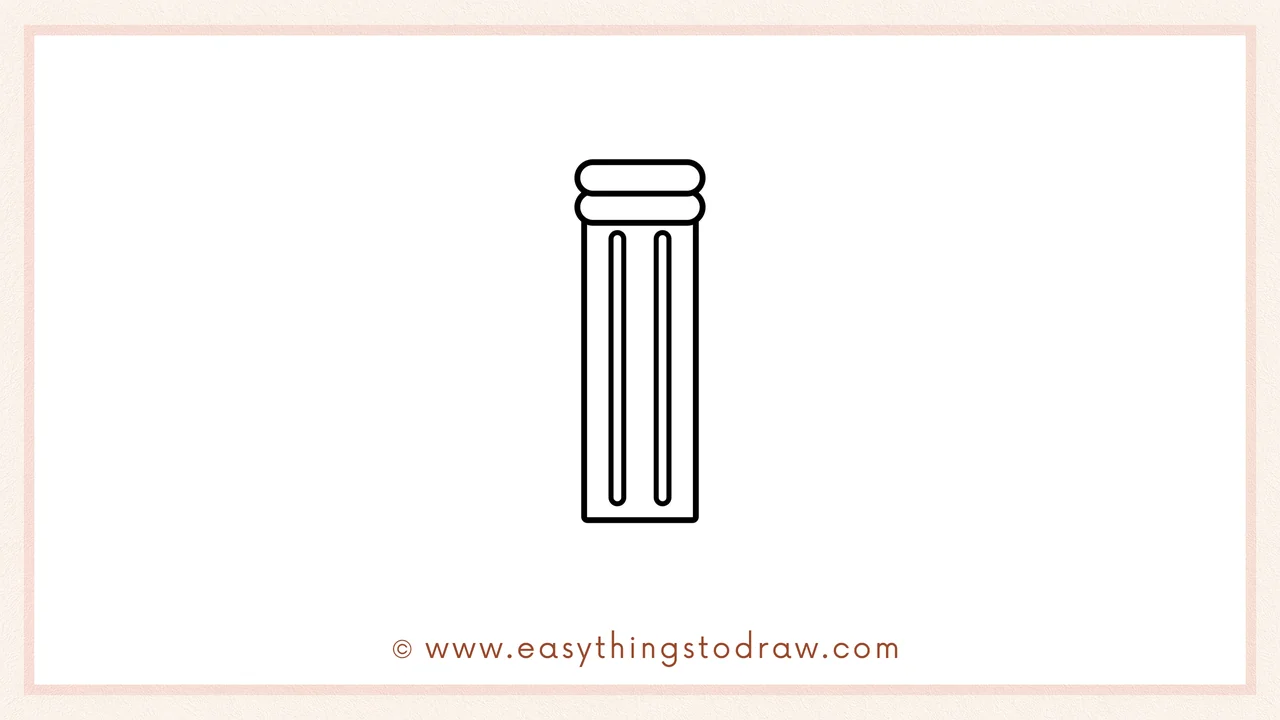
At the top of the pencil, draw three thin, stacked rounded rectangles. These are the metal bands that hold the eraser in place.
Step 4 – Add the Eraser Cap
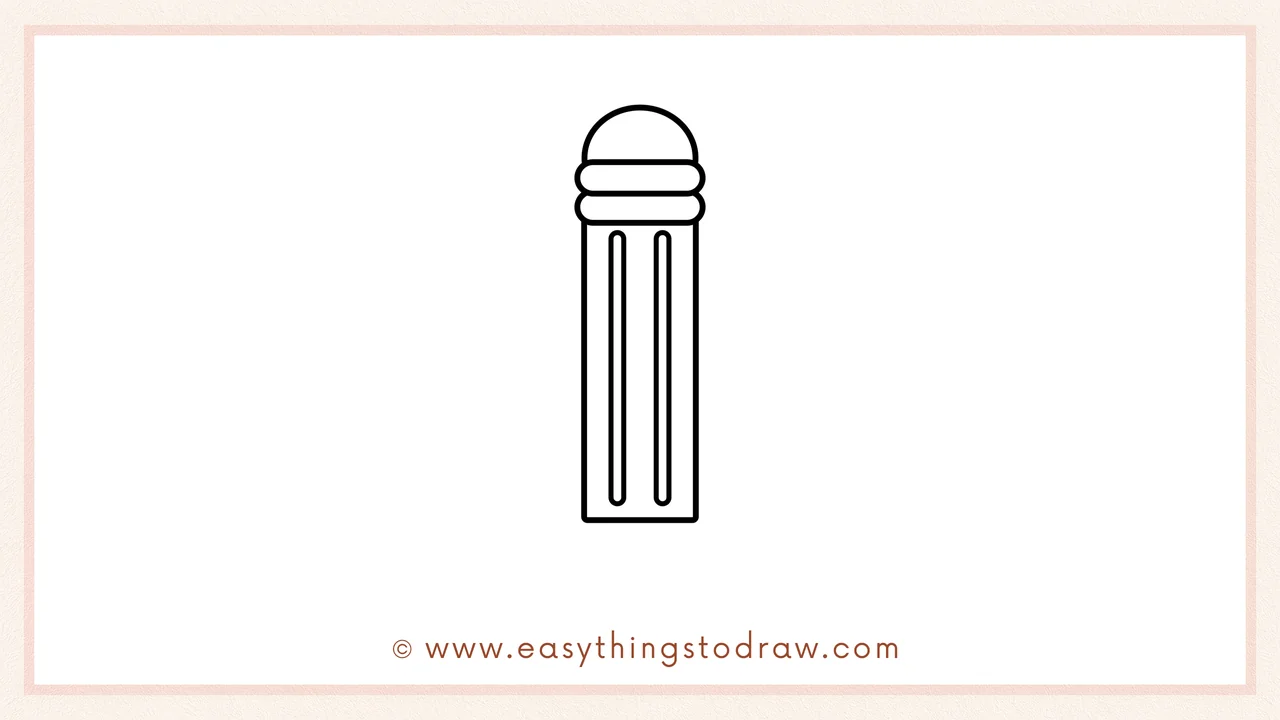
Now draw a half-circle above the bands to make the eraser. It should look like a little bump resting on top.
Step 5 – Draw the Pencil Tip
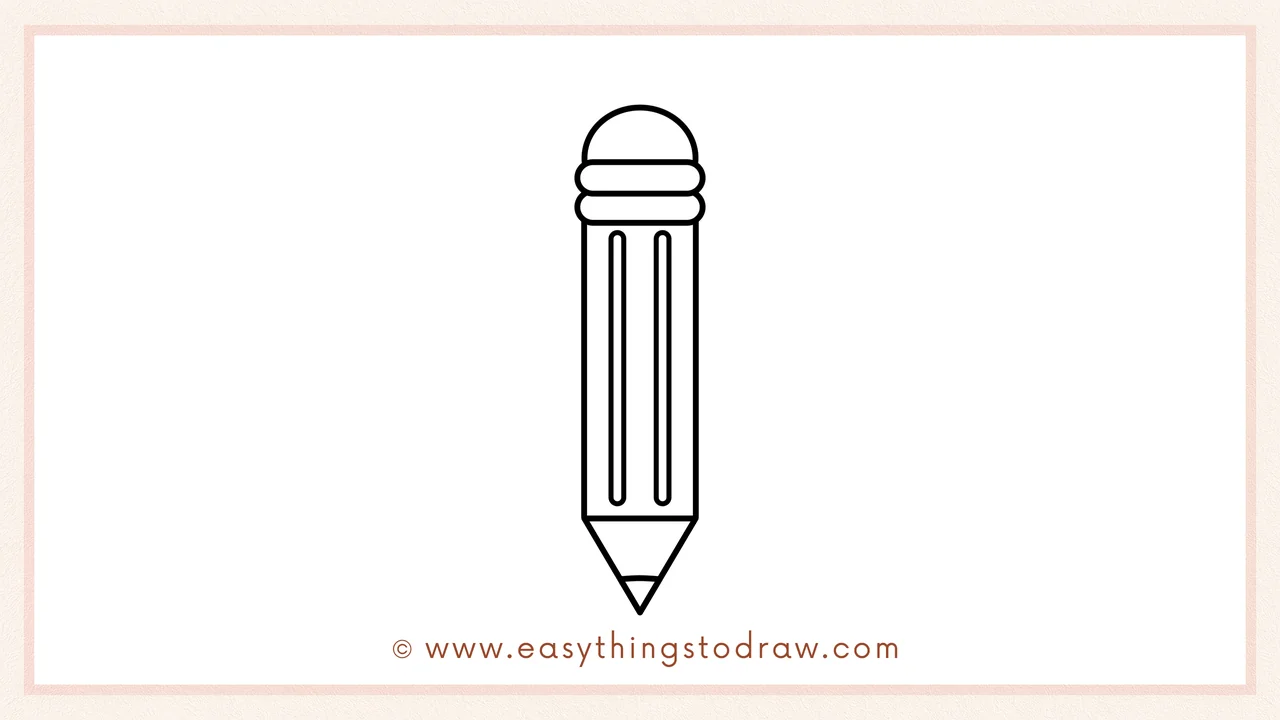
At the bottom, draw a triangle pointing downward to create the sharpened pencil tip. Add a small curved line to separate the wooden part from the lead.
Step 6 – Add a Happy Face!
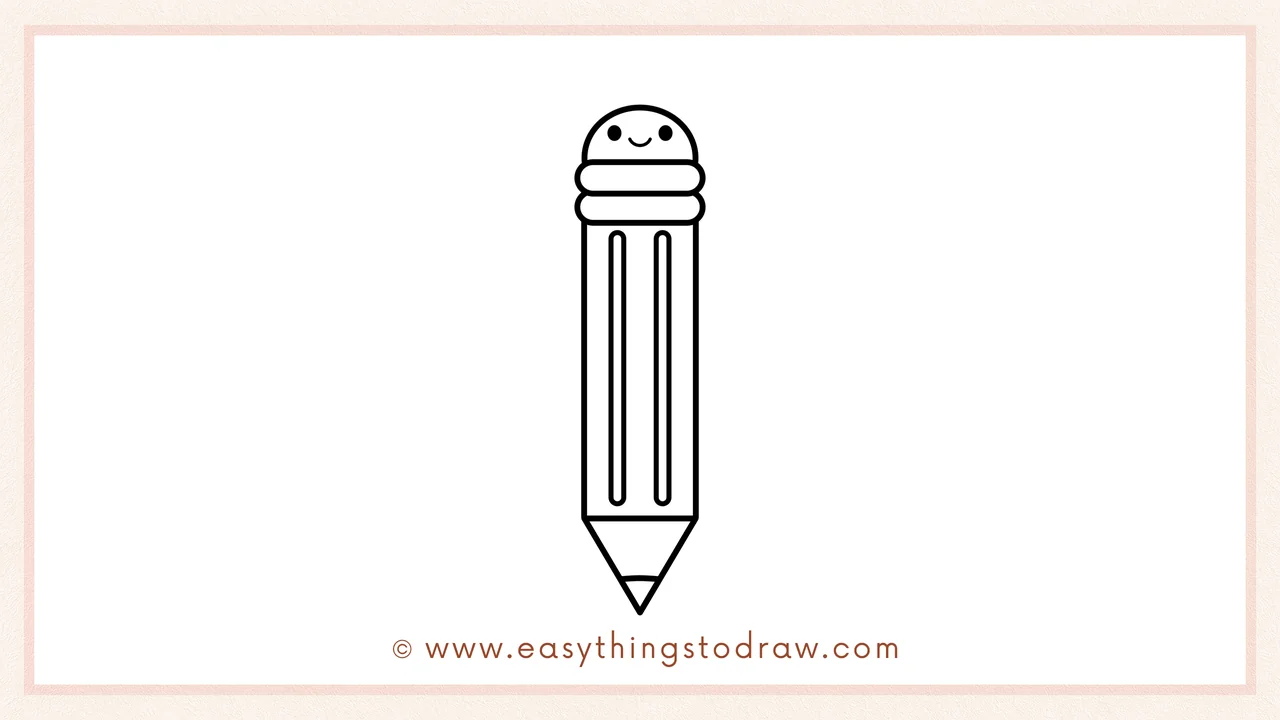
Time for the final touch! Add two little eyes and a smile inside the eraser circle. Now your pencil looks cheerful and full of personality!
Frequently Asked Questions (FAQ)
Can I turn this pencil into a character?
Absolutely! Add arms, legs, or even a speech bubble to give it a fun personality.
Should I color the pencil with real colors?
Sure! Try yellow for the body, pink for the eraser, and gray for the lead.
Is this drawing good for classroom activities?
Yes! It’s simple and fun, great for school-themed lessons or art time.
What if my lines aren’t straight?
That’s okay! Drawing improves with practice. Your pencil doesn’t need to be perfect to be awesome!
Printable Drawing Tutorials
Download Printable How to draw a pencil Drawing Tutorials
You Did It!
Awesome job drawing your adorable pencil! With just a few shapes and a happy face, you created a lovable school supply. Want to make it even cooler? Try adding sunglasses, a notebook friend, or a colorful background. Share your cute pencil with others and come back soon for more fun tutorials!
