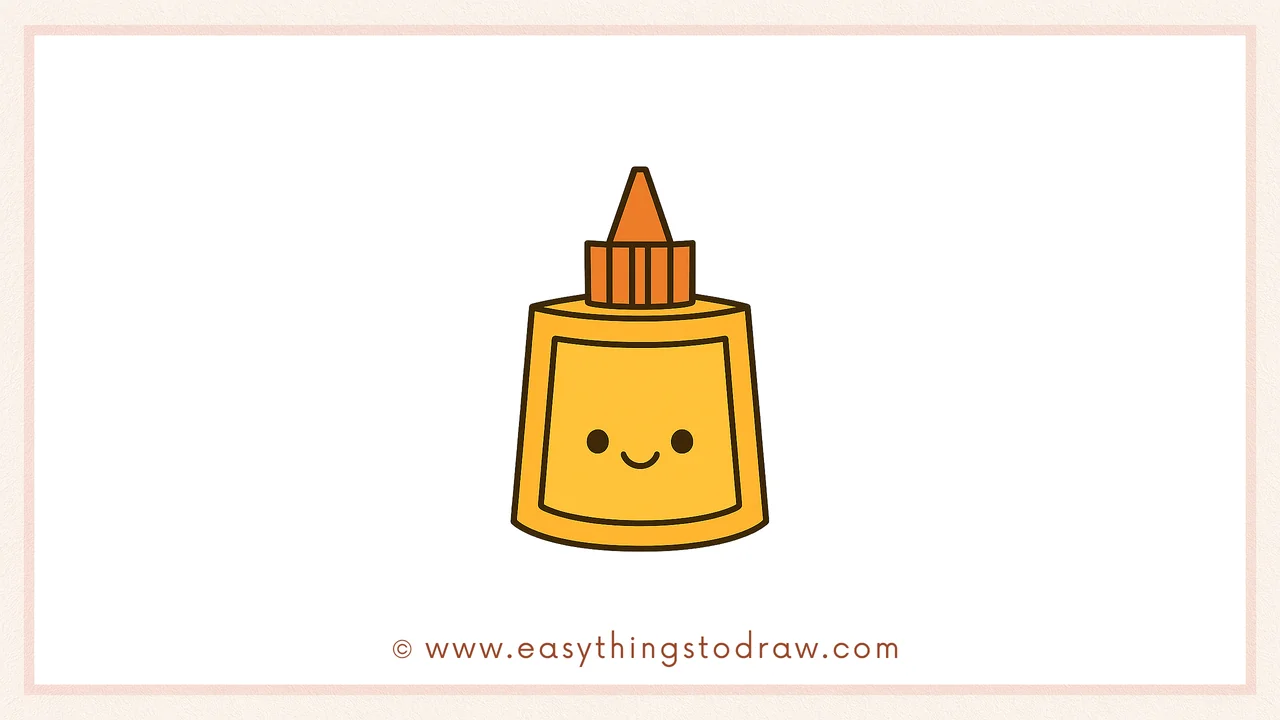
Get stuck on drawing fun with this adorable glue bottle tutorial! Perfect for kids and beginners, this step-by-step art guide will show you how to draw a cute cartoon-style glue bottle with a big smile and a twisty cap. Whether it’s for a school-themed project or just creative fun, this glue is sure to stick in your memory!
What You Need:
- A pencil
- An eraser
- A black marker (for outlining)
- Coloring tools (crayons, markers, or colored pencils)
- Drawing paper
Step by Step Glue Bottle Drawing Instructions
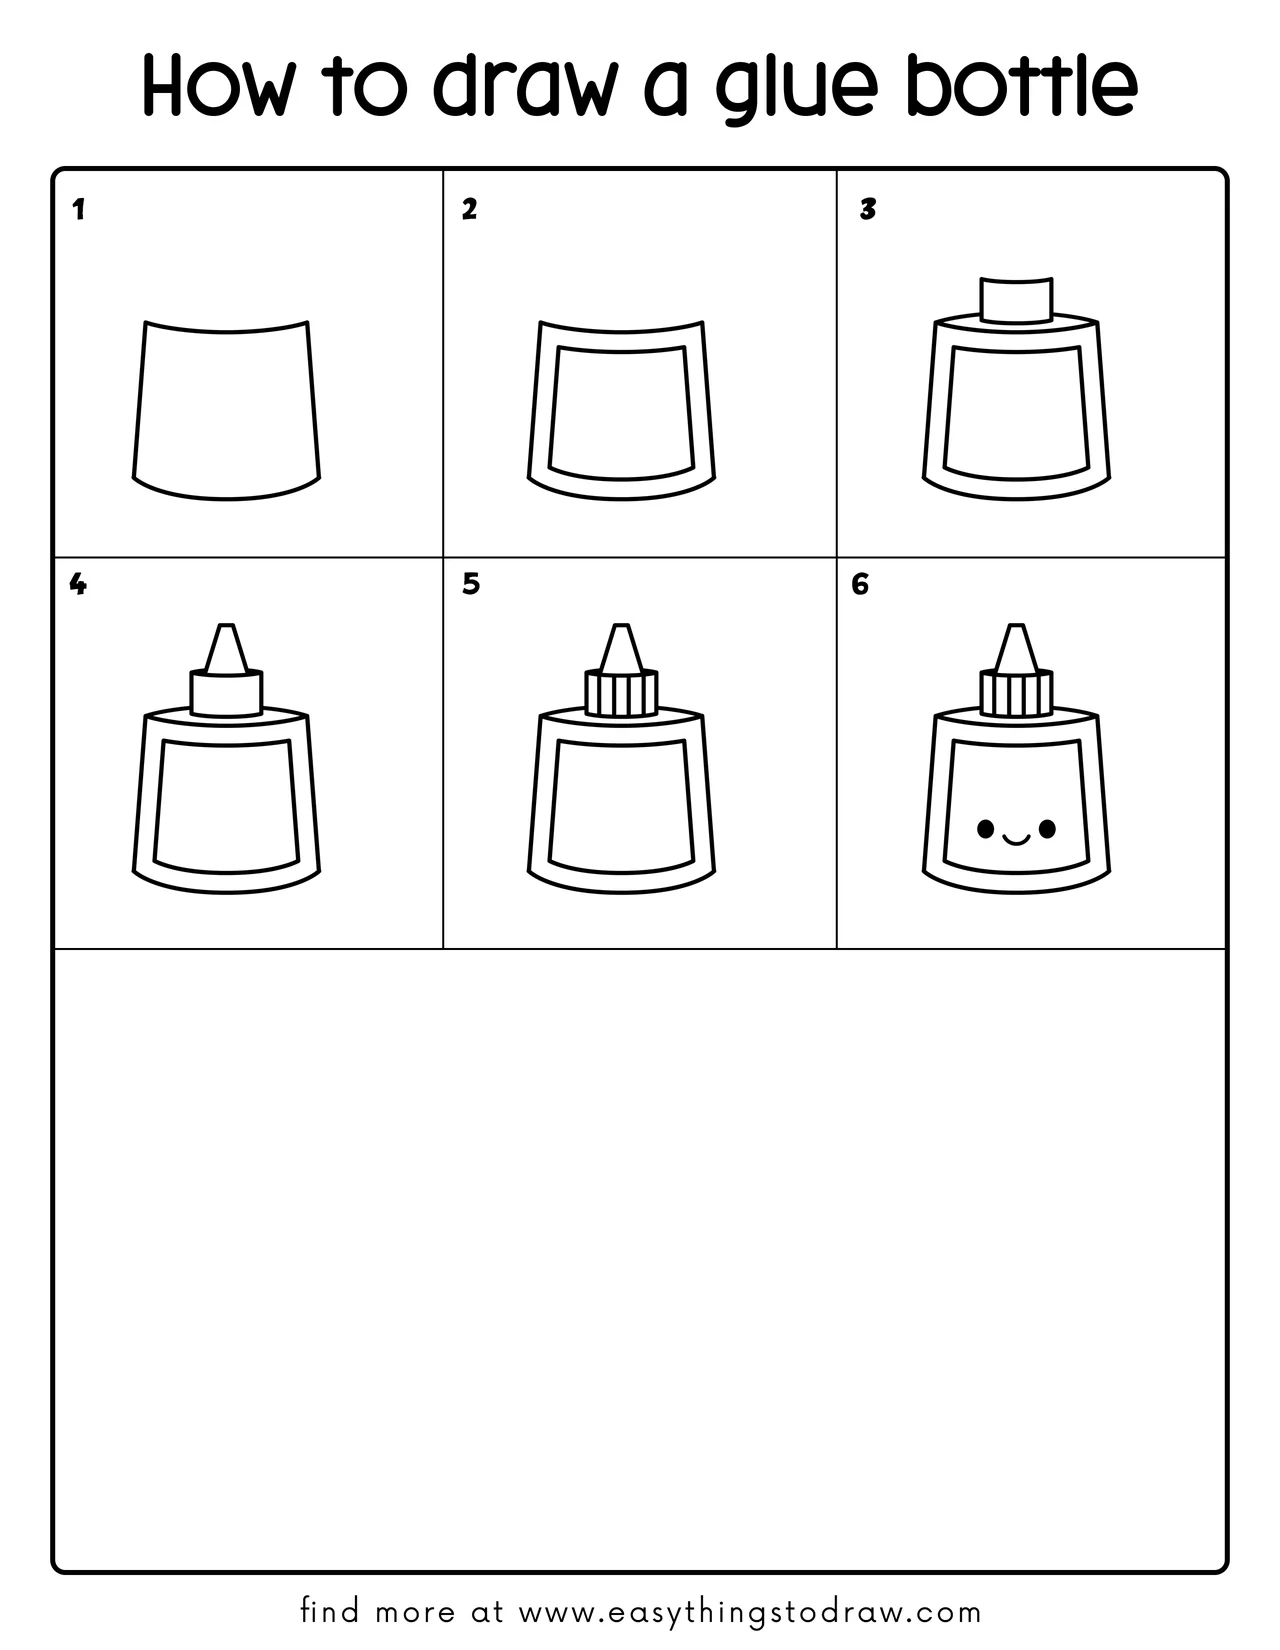
Step 1 – Draw the Bottle Body
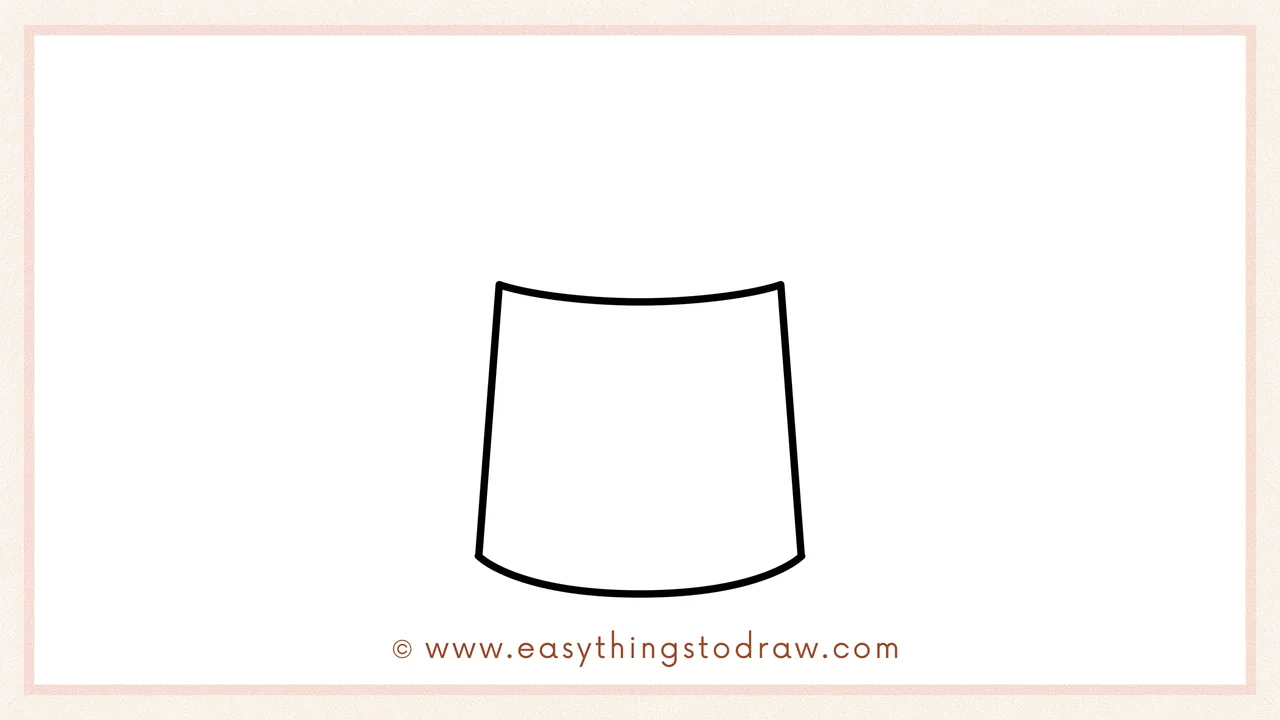
Start by drawing a wide trapezoid shape — the top edge curves slightly, and the sides taper outward. This is the base of your glue bottle.
Step 2 – Add the Label
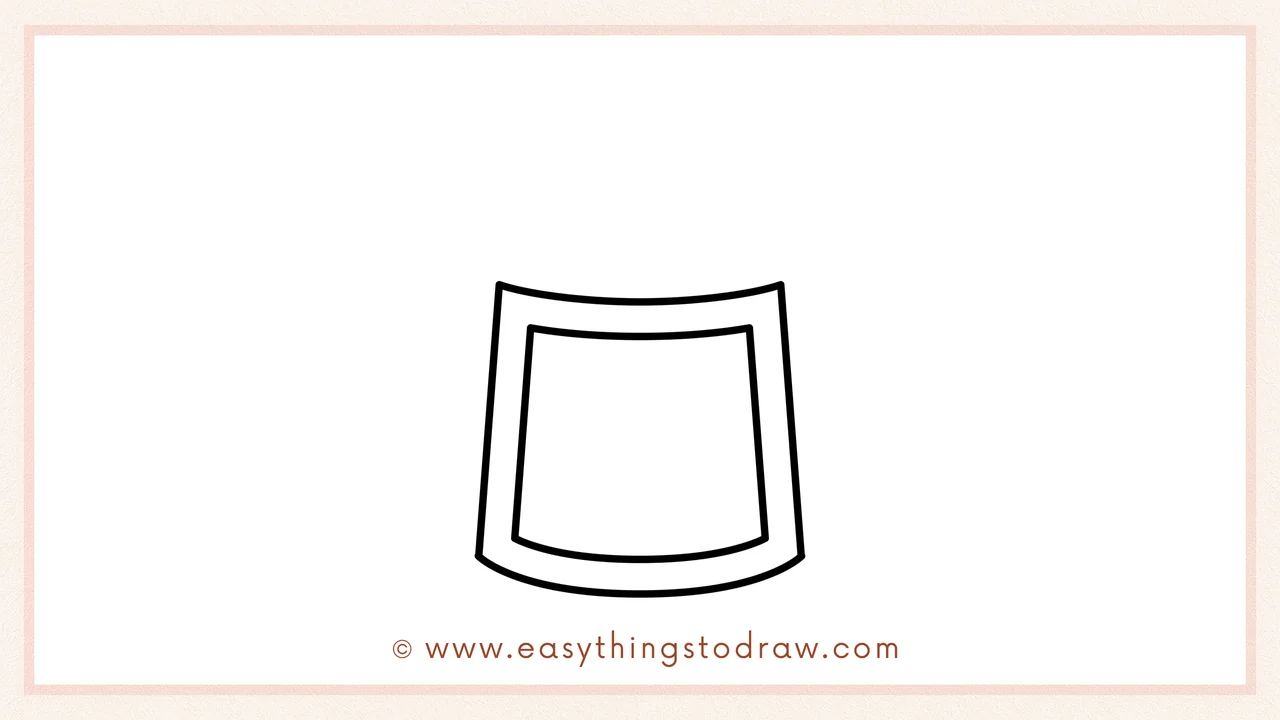
Inside the bottle, draw a smaller curved trapezoid — this is the label area. It follows the same shape as the bottle.
Step 3 – Draw the Cap Base
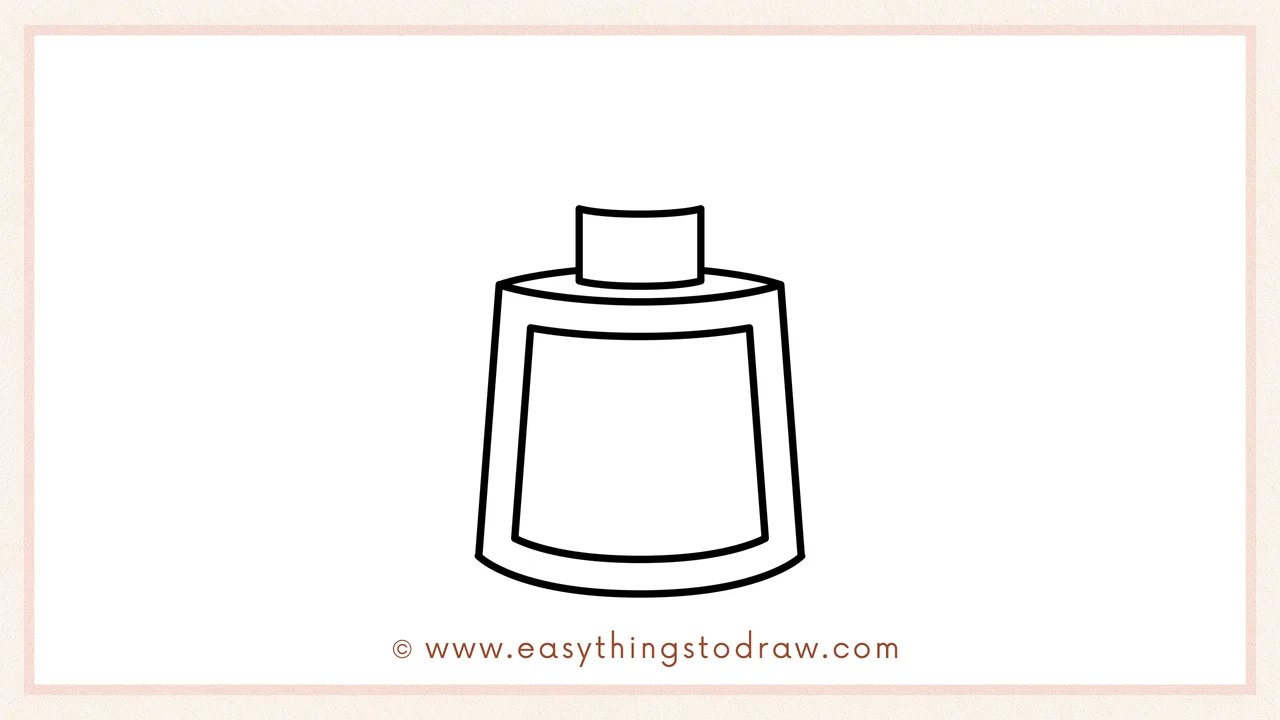
At the top, draw a short cylinder for the glue bottle’s cap. It should sit nicely above the opening.
Step 4 – Add the Nozzle

Now draw a small cone on top of the cap. This is the glue nozzle — where the glue comes out!
Step 5 – Add Cap Details
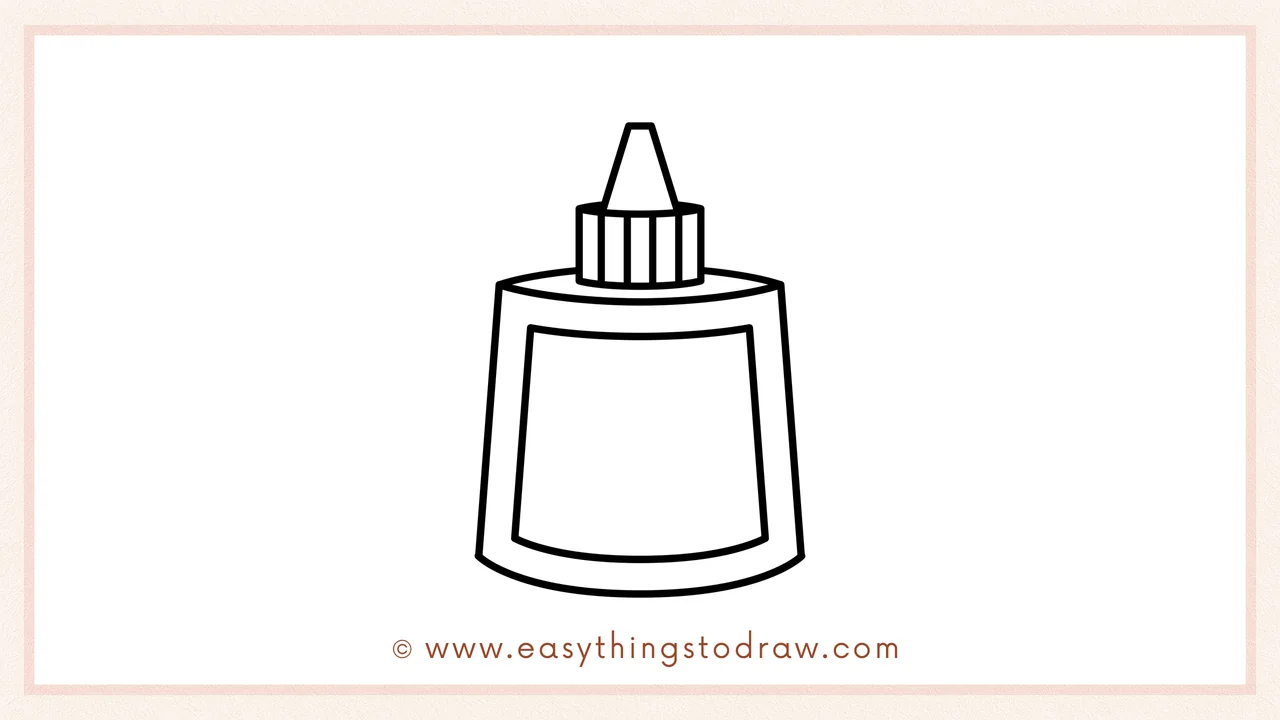
Draw vertical lines down the cap to give it grip texture — just like a twist-open top!
Step 6 – Draw a Cute Face
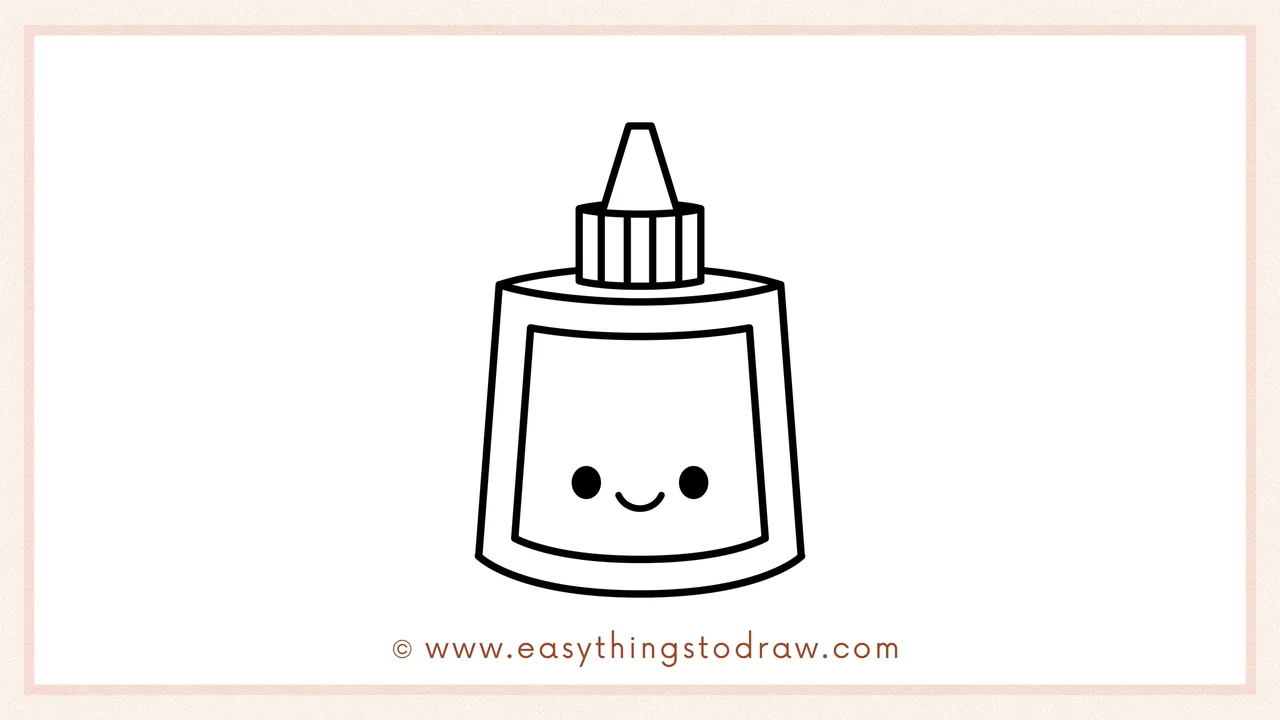
Let’s bring it to life! Add two little eyes and a big happy smile on the label area. Now your glue bottle is full of personality!
Frequently Asked Questions (FAQ)
What color should I use for my glue bottle?
You can try classic white with an orange cap, or get creative with rainbow bottles and sparkly labels!
Can I make it a glitter glue bottle?
Definitely! Just draw glitter swirls or stars on the label to show it’s super sparkly!
Is this good for a school art project?
Yes! It’s perfect for drawing school supplies or making a classroom-themed poster.
Can I add glue drops or a glue trail?
Great idea! Add a cute drip of glue coming out or some drops on paper nearby.
Printable Drawing Tutorials
Download Printable How to draw a glue bottle Drawing Tutorials
You Did It!
Awesome job drawing your cute little glue bottle! Whether it’s sitting on a desk, helping with crafts, or making things stick, your bottle now has a personality all its own. You can even draw scissors, paper, and a ruler to go with it. Keep being creative and adding more fun tools to your art supply collection!
