Want to light up your holiday art with a cozy Christmas candle? You’re in the right place! In this easy Christmas candle drawing tutorial, kids and beginners will learn how to draw a glowing candle step by step. With dripping wax, holly leaves, and a sweet little smile, this cheerful candle will brighten any page!
This guide is perfect for:
– Kids learning how to draw festive objects 🕯️
– Beginners practicing shape-building skills ✏️
– Teachers and parents planning holiday-themed art lessons 🎁
🎨 Why Learn From Us?
At Easy Things to Draw, our mission is to make drawing fun, easy, and confidence-boosting. Every tutorial is designed by certified art educators who know how to teach drawing in a way that’s gentle, encouraging, and always age-appropriate.
With over 10 years of experience in children’s art education, we’re proud to help young artists build skills they can be proud of—one line at a time.
✅ What Makes This Candle Drawing Guide Unique?
🕯️ Holiday-Themed and Beginner-Friendly
Focused on shapes like ovals, curves, and lines that are easy for kids🌟 Step-by-Step Visual Breakdown
Each detail is broken down so even preschoolers can follow along🧑🏫 Created by Teachers
Reviewed for learning value and classroom safety🌿 Creative Expression
Kids can personalize their candle with colors, patterns, or even extra decorations!
🔒 Safe and Classroom-Approved
All our tutorials are:
– Free of ads and distractions
– Perfect for printing or digital use
– Created with children’s well-being in mind
🎄 Let’s Draw This Christmas Candle Together!
Grab your supplies and join us for a step-by-step drawing of a cozy holiday candle that’s perfect for your Christmas crafts and cards!
What You Need:
- A pencil
- An eraser
- A black marker (for outlining)
- Coloring tools (crayons, markers, or colored pencils)
- Drawing paper
Step by Step Christmas Candle Drawing Instructions
Step 1 – Draw the Flame
Begin by drawing a teardrop shape with a smaller teardrop inside it. This is your candle’s gentle, glowing flame.
Step 2 – Add the Melting Wax Top

Below the flame, sketch a soft oval and draw drippy, wavy lines coming down from it to show melted wax.
Step 3 – Draw the Candle Body
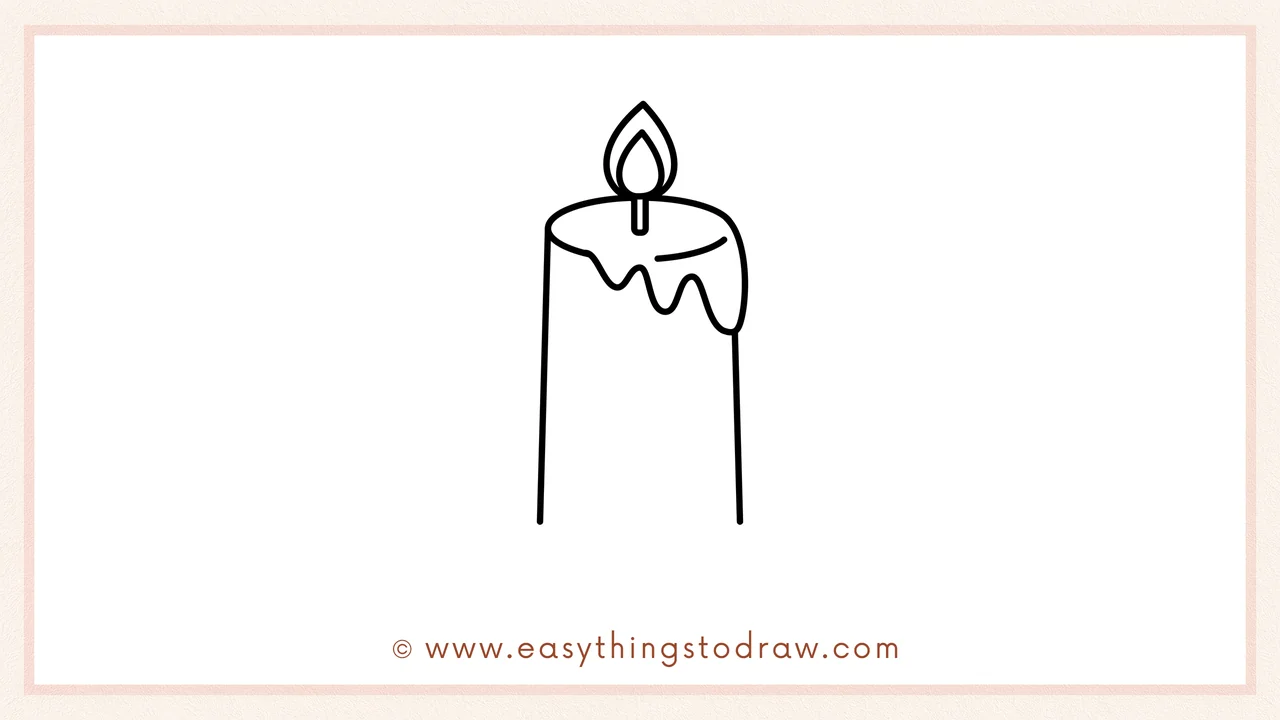
Extend two straight vertical lines down from the wax to form the tall candle shape.
Step 4 – Add Three Berries at the Base
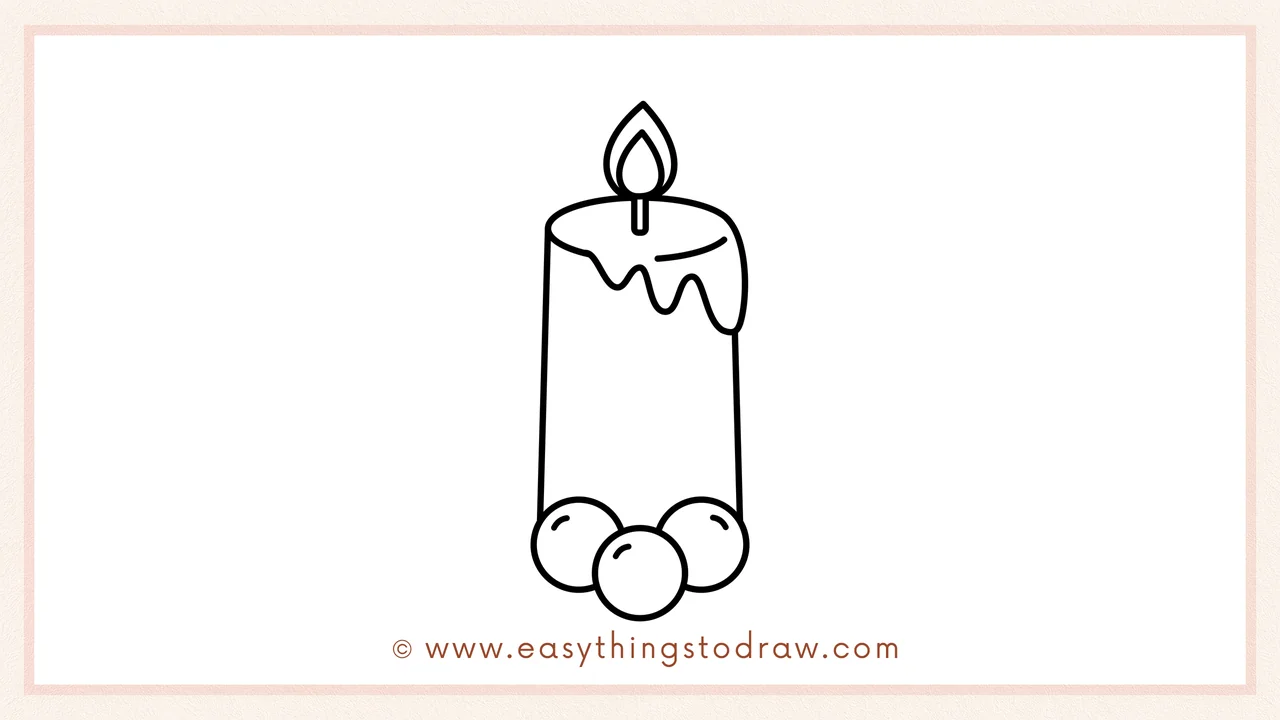
Draw three overlapping circles near the candle’s bottom—these are festive holly berries!
Step 5 – Add Holly Leaves

Draw two big, pointy holly leaves behind the berries, one on each side, with jagged edges for that holiday look.
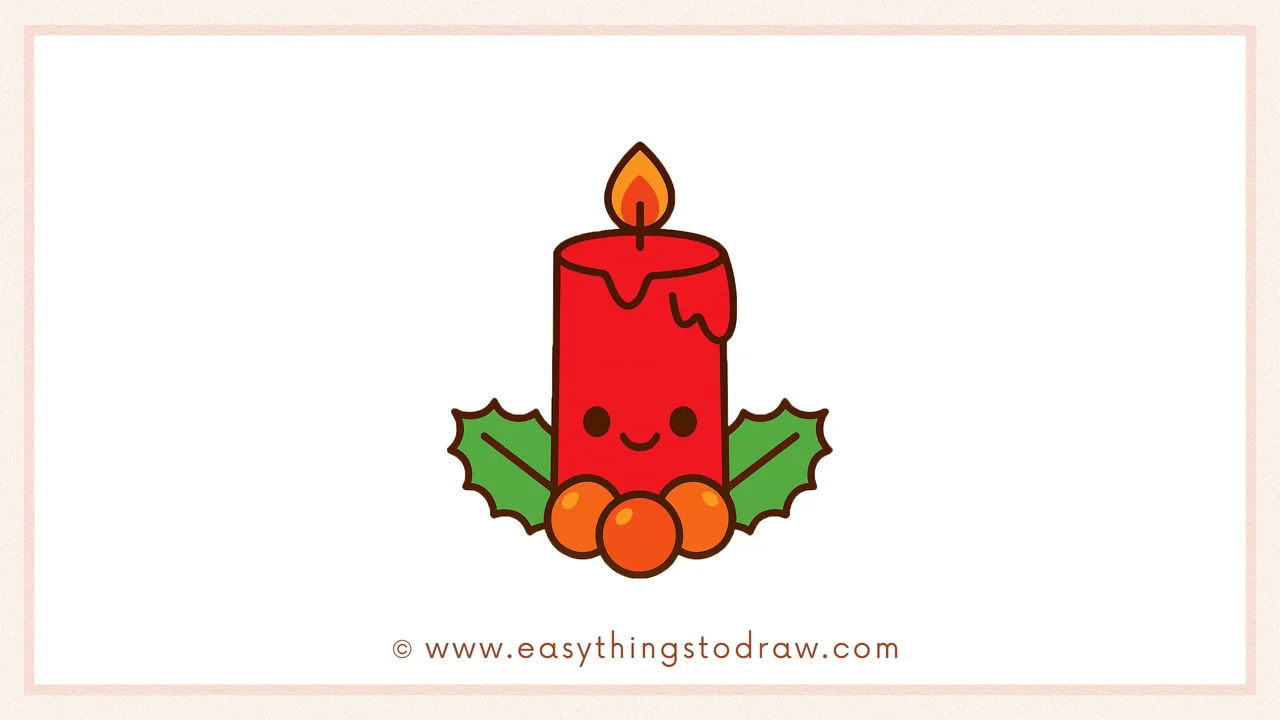
Step 6 – Draw a Face and Color!
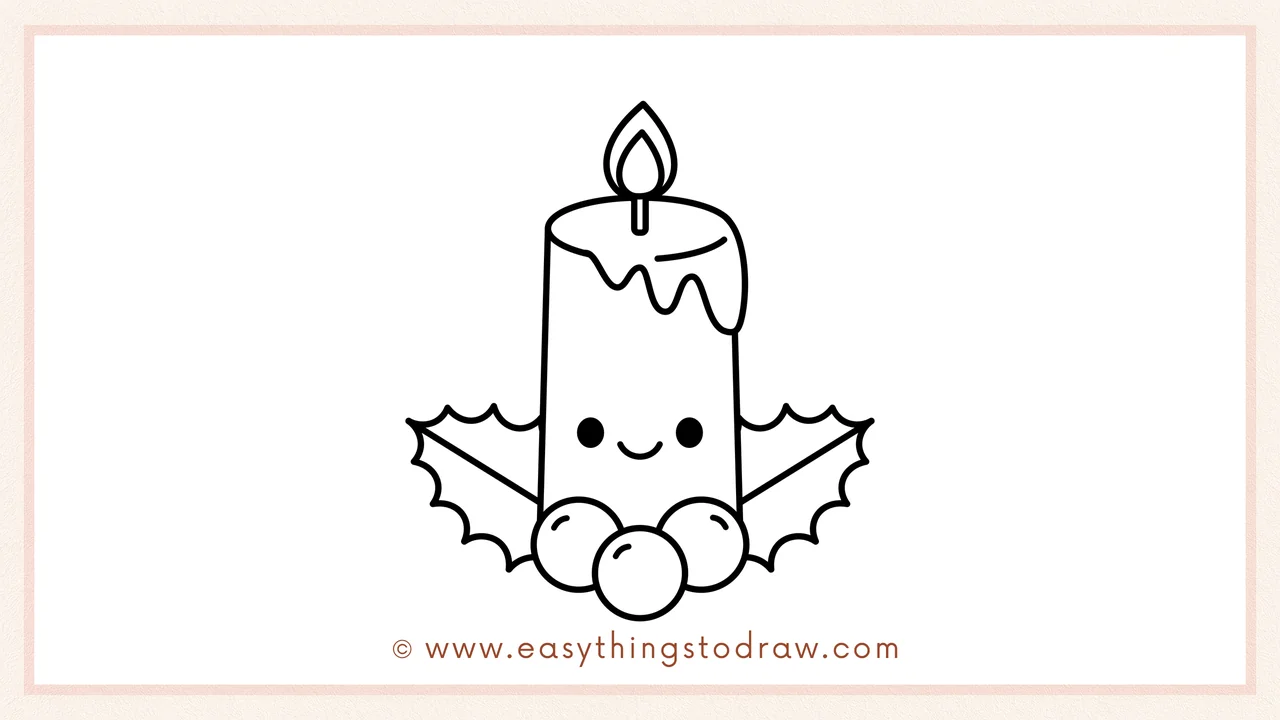
Give your candle some personality with two little oval eyes and a smiling mouth. Now color it with reds, greens, and warm yellows to bring it to life!
Frequently Asked Questions (FAQ)
Can I draw more than one candle together?
Yes! Create a festive candle trio or a row of candles for a cozy winter vibe.
What colors work best for Christmas candles?
Classic candles are red, green, white, or gold, but you can use any color that makes your drawing feel festive.
Is this suitable for school or classroom projects?
Definitely! This tutorial is safe, print-ready, and works well for group activities.
What if my wax drips look different?
That’s part of the charm! Every candle melts differently—your version is perfect just as it is.
Printable Drawing Tutorials

Download Printable How to draw a Christmas candle Drawing Tutorials
You Did It!
You did it—your Christmas candle is glowing with charm! This drawing makes a perfect decoration for cards, crafts, or even holiday placemats. Add sparkle effects, stars in the background, or make a set of different candles in fun colors!
Print out your drawing, gift it to a friend, or share it with us online—happy holidays and happy drawing!
