Ready to draw a sweet holiday treat? Learn how to draw a classic Christmas candy cane with a cheerful twist! This easy step-by-step art lesson shows kids and beginners how to draw a striped candy cane with just a few curved lines—and a smile to match.
This guide is perfect for:
– Kids who love Christmas sweets and crafts 🍭
– Beginners learning how to draw curved shapes ✏️
– Parents and teachers doing winter-themed activities with kids ❄️
🎨 Why Learn From Us?
At Easy Things to Draw, we create fun and visual tutorials that make drawing feel magical! Our guides are made by certified educators with over 10 years of experience helping kids draw confidently, even if they’ve never picked up a pencil before.
Our friendly approach turns basic shapes into festive fun—perfect for home or classroom use!
✅ What Makes This Candy Cane Drawing Special?
🍬 Beginner-Approved Method
Simple curved lines make it easy to follow for little hands🔄 Step-by-Step Visuals
Breaks the candy cane into manageable parts, including the iconic hook🧑🏫 Created by Art Educators
Designed with clarity, age-appropriateness, and creative play in mind🌈 Encourages Personal Style
Kids can add sparkles, faces, or even make rainbow-striped versions!
🔒 100% Safe for Kids
– No ads or popups
– Printable and classroom-friendly
– Free of inappropriate content
🎄 Let’s Draw This Sweet Candy Cane Together!
Gather your drawing supplies and follow along—we’re turning curves and stripes into a cute candy cane character!
What You Need:
- A pencil
- An eraser
- A black marker (for outlining)
- Coloring tools (crayons, markers, or colored pencils)
- Drawing paper
Step by Step Christmas Candy Cane Drawing Instructions
Step 1 – Start with the Hook Curve
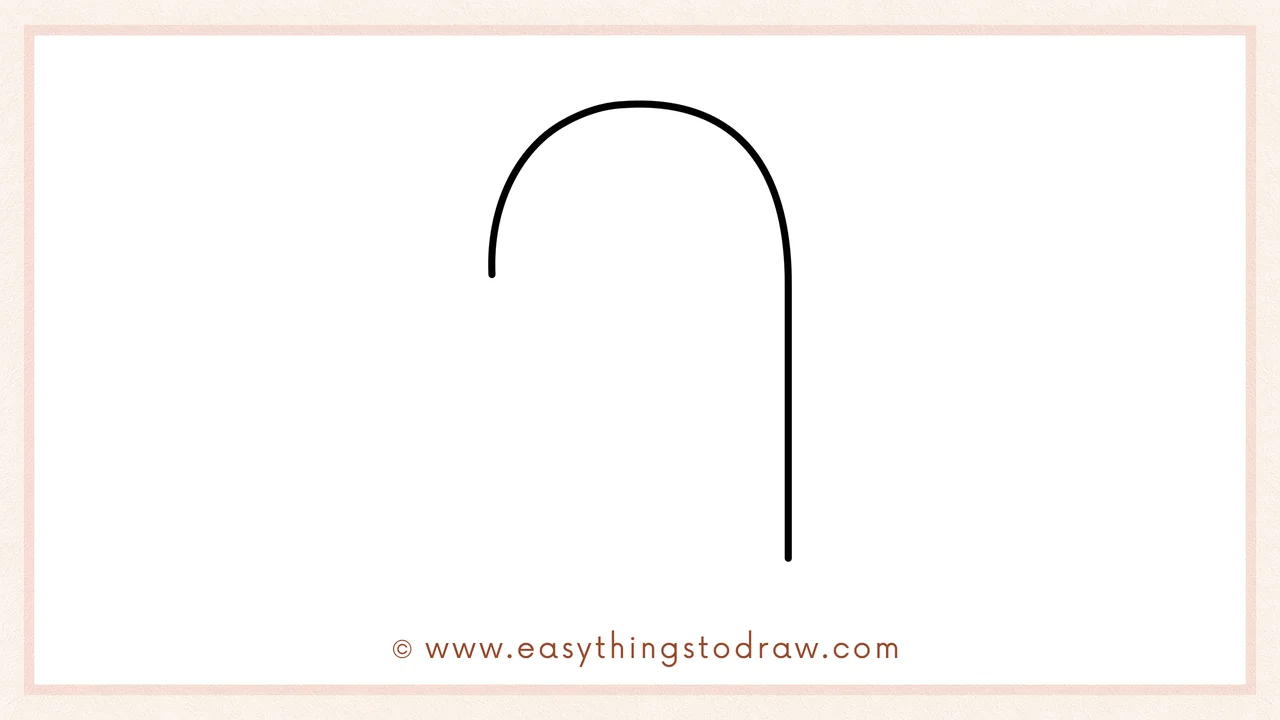
Draw a large upside-down “J” shape. This will be the candy cane’s basic outline.
Step 2 – Add the Inner Curve

Now draw a second line inside the first one, following its shape closely. This creates the thickness of the candy cane.
Step 3 – Close the Bottom
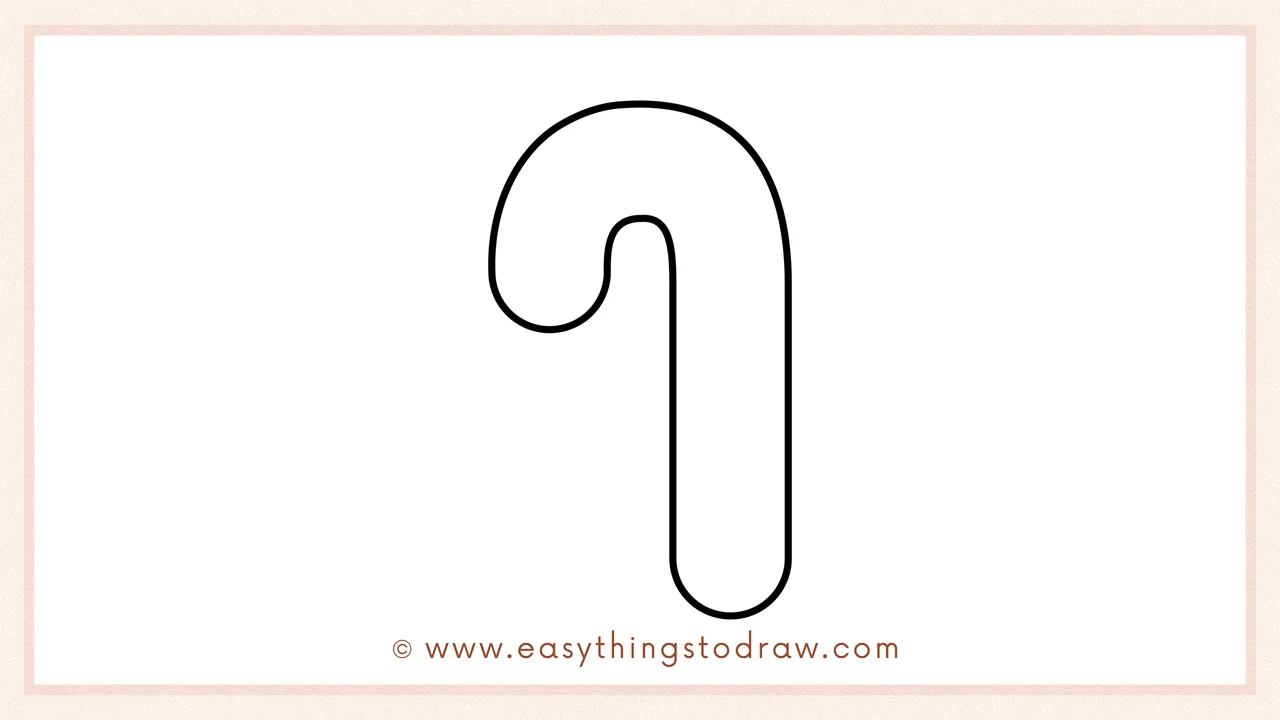
Round off the bottom of the cane by connecting the inner and outer lines with a curved line.
Step 4 – Draw the First Few Stripes
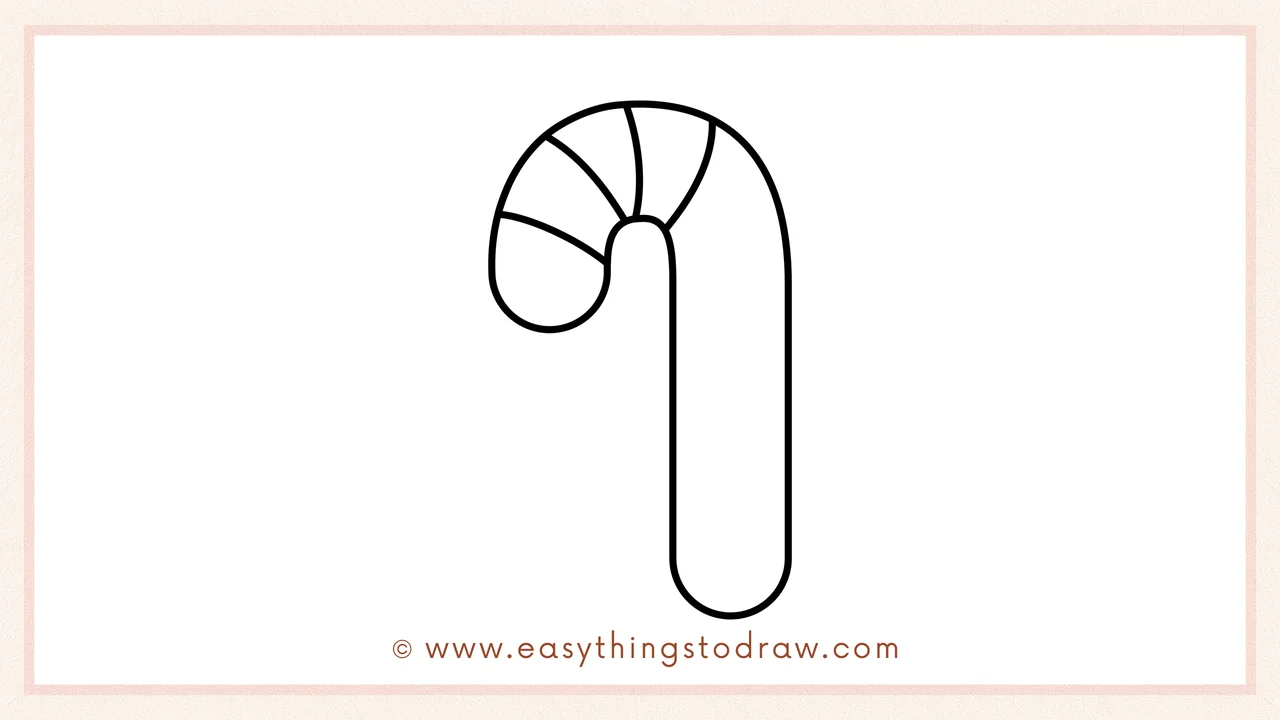
Start adding diagonal stripes at the top of the hook. These will be the candy cane’s classic red and white sections.
Step 5 – Complete the Stripes
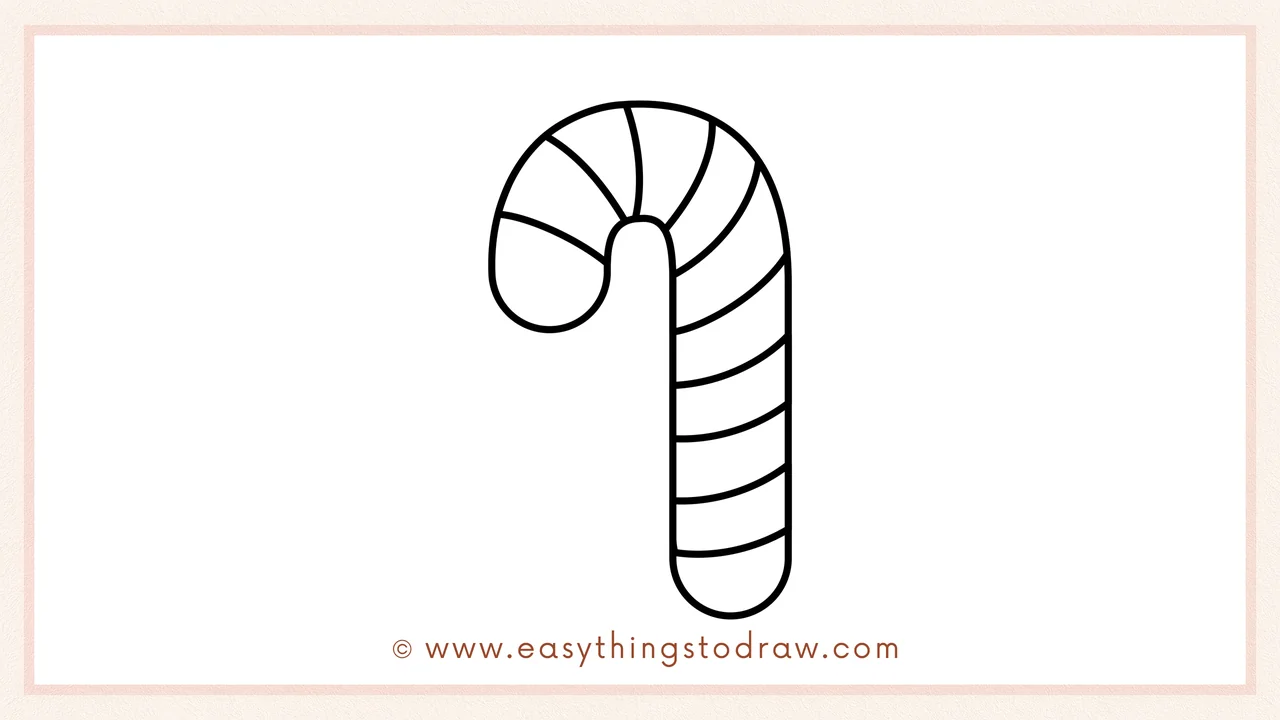
Continue drawing the diagonal stripes down the whole candy cane until you reach the bottom.
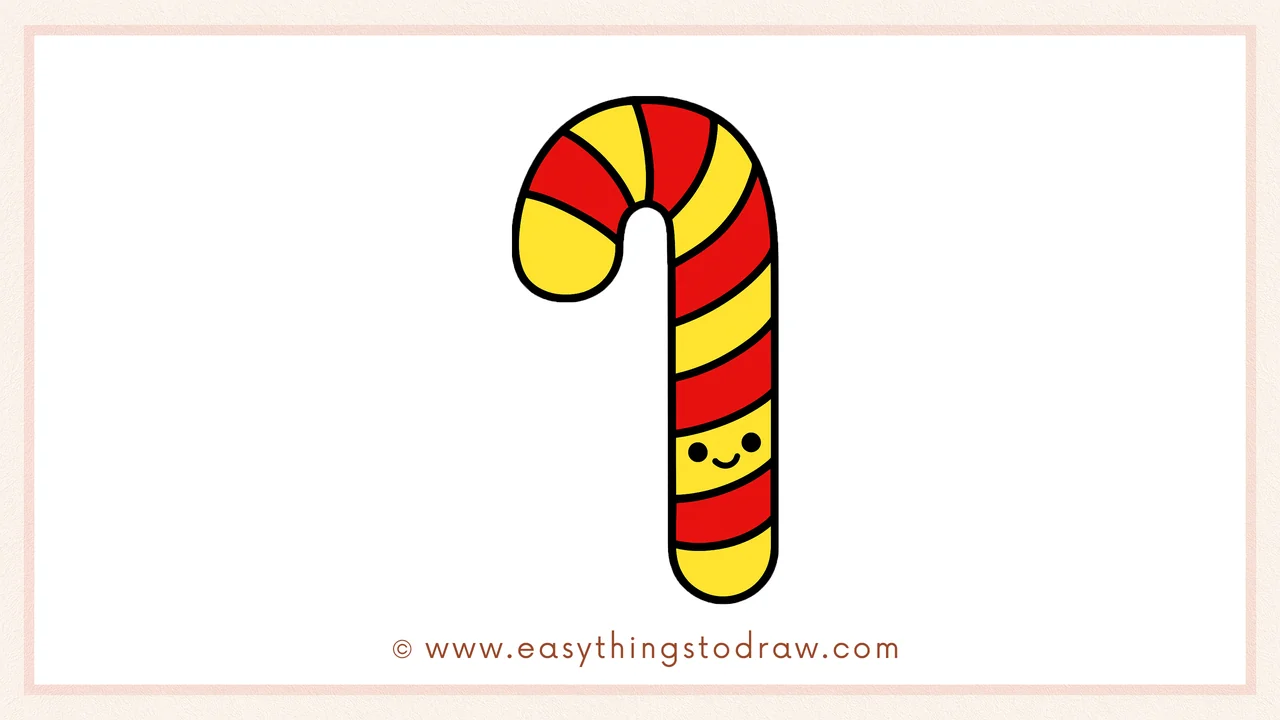
Step 6 – Add a Face and Color It!

Give your candy cane a cute personality with eyes and a smile! Then color in the stripes—red and white for a classic look or go wild with rainbow stripes!
Frequently Asked Questions (FAQ)
Can I make the candy cane a different shape?
Sure! Try bending it more or making it straight like a peppermint stick.
What colors should I use?
Red and white are classic, but pink, green, blue, or rainbow work great too!
Can I turn this into a card or ornament?
Yes! Just cut it out and glue it to a folded card or cardboard for easy DIY decor.
What if my stripes don’t line up perfectly?
That’s totally okay! Every candy cane is a little different—just like your art.
Printable Drawing Tutorials

Download Printable How to draw a candy cane Drawing Tutorials
You Did It!
Awesome work—your candy cane looks deliciously festive! Try drawing a few more in different sizes and colors to make a full Christmas treat display. You can even turn them into stickers, gift tags, or add snowflakes in the background!
Print it out, color it again, and don’t forget to show off your sweet holiday creation!
