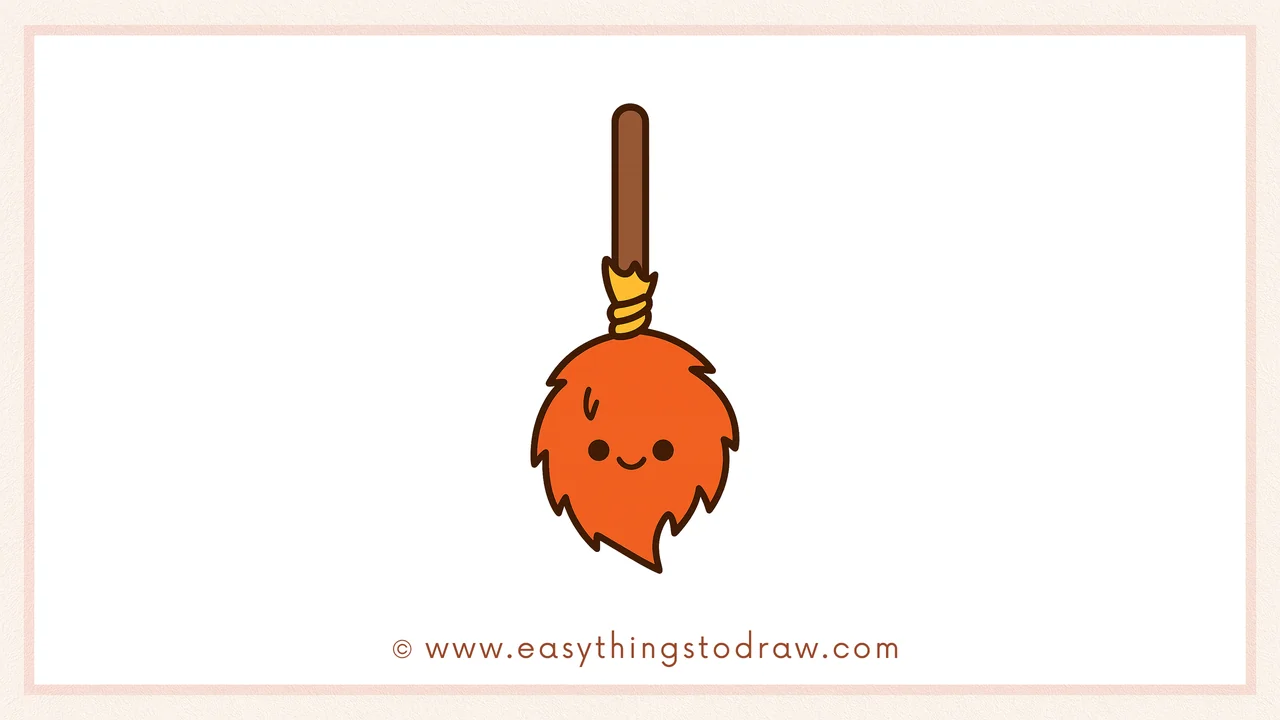
Grab your pencils and get ready to draw a friendly little broom! This cute cartoon broom drawing tutorial is perfect for Halloween fun or magical adventures. Kids and beginners will love how easy it is to sketch the fluffy bristles, twisty string, and smiling face. It’s a fun way to explore shapes and textures with this easy broom drawing for kids!
What You Need:
- A pencil
- An eraser
- A black marker (for outlining)
- Coloring tools (crayons, markers, or colored pencils)
- Drawing paper
Step by Step Broom Drawing Instructions
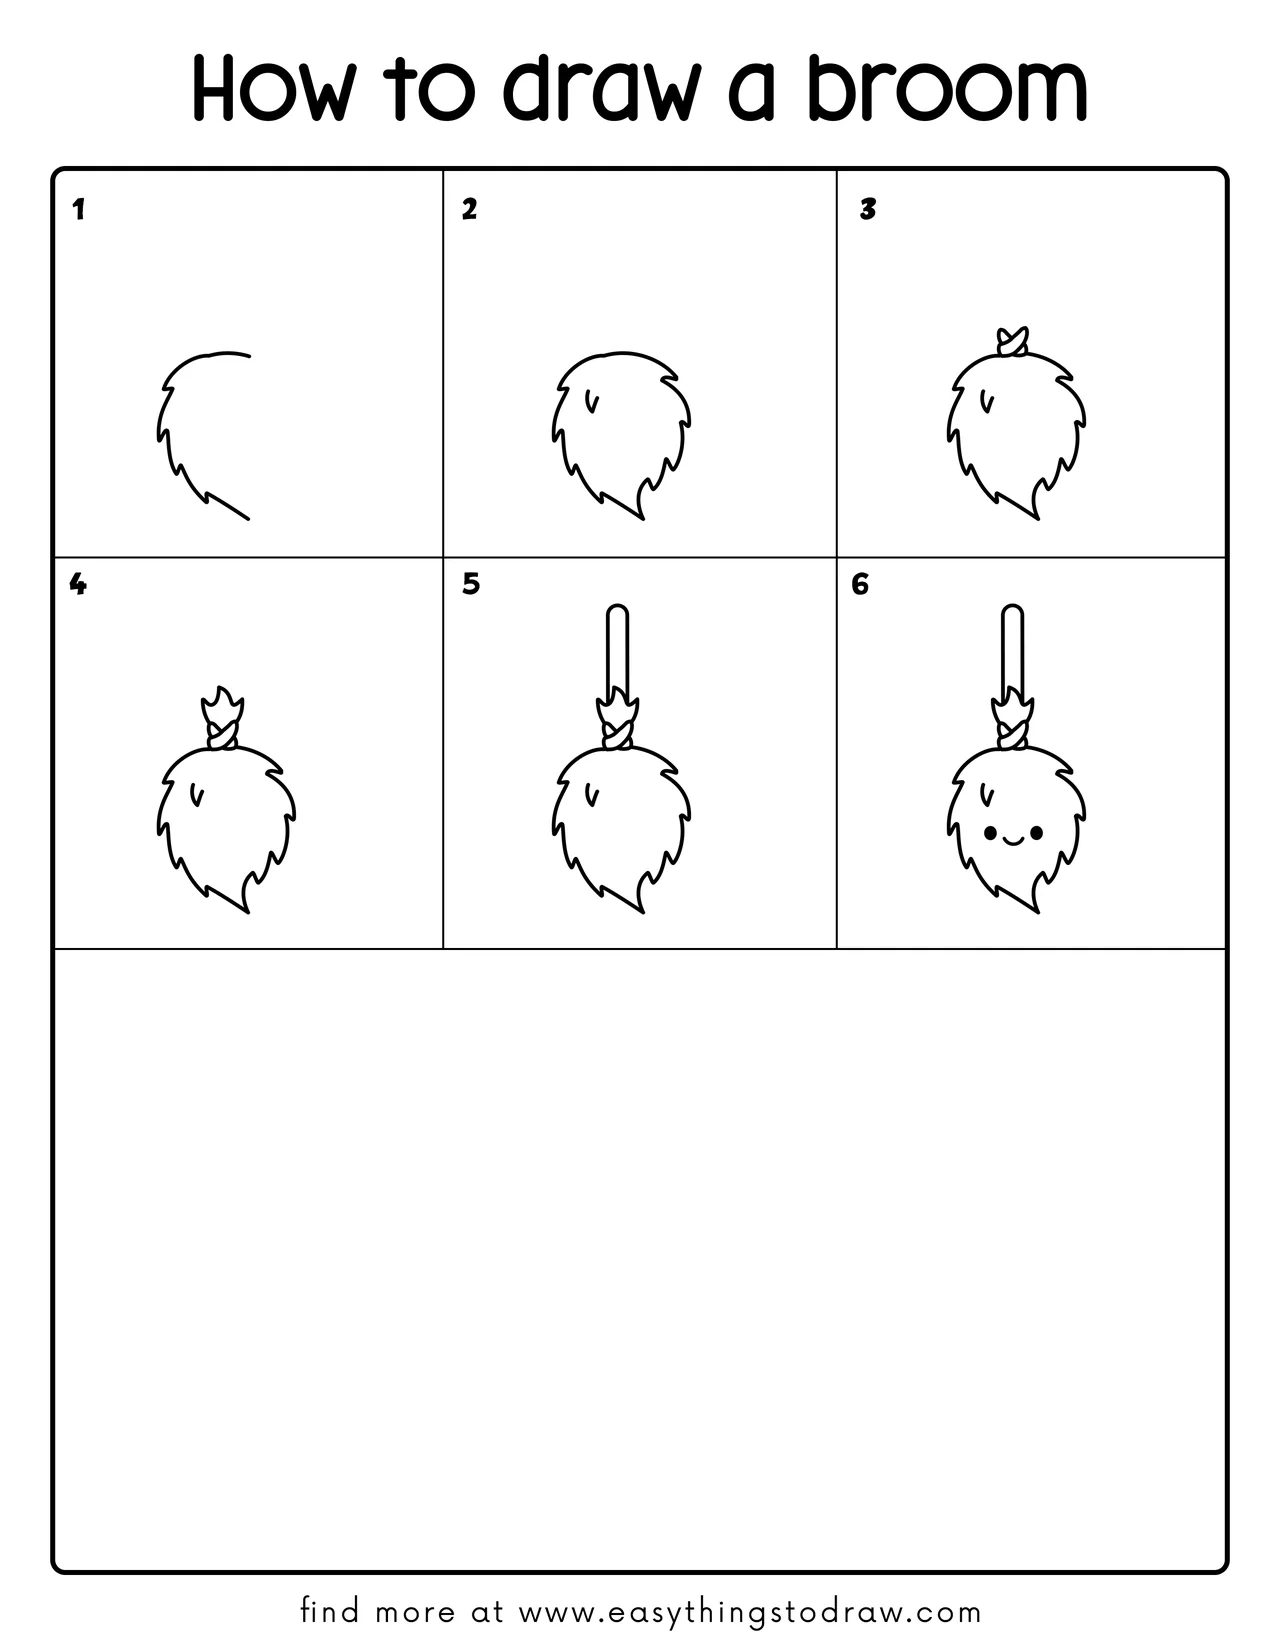
Step 1 – Start the Bristle Curve
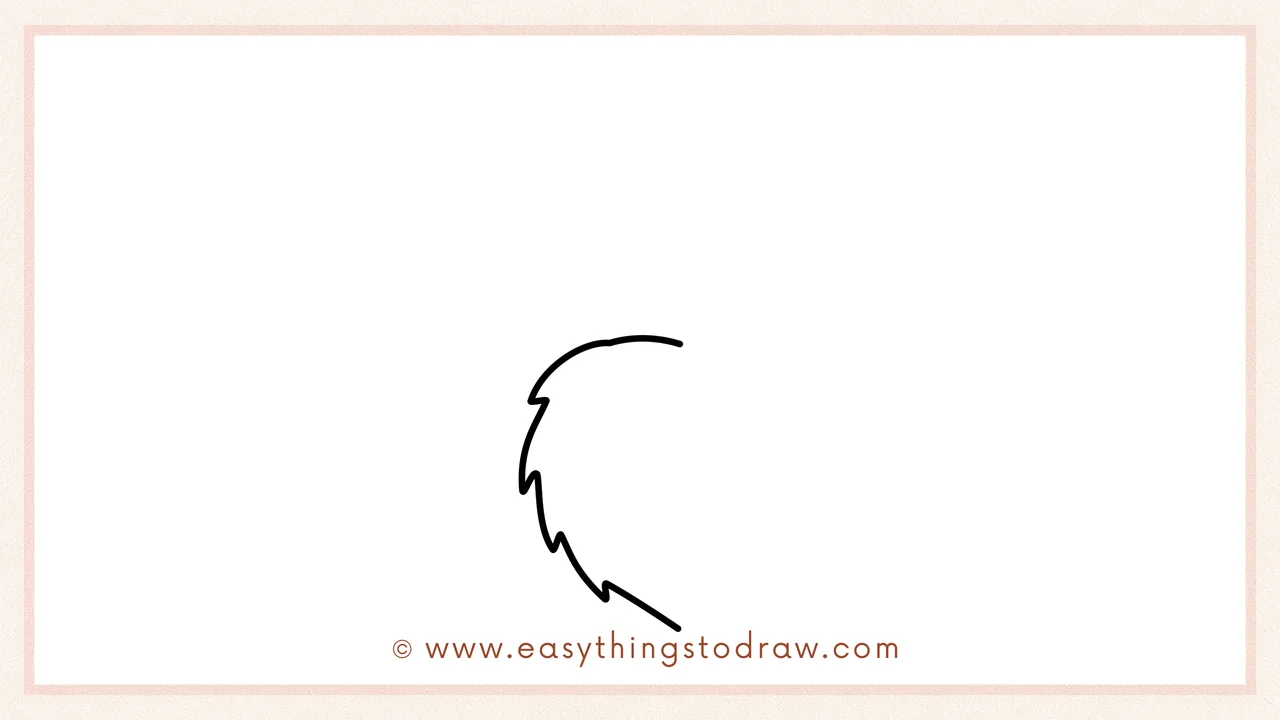
Begin by drawing a curvy zig-zag line like a fluffy beard on the left side of your page. This is one edge of the broom’s soft bristle shape.
Step 2 – Complete the Bristle Shape
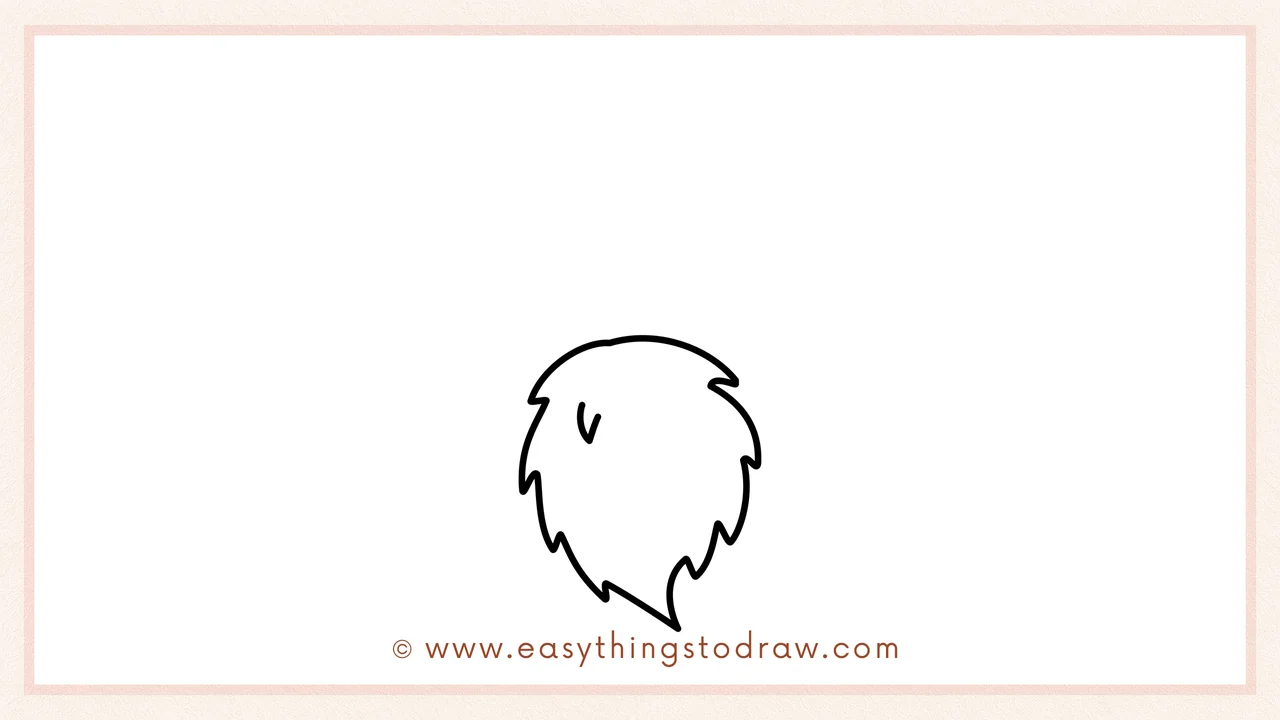
Now connect the line into a full leafy teardrop shape with more zig-zags on the right side. This makes the whole bristle part of the broom nice and round!
Step 3 – Add the Knot at the Top

Draw a little twisty ribbon on top of the broom bristles – this is where the handle ties in. It looks like a small bow or knotted string.
Step 4 – Make the Knot Puffy
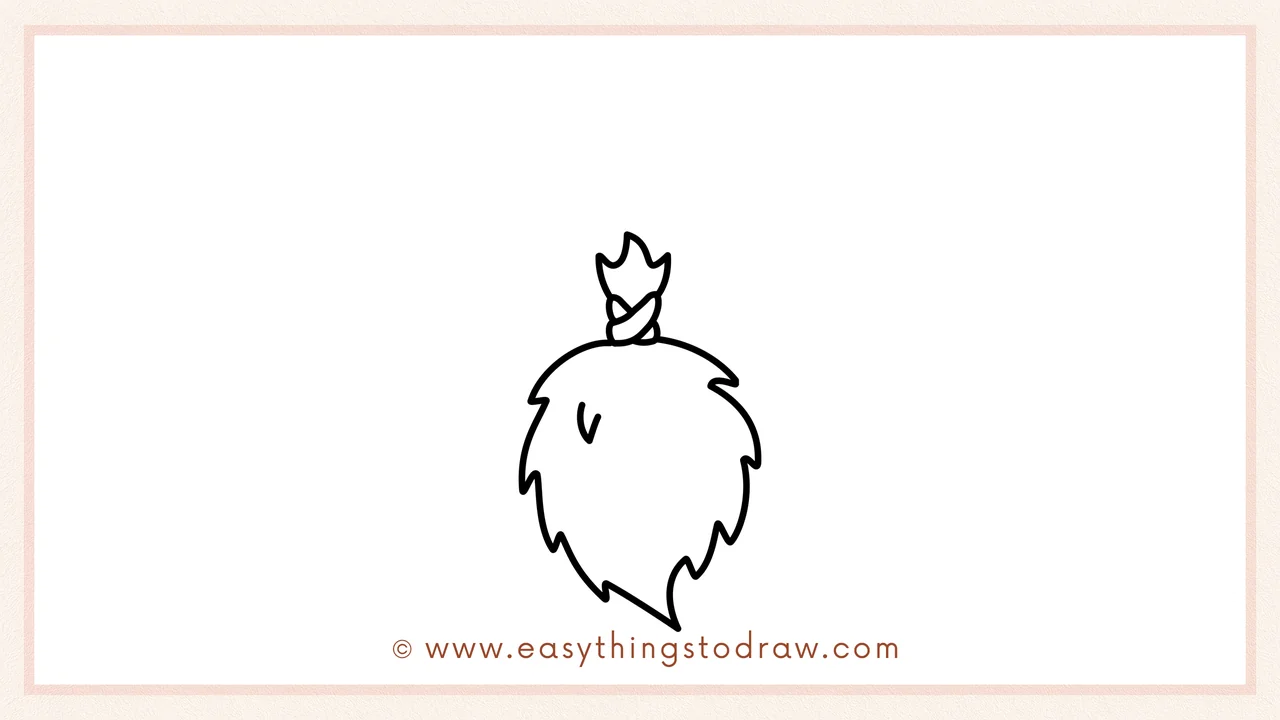
Add some detail by drawing folds or twists inside the knot, giving it a puffy and textured look. Now the string looks like it’s really tied tight!
Step 5 – Draw the Handle
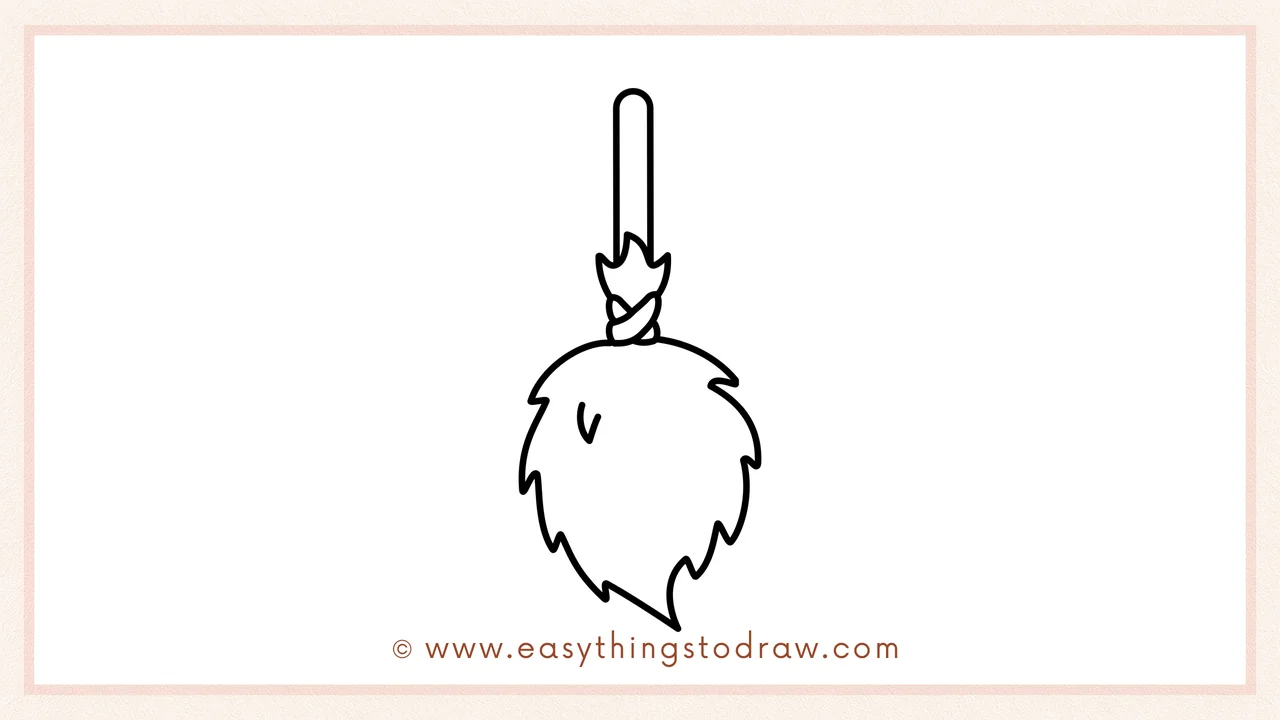
Draw a long, straight vertical handle coming out of the top of the knot. It should be rounded at the top to look smooth and easy to hold.
Step 6 – Add a Smiley Face
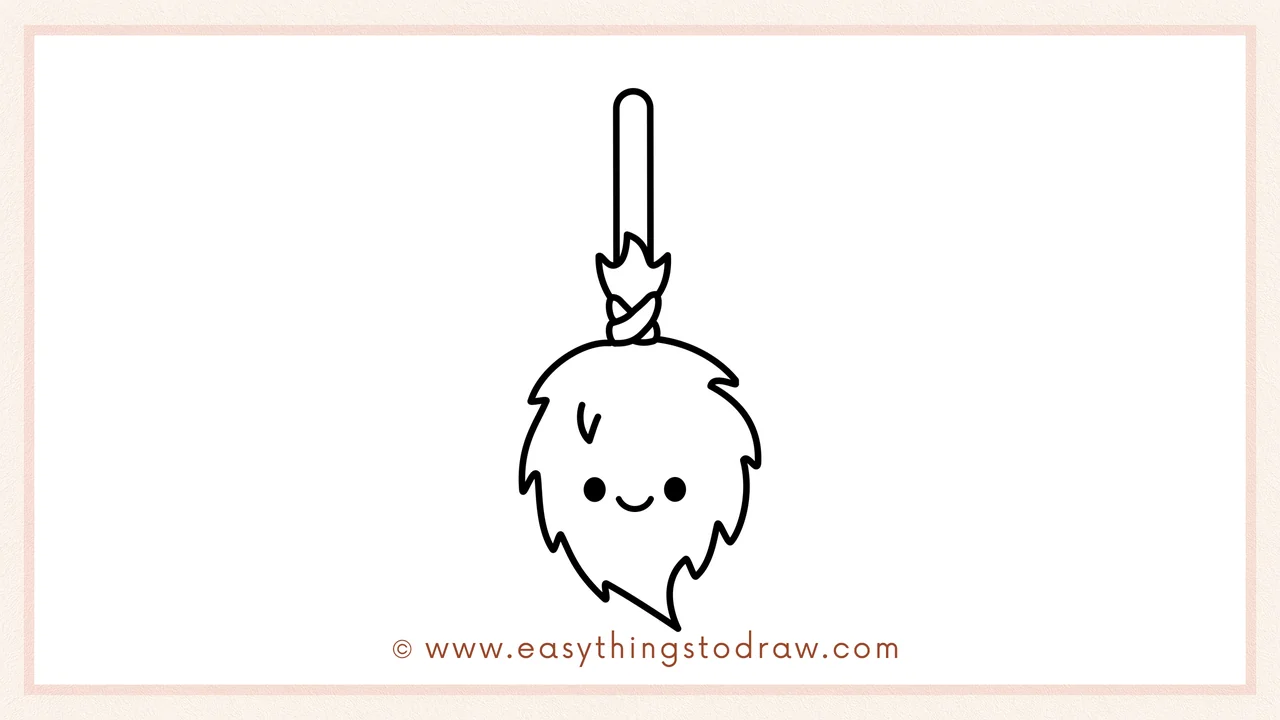
Finish by giving your broom two dot eyes and a little curved smile near the middle of the bristles. Now your broom is alive and super cute!
Frequently Asked Questions (FAQ)
Can I decorate the broom for Halloween?
Of course! Add a witch hat, little stars, or even make it fly through the sky!
What colors should I use for the broom?
Yellow or tan for the bristles, brown for the handle, and purple or orange for the string are great spooky picks!
Can I make the broom look magical?
Definitely! Add sparkles, swirls, or even a cat riding on it!
Is this project good for young kids?
Yes! It’s made with simple shapes and flowing lines, perfect for kids ages 4 and up.
Printable Drawing Tutorials
Download Printable How to draw a broom Drawing Tutorials
You Did It!
Woohoo! You just finished drawing your very own cartoon broom. Doesn’t it look cheerful and ready to sweep into action? Now you can color it any way you like, add fun accessories, or draw a spooky background. Share it, print it, or start your own collection of magical tools. Great work, artist!
