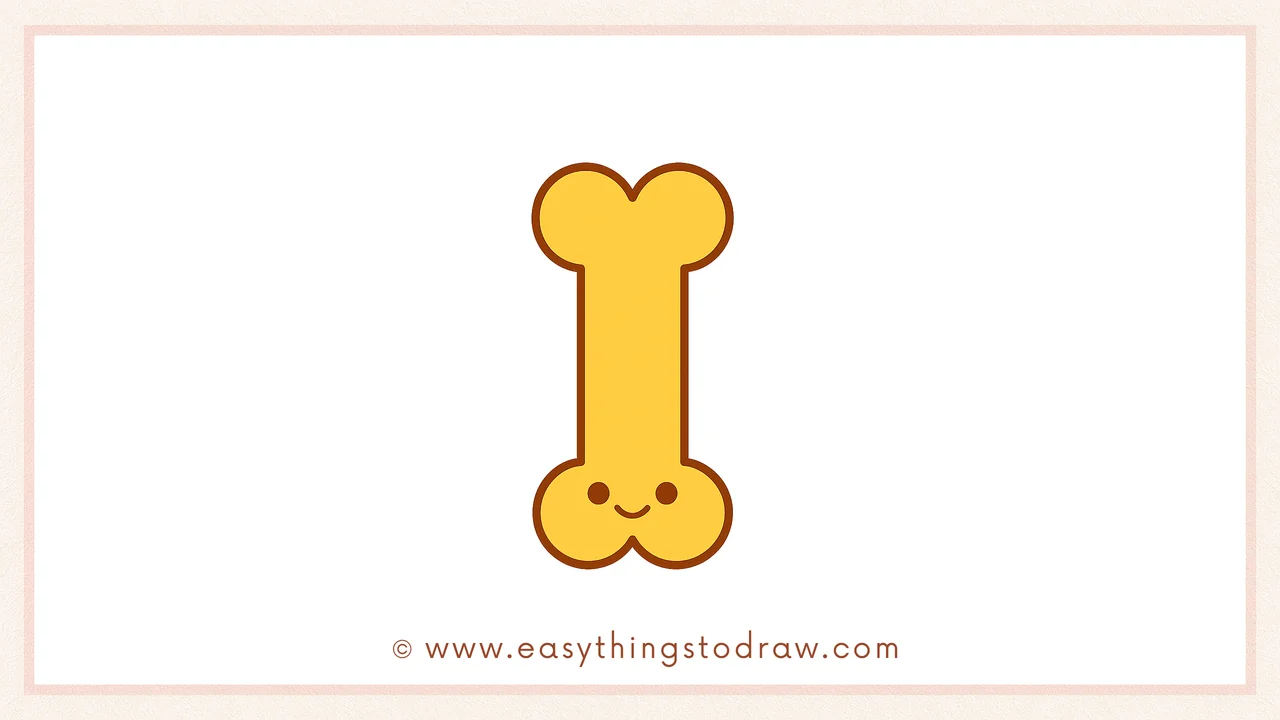
Ready to turn a simple bone into a cute cartoon character? This fun and easy bone drawing tutorial is perfect for kids and beginners who want to doodle something playful and charming. You’ll use basic curves and circles to create a bone with a big personality. This easy cartoon bone drawing for beginners is a great way to practice your line work and have fun!
What You Need:
- A pencil
- An eraser
- A black marker (for outlining)
- Coloring tools (crayons, markers, or colored pencils)
- Drawing paper
Step by Step Bone Drawing Instructions
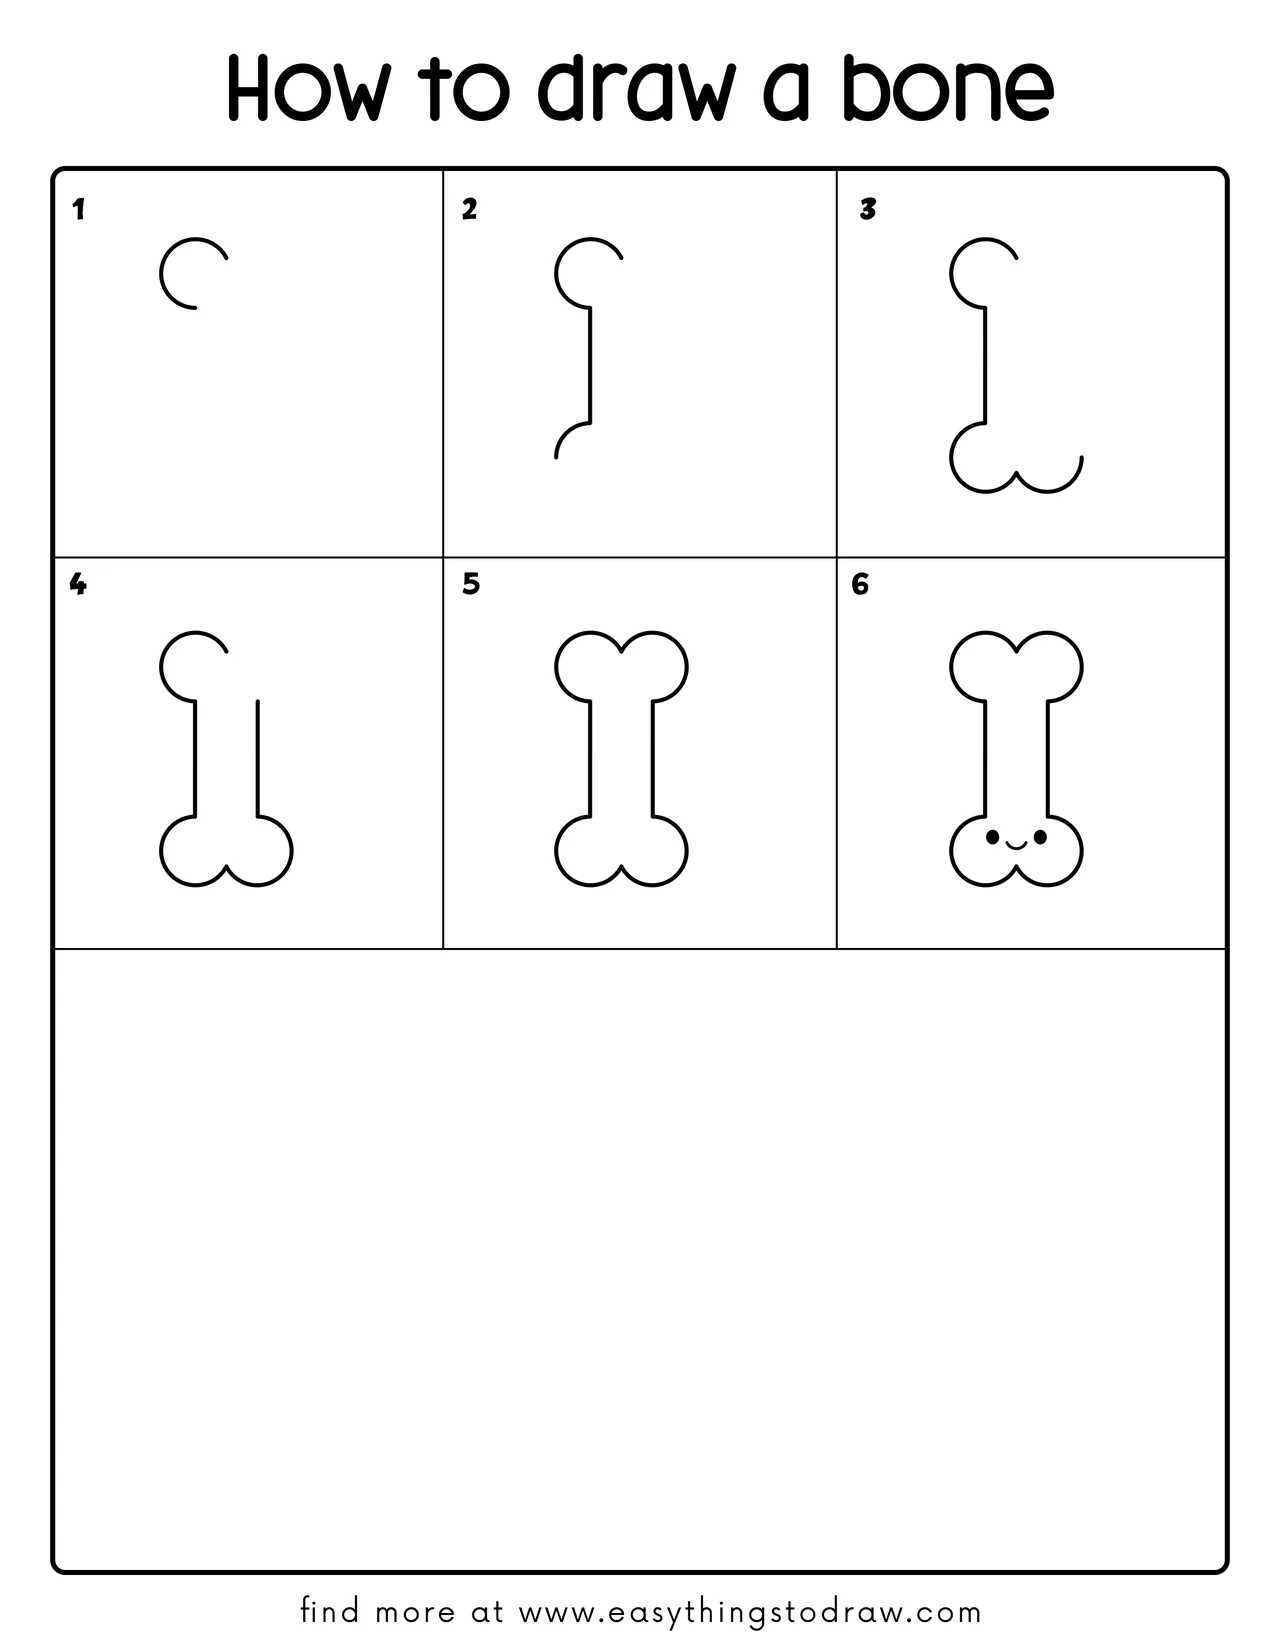
Step 1 – Start with a C-shaped Curve
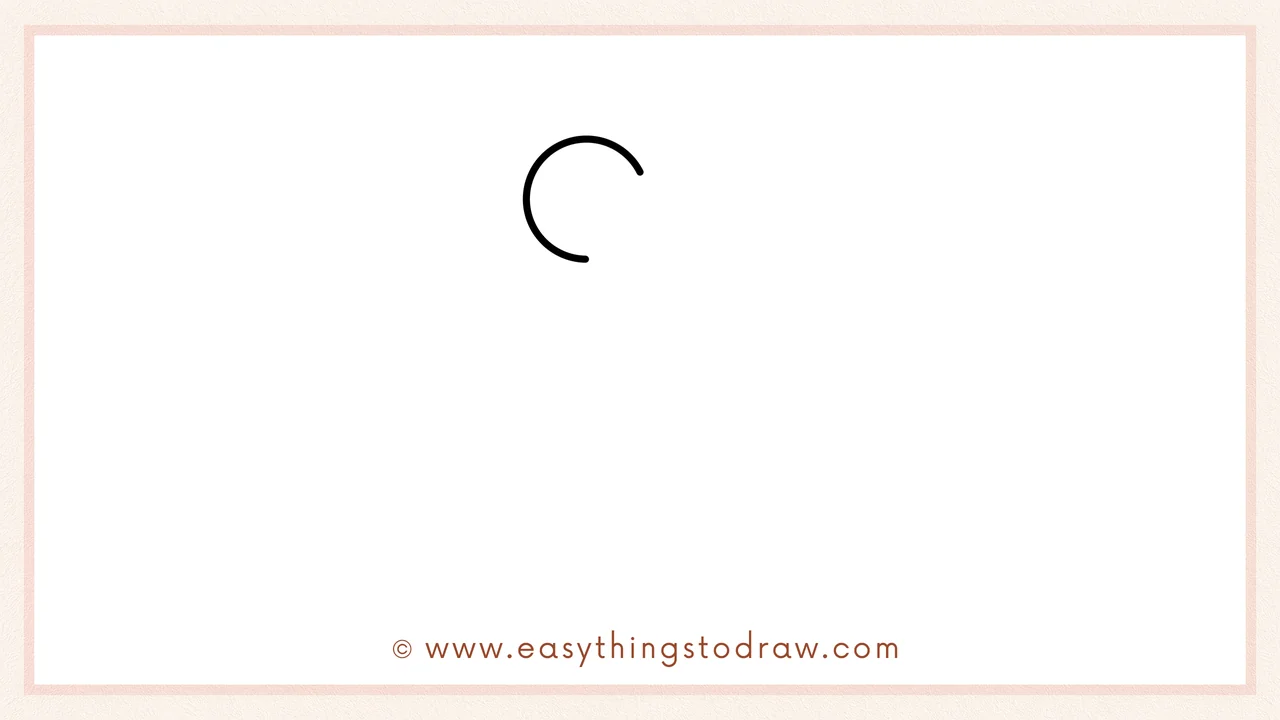
Begin in the top-left of your page and draw a large “C” shape. This is the beginning of the top end of your bone. It should be a gentle curve, like the start of a circle.
Step 2 – Add the Bone’s Middle
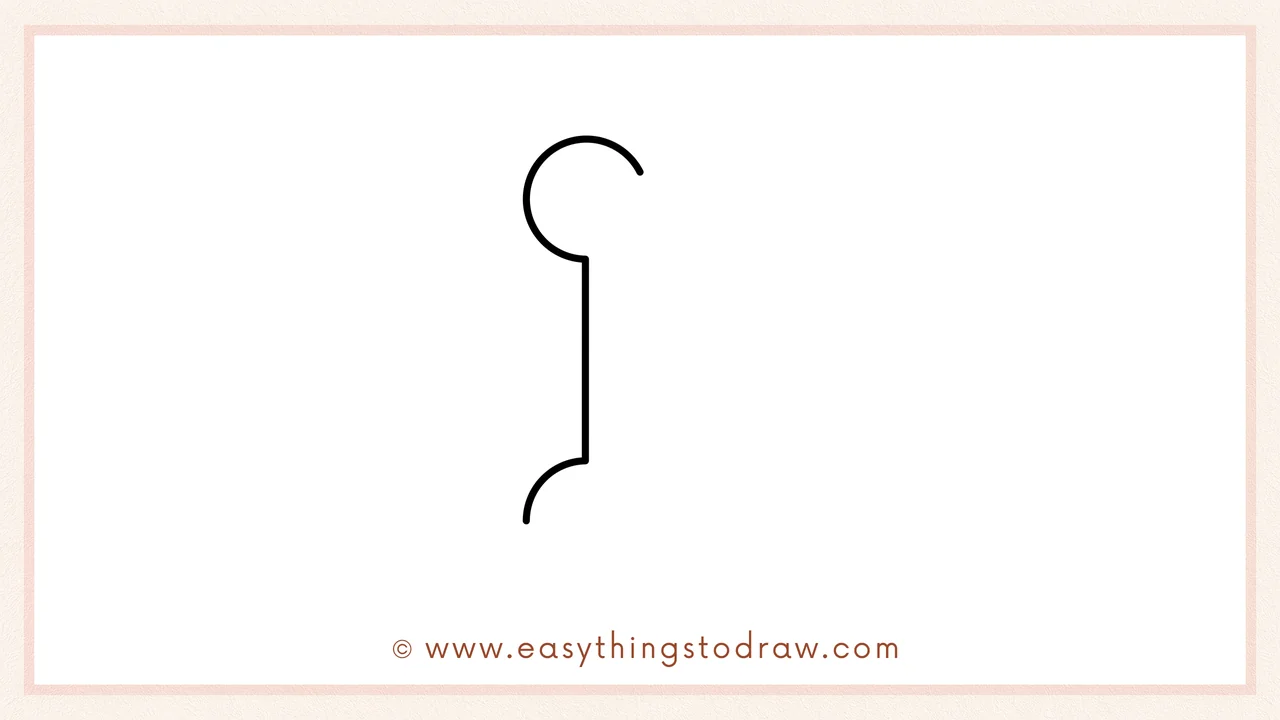
Now draw a long, straight line going down from the end of the “C”, and curve it out again at the bottom. This line makes up the center and starts the lower part of your bone.
Step 3 – Finish the Bottom Curve
On the bottom right, draw another round curve to complete the bottom of the bone. Now it looks like two round bumps at the base – just like a real cartoon bone!
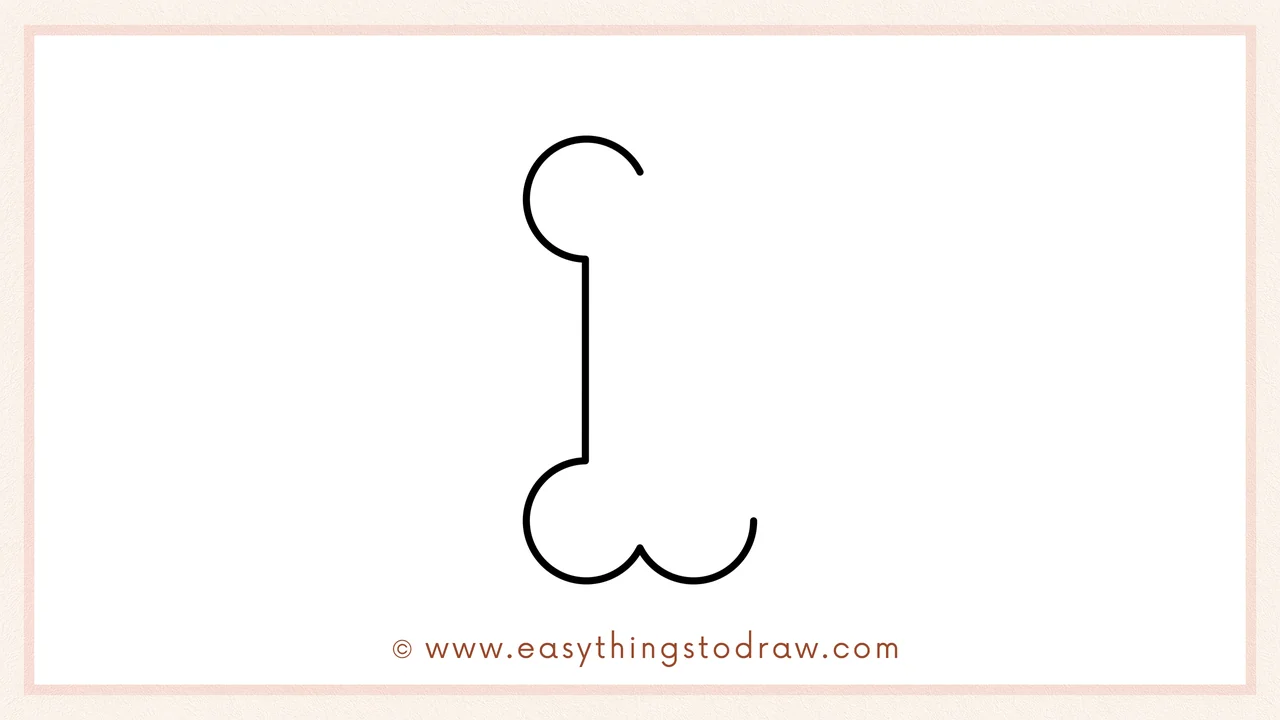
Step 4 – Start the Right Side

Go back to the top, and now draw a vertical straight line going down the right side. You’re building the other half of the bone now – it’s becoming symmetrical!
Step 5 – Complete the Bone Shape
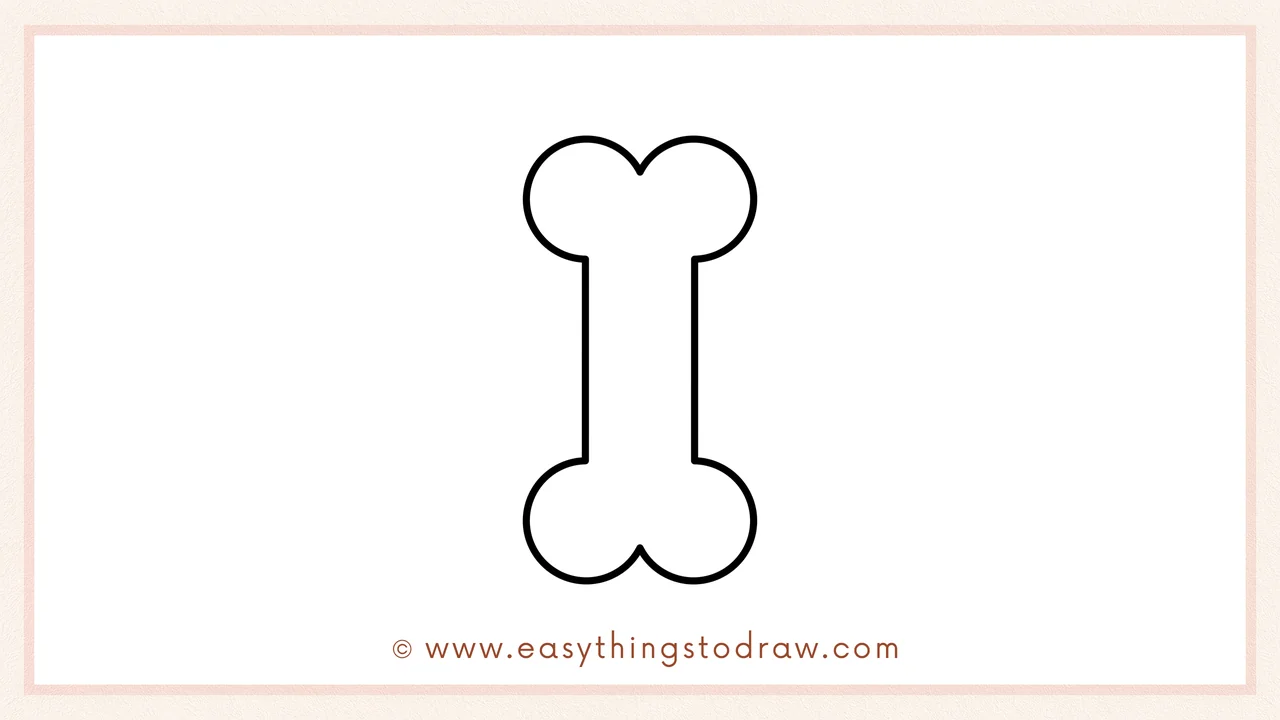
Now draw two matching curves at the top and bottom to close the shape. Your cartoon bone is now complete – nice job staying balanced and round!
Step 6 – Add a Face for Extra Cuteness
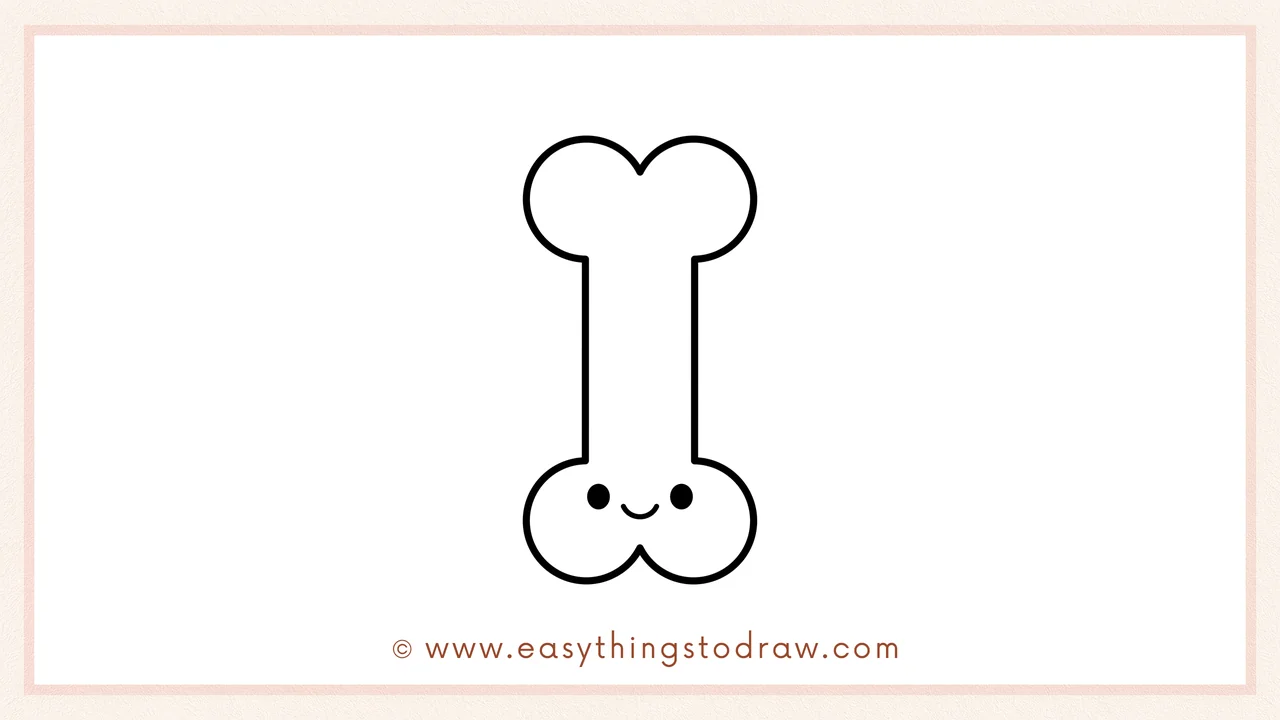
Let’s make it come alive! Draw two small circles for eyes near the bottom, and a tiny smiling mouth between them. Now your bone has a happy personality!
Frequently Asked Questions (FAQ)
Can I turn this bone into a character?
Yes! Add arms, legs, or even a bowtie to give your bone more personality.
What colors can I use to decorate my bone drawing?
You can use light browns, whites, or even rainbow colors to make it fun and creative!
Is this drawing good for preschoolers?
Absolutely! The shapes are simple and great for kids aged 4–7 to practice their motor skills.
Can I add a background to my bone drawing?
Sure! Draw a dog, a park, or even a cartoon skeleton holding it for a fun scene.
Printable Drawing Tutorials
Download Printable How to draw a bone Drawing Tutorials
You Did It!
You did it! Great job drawing your adorable cartoon bone. Doesn’t it look full of life with that cute smile? Now you can personalize it with glasses, a name tag, or even make a comic about its adventures. Show your drawing to your friends, color it your way, and try drawing it again with different expressions. Keep sketching and let your creativity shine!
