Want to draw a lucky little shamrock for St. Patrick’s Day? You’re in the right place! In this easy step-by-step drawing guide, we’ll show you how to draw an adorable three-leaf clover with a smiling face. It’s perfect for decorations, crafts, and beginner artists!
This guide is perfect for:
- Young children learning to draw holiday symbols ✨
- Beginners practicing curved lines and shapes 🍀
- Parents and teachers looking for seasonal art ideas 🎨
👩🎨 Why Learn From Us?
At Easy Things to Draw, we specialize in step-by-step drawing lessons designed specifically for children, beginners, and visual learners. Our art tutorials are crafted by real artists and educators with years of experience teaching drawing in classrooms, online, and at community art workshops.
With over 10 years of experience in beginner art education, our team knows how to simplify complex subjects into fun and rewarding creative steps — so you or your child can draw confidently, one line at a time.
✅ What Makes This Shamrock Tutorial Special?
– 🍃 Beginner-friendly design: Built from three simple heart-like leaves
– 😊 Smiling personality: Add cute cartoon features at the end
– 🧑🏫 Educator-approved: Classroom-tested and safe for all ages
– 🌟 Customizable: Add sparkles, rainbows, or even gold coins around it!
🔒 Safe, Reliable, and Classroom-Ready
Our tutorials are designed with child safety and clarity in mind. They are:
– Ad-free and distraction-free
– Printable for home or classroom
– Created to inspire confidence and creativity
🍀 Let’s Draw Some Luck!
Grab your pencil and get ready — this cheerful shamrock only takes 6 easy steps!
What You Need:
- A pencil
- An eraser
- A black marker (for outlining)
- Coloring tools (crayons, markers, or colored pencils)
- Drawing paper
Step by Step Shamrock Drawing Instructions
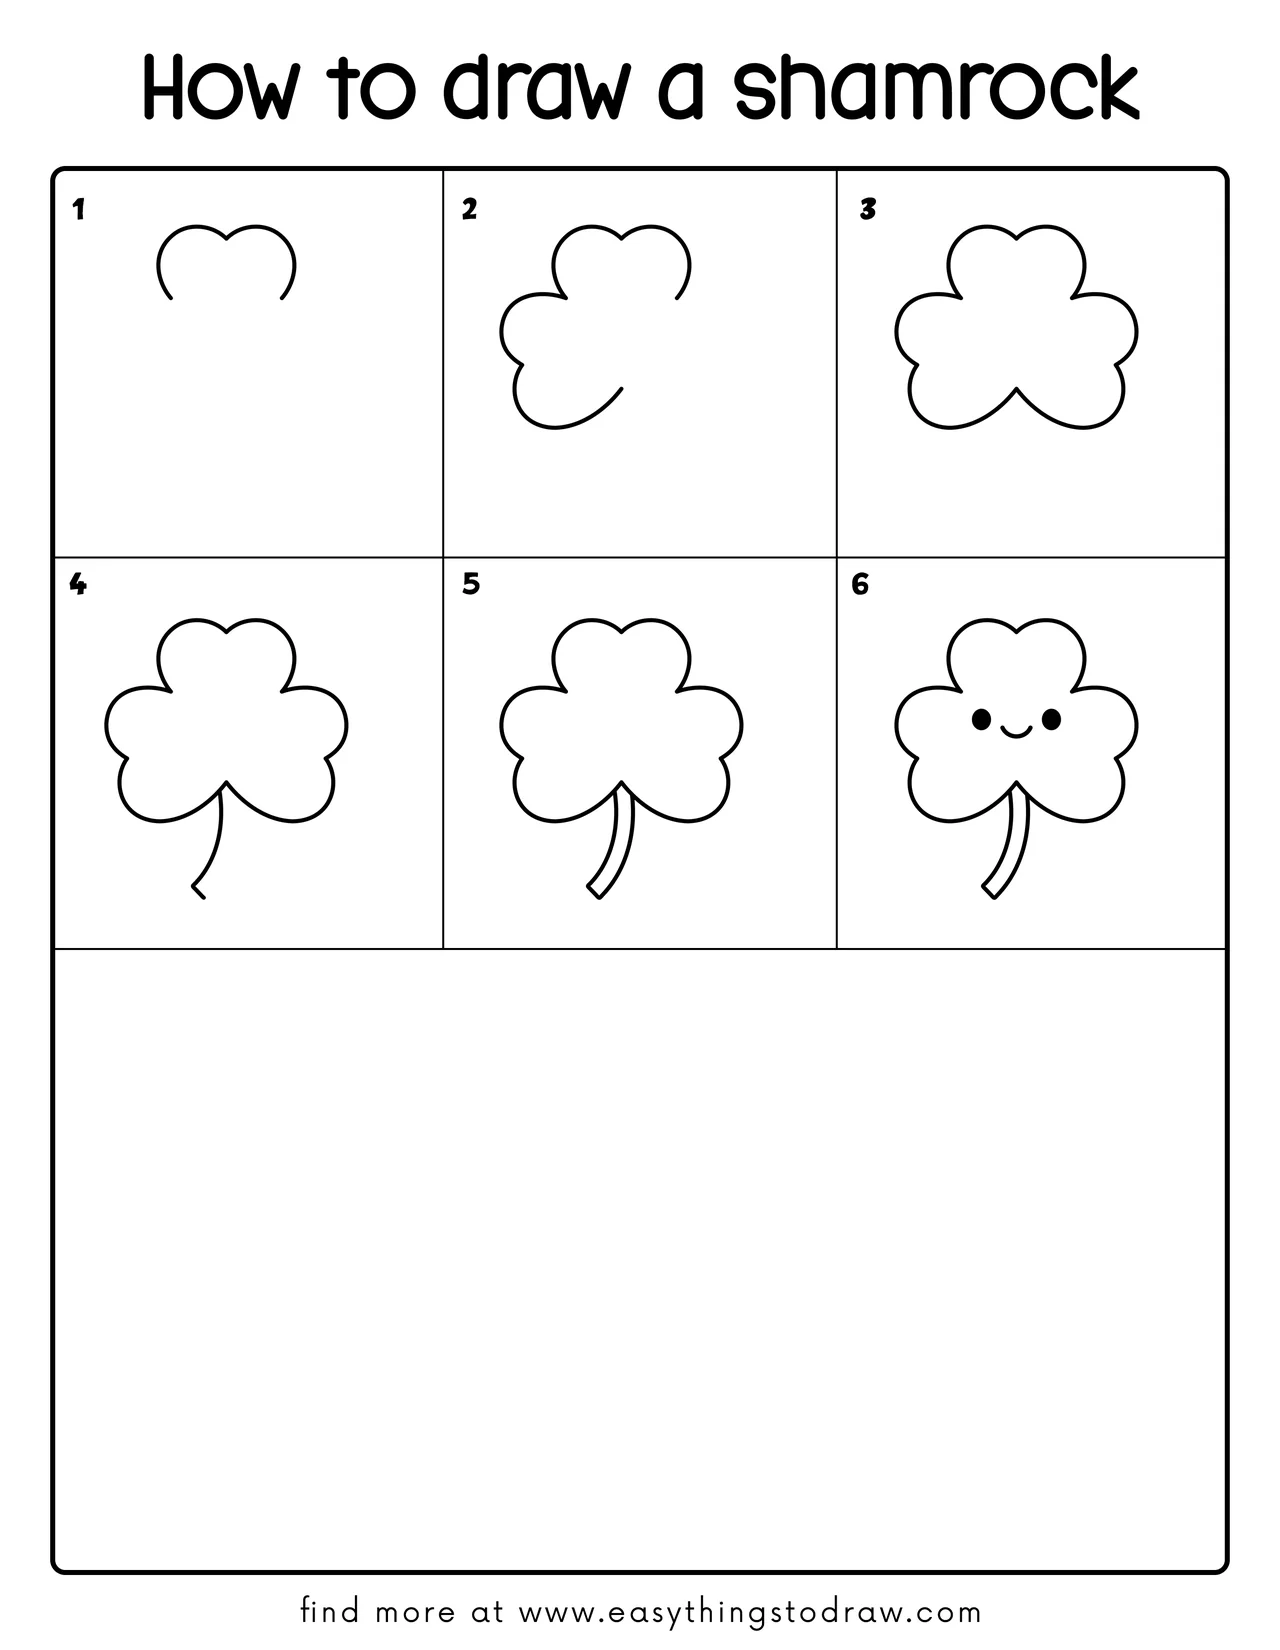
Step 1 – Draw the Top Two Leaves

Start with two round heart-like shapes side by side. These form the top parts of the shamrock.
Step 2 – Add the Left Leaf
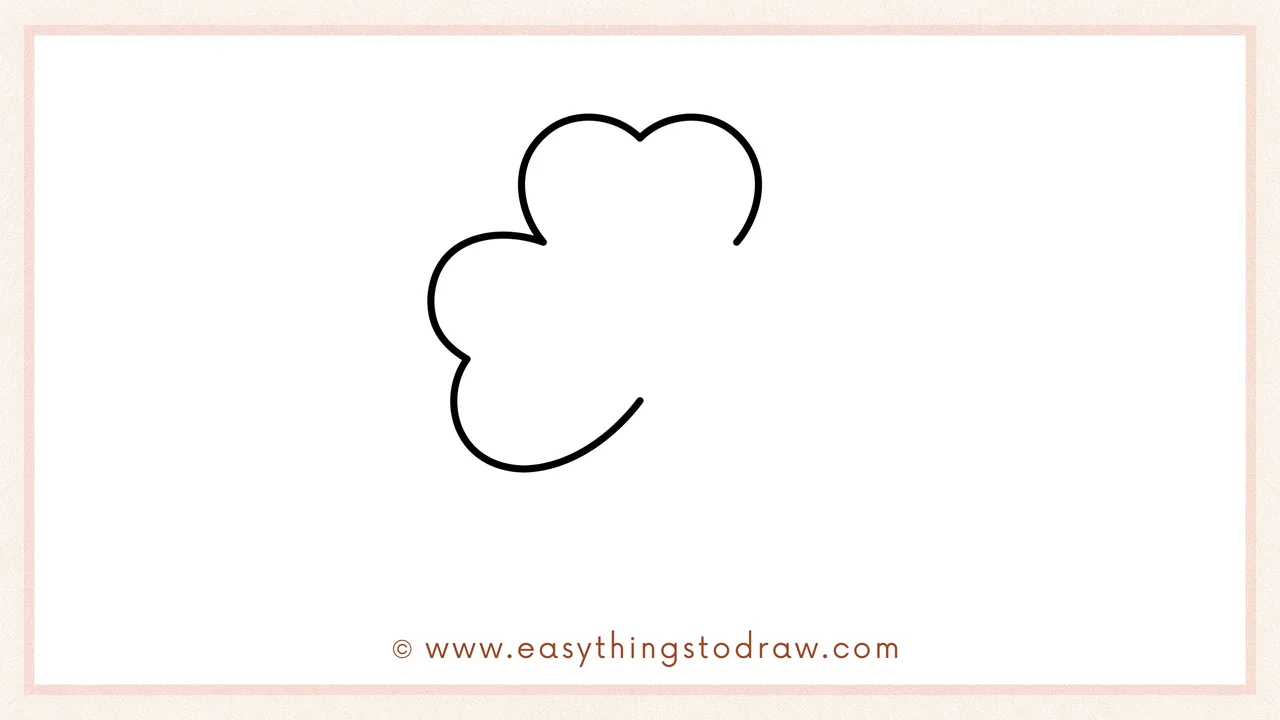
On the left side, draw a third similar shape pointing diagonally down. It connects to the top left leaf.
Step 3 – Add the Right Leaf

Now finish the shamrock’s three-leaf shape by adding the right-side leaf, also pointing slightly downward.
Step 4 – Draw the Curved Stem
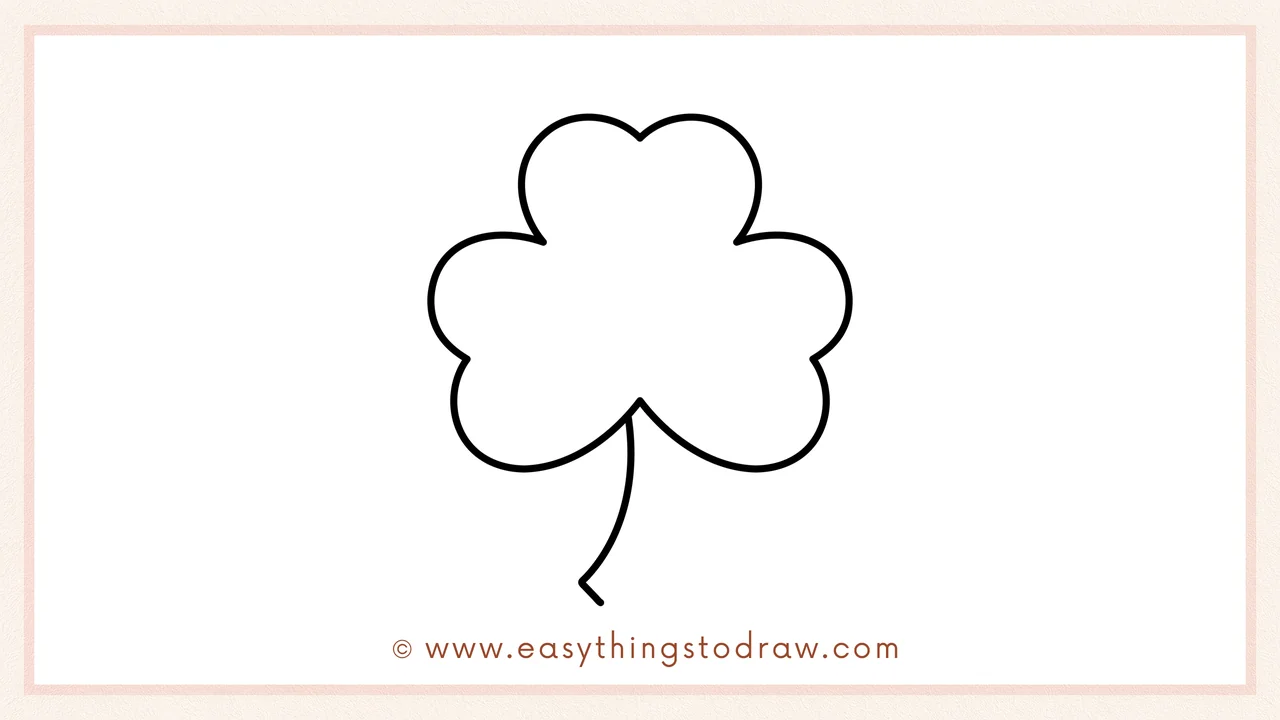
Under the middle leaf, draw a curved line going downward, ending in a short little point. This is the stem of your shamrock.
Step 5 – Thicken the Stem
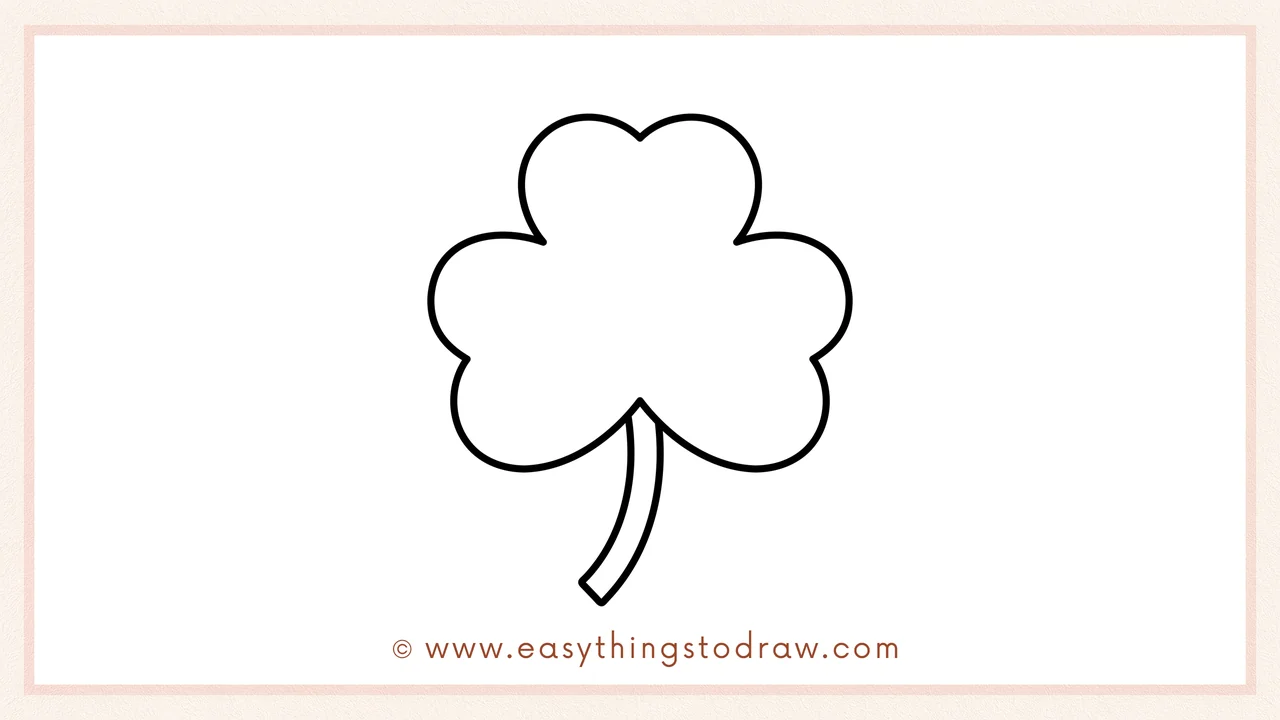
Draw a second curve next to the first to make the stem thicker. This helps it look complete and balanced.
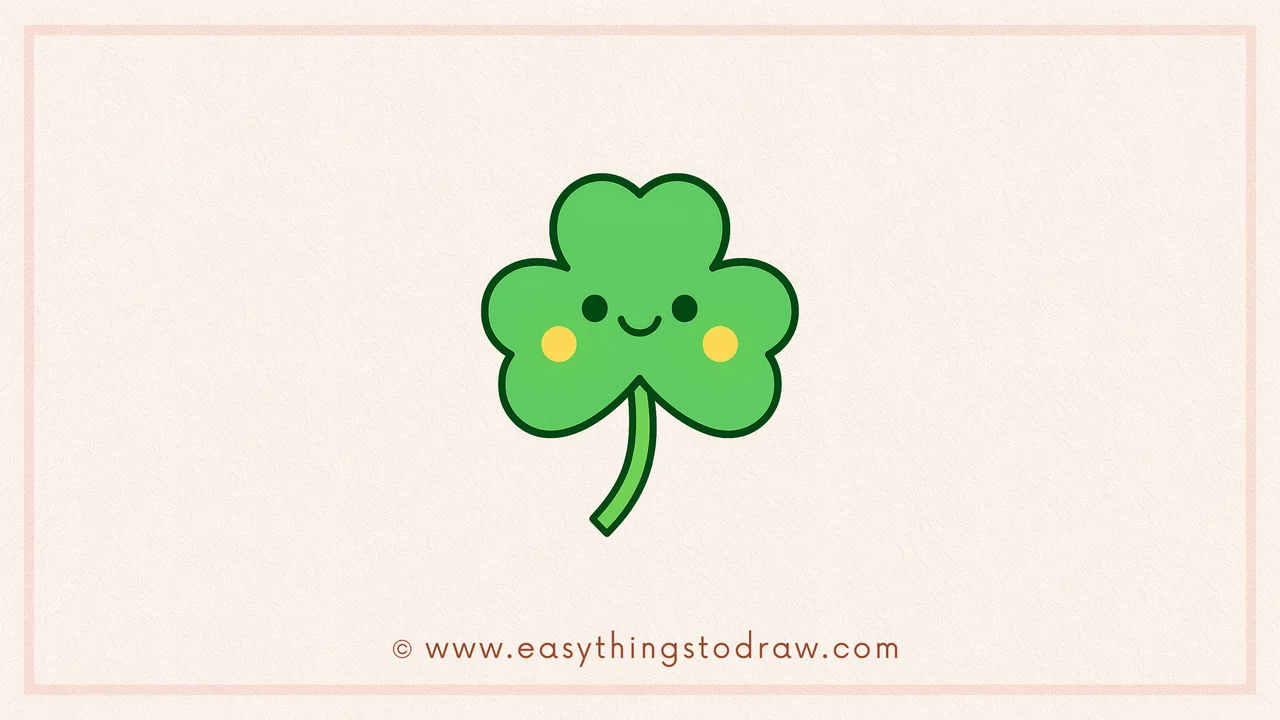
Step 6 – Add a Cute Face

Let’s bring it to life! Draw two black dots for eyes and a small curved smile in the center of the top leaf.
Frequently Asked Questions (FAQ)
Can I make this into a four-leaf clover?
Yes! Just draw an extra leaf on the bottom or side — four-leaf clovers are a fun variation and symbolize extra luck.
What color should I use to decorate it?
Green is traditional, but you can add glitter, rainbow accents, or even use pastel colors for a whimsical twist.
Can I add accessories to the shamrock?
Absolutely. Try a little bowtie, hat, or even a leprechaun mustache to give it more personality!
Is this tutorial good for young kids?
Yes! This guide is perfect for ages 4 and up, with simple shapes and friendly steps.
Printable Drawing Tutorials
Download Printable How to draw a shamrock Drawing Tutorials
You Did It!
You did it — your shamrock is absolutely adorable! 🍀
Now it’s time to color it in — green is the classic choice, but you can add your own fun twist. Want to make it magical? Add a sparkly background, a rainbow above it, or a pot of gold next to it. Print it and draw it again with different faces or outfits for extra fun!
