Looking to draw a cute star with a cheerful face? This step-by-step tutorial will show you how to draw an adorable cartoon-style star in just a few simple shapes — perfect for kids, beginners, and anyone looking for a quick and fun art activity!
This guide is perfect for:
- Young artists practicing basic geometric shapes ⭐
- Beginners who want to create cute and happy characters 😊
- Parents and teachers planning creative classroom activities 🎨
🌟 Why Learn From Us?
At Easy Things to Draw, we specialize in creating kid-friendly tutorials that simplify drawing into fun, bite-sized steps. With years of experience teaching art to beginners, we know exactly how to help you gain confidence with every line you draw.
✅ What Makes This Star Drawing Tutorial Shine?
– ✏️ Step-by-step structure using simple lines and angles
– 🎨 Encourages creativity with expressive faces and poses
– 🧠 Builds visual symmetry and fine motor skills
– 🥳 Add personality: your star can be sleepy, silly, or stylish!
🔒 Safe, Simple, and Classroom Ready
No complicated tools, no ads, just clean instructions and positive results every time. Great for classrooms, homes, or art parties!
What You Need
- Pencil ✏️
- Eraser
- Black pen or fine liner for outlines 🖊️
- Crayons, markers, or colored pencils 🌈
- A sheet of paper 📄
- Your imagination!
Step by Step Star Drawing Instructions
Step 1 – Draw the Top Point
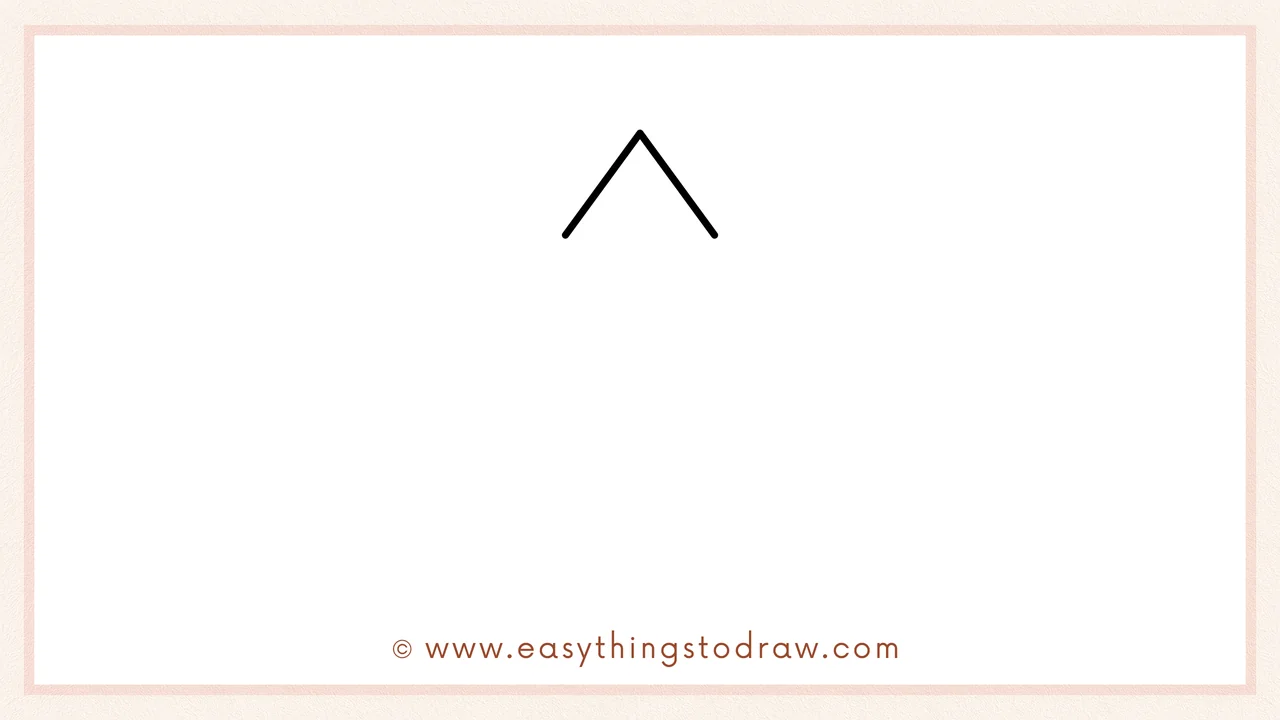
Start by drawing an upside-down “V” near the top center of your page. This is the top point of your five-point star.
Step 2 – Add the Side Arms
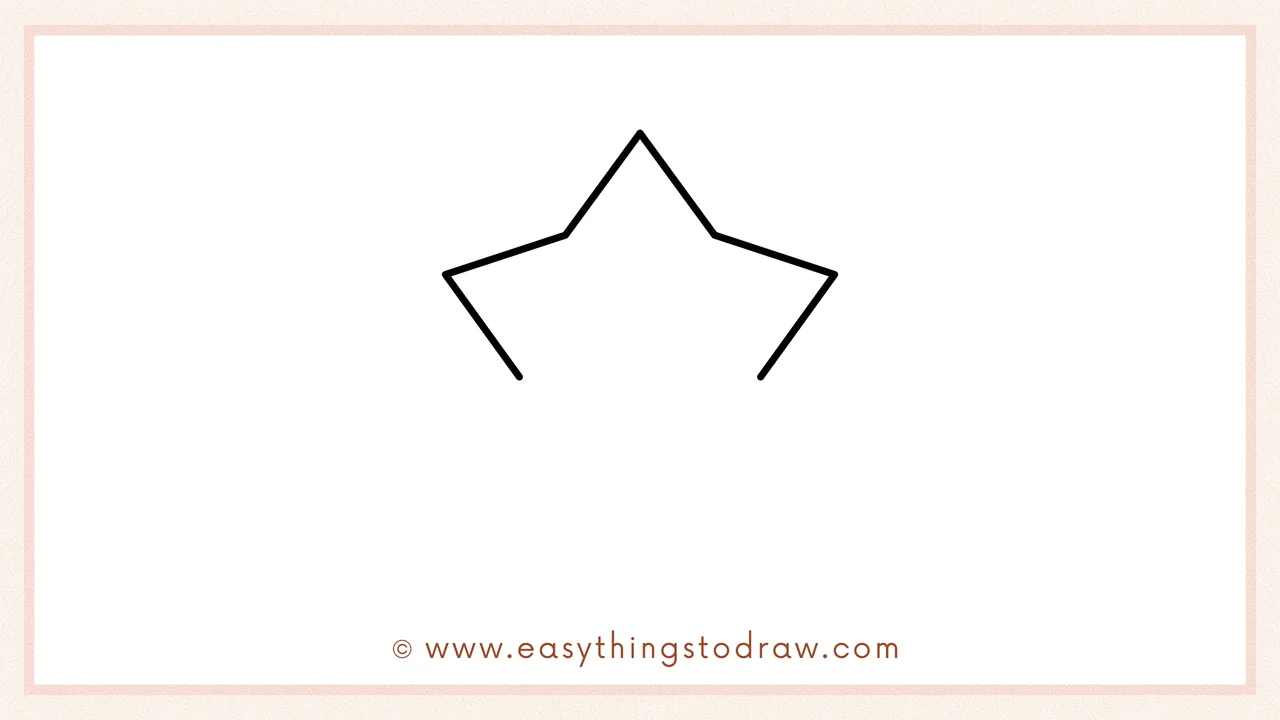
From the bottom ends of the “V”, extend two diagonal lines outward and downward. These lines begin to form the star’s left and right arms.
Step 3 – Complete the Star Shape
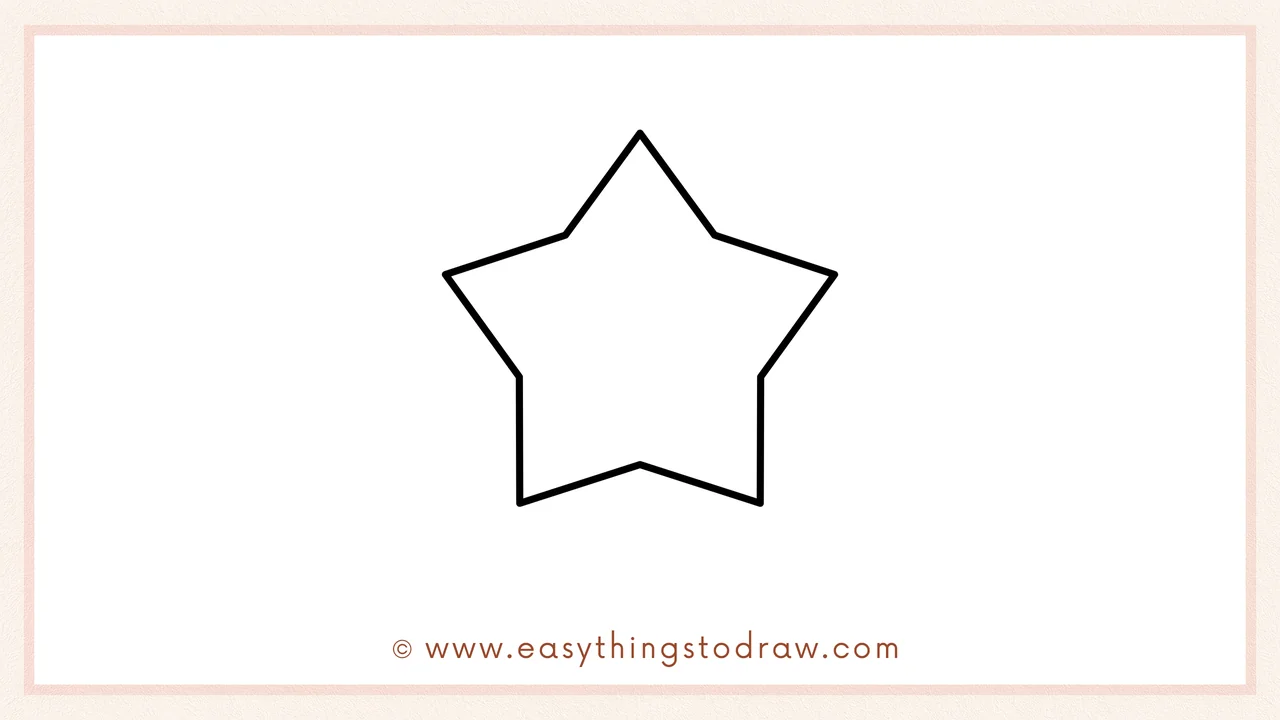
Connect the diagonal lines with two more straight lines to close the shape into a full five-pointed star. It should now look like a classic symmetrical star.
Step 4 – Draw One Little Leg
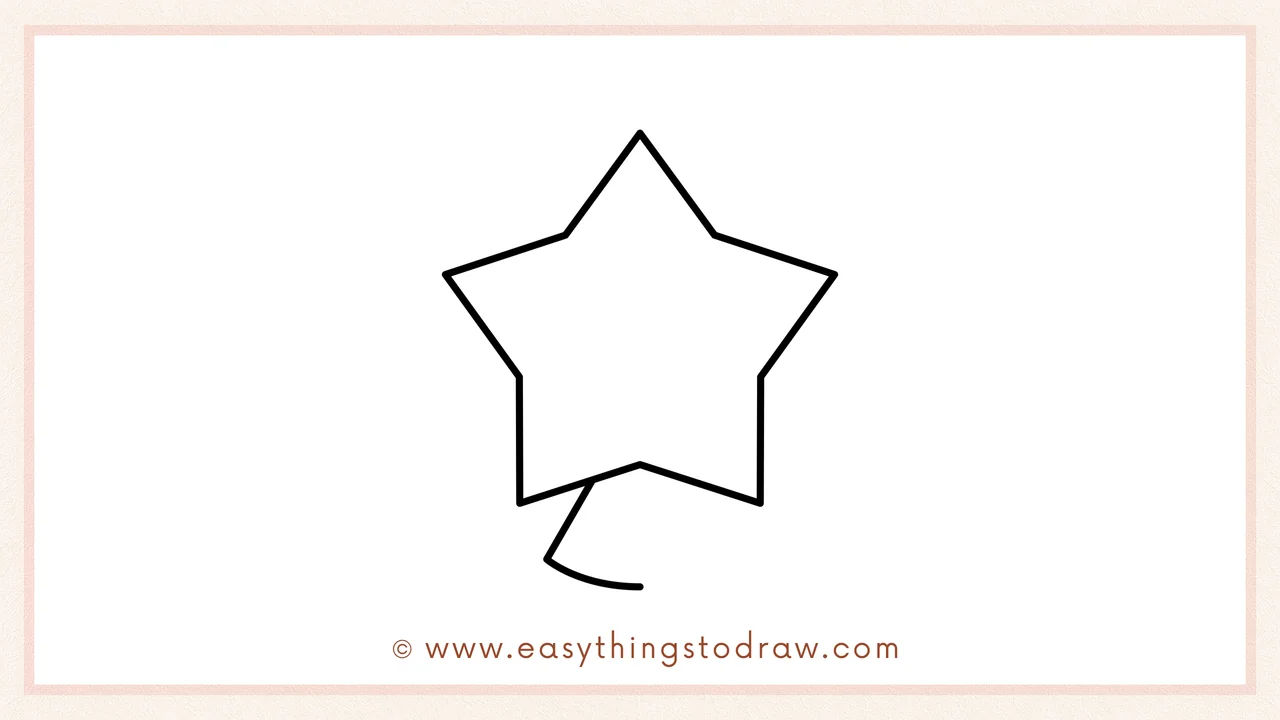
Underneath the bottom point of the star, draw a small curved triangle or wedge shape. This is one of the star’s legs — make it cute and soft.
Step 5 – Add the Second Leg
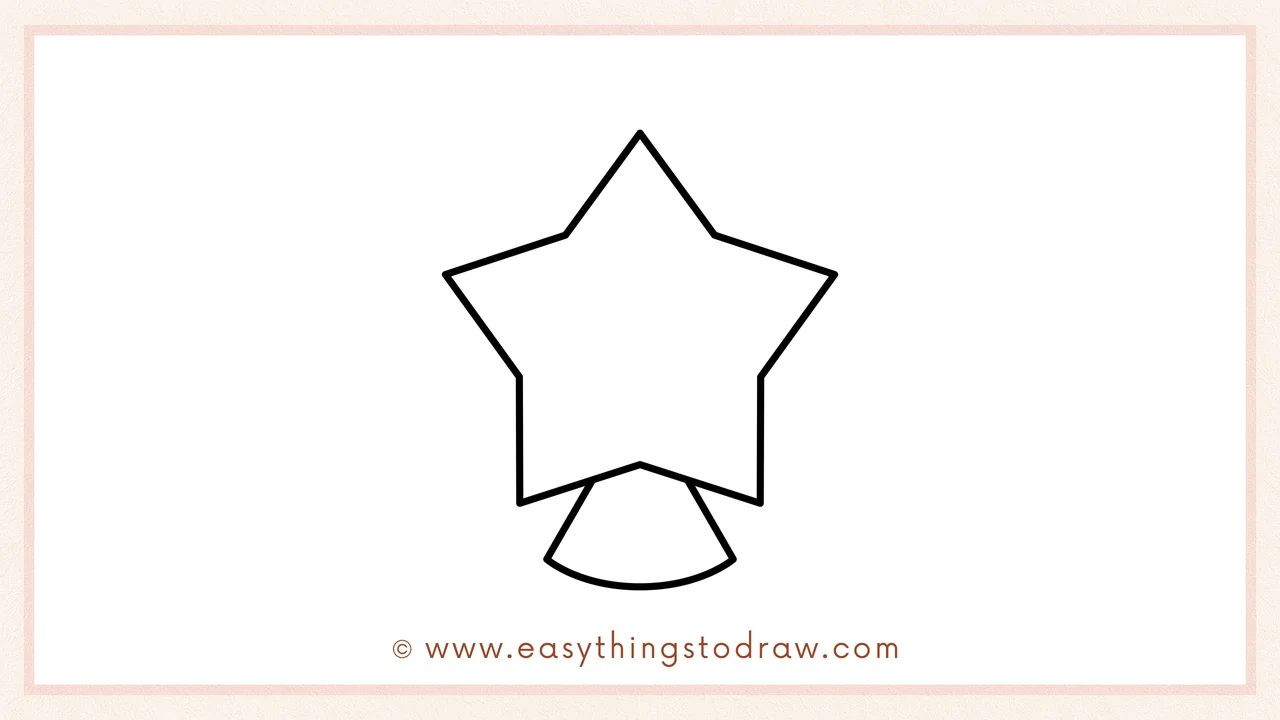
Next to the first, draw a matching leg. Your star now looks like it’s ready to walk, bounce, or dance across the page!
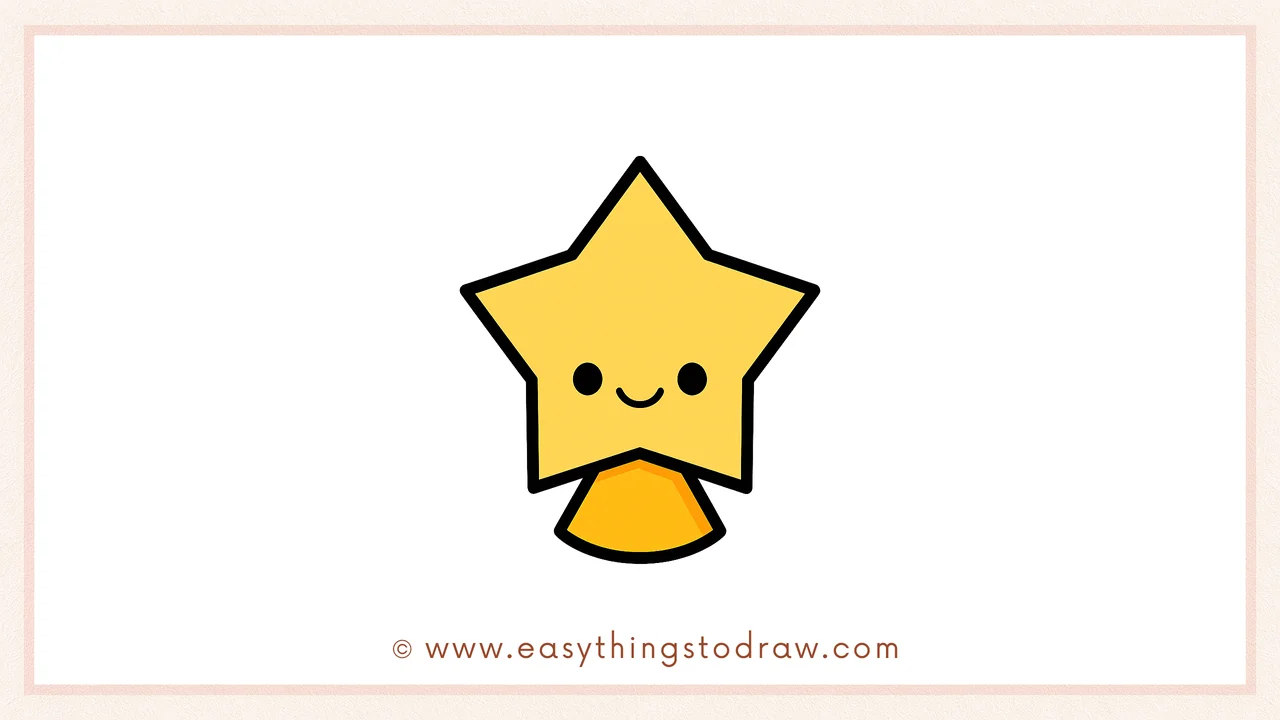
Step 6 – Draw a Cute Face
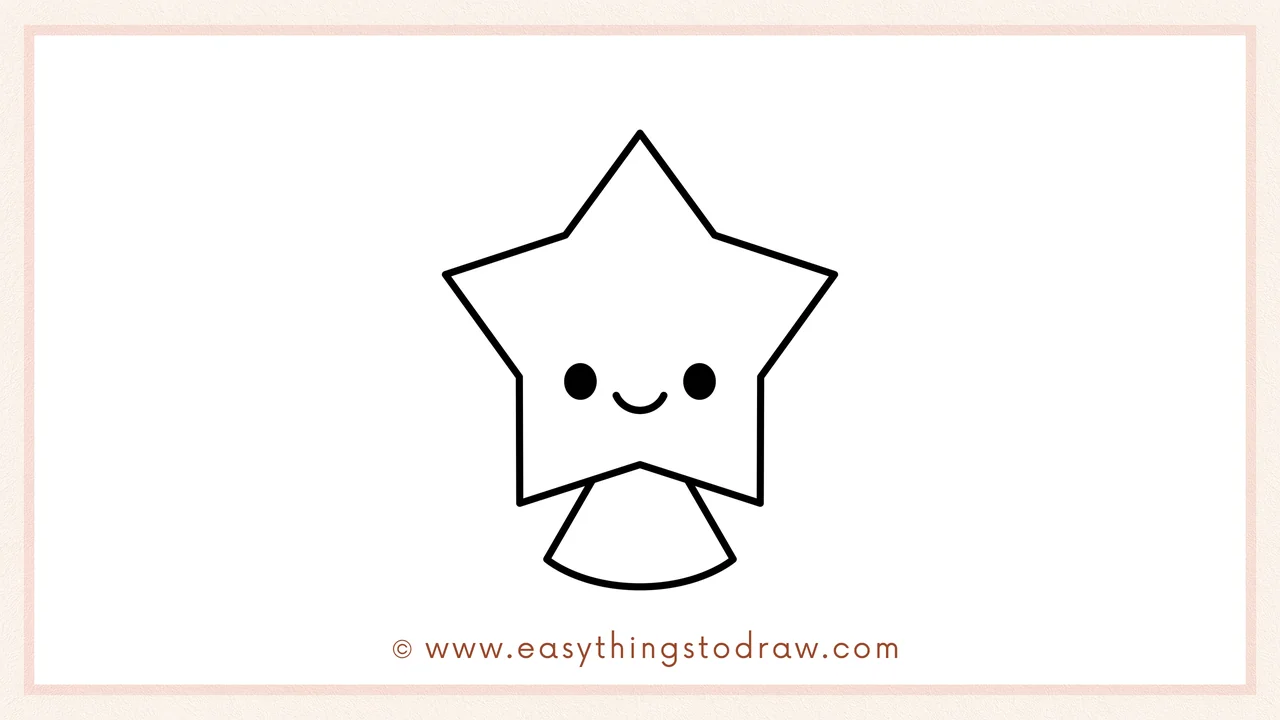
To finish, add two small black ovals or circles for eyes, and a tiny smiling curve between them. Your star now has personality and sparkle!
Frequently Asked Questions (FAQ)
Can I customize the star’s face?
Absolutely! You can make it winking, surprised, sleepy, or even add accessories like glasses or a bowtie.
What colors should I use?
Yellow and gold are classic for stars, but you can make yours pink, blue, rainbow, or any color you like!
Is this tutorial suitable for group art sessions?
Yes! It’s fast, fun, and easy to follow. Great for classrooms, birthday parties, and after-school activities.
My star isn’t symmetrical — is that okay?
Yes! Every star is unique. As long as you had fun, that’s what matters most. You can always practice and try again too!
Printable Drawing Tutorials

Download Printable How to draw a star Drawing Tutorials
You Did It!
Awesome job! You just drew a happy, bouncing star that’s full of charm and cheer. Whether you keep it simple or add your own details, you’ve created something totally yours.
👉 Want to draw more cute things? Try our step-by-step guides for clouds, moons, suns, and more — your own sky full of characters awaits!
Happy Drawing! 🌟✨
