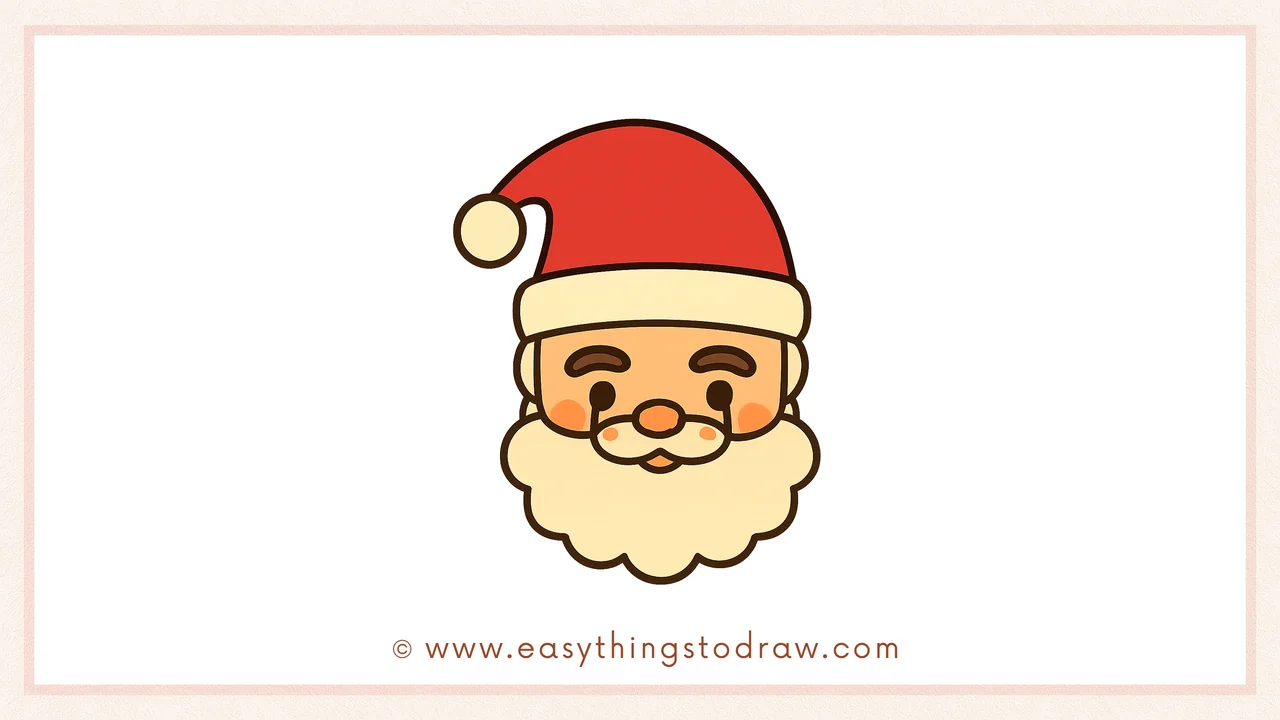
Looking to draw a jolly Santa Claus for the holidays but not sure where to start? You’re in the right place! In this beginner-friendly tutorial, we’ll guide you through six fun steps to draw an adorable cartoon Santa Claus — no fancy tools or advanced skills needed.
This guide is perfect for:
- Kids who love Christmas and want to draw holiday characters 🎅
- Beginners who want to practice sketching cute faces ✏️
- Teachers and parents looking for seasonal art activities 🎨
🎄 Why Learn From Us?
At Easy Things to Draw, we specialize in simple, step-by-step drawing tutorials created just for kids and beginner artists. With over 10 years of experience teaching art in classrooms, online, and at community events, our guides are built to be clear, fun, and accessible for all ages.
✅ What Makes This Santa Drawing Tutorial Special?
– 🎅 Designed for absolute beginners: We break Santa down into basic shapes like circles and curves.
– 🧠 Learning + fun: Kids improve motor skills while enjoying a festive project.
– 🖼️ Classroom-ready: Perfect for holiday lessons, printables, or family activities.
– 💡 Encourages creativity: After learning the basics, kids can personalize Santa with colors, glasses, or even reindeer friends!
🔒 Safe, Educational, and Kid-Friendly
All our tutorials are kid-safe, ad-free, and reviewed by educators. No distracting content — just pure creative fun!
🎅 Let’s Draw Santa Claus Together!
Grab your pencil and paper, and let’s make a joyful Santa in just six simple steps.
What You Need
- Pencil ✏️
- Eraser (just in case!)
- Black marker or pen 🖊️
- Coloring tools (crayons, markers, or colored pencils) 🖍️
- Paper 📄
- A big smile! 😄
Step by Step Santa Claus Drawing Instructions
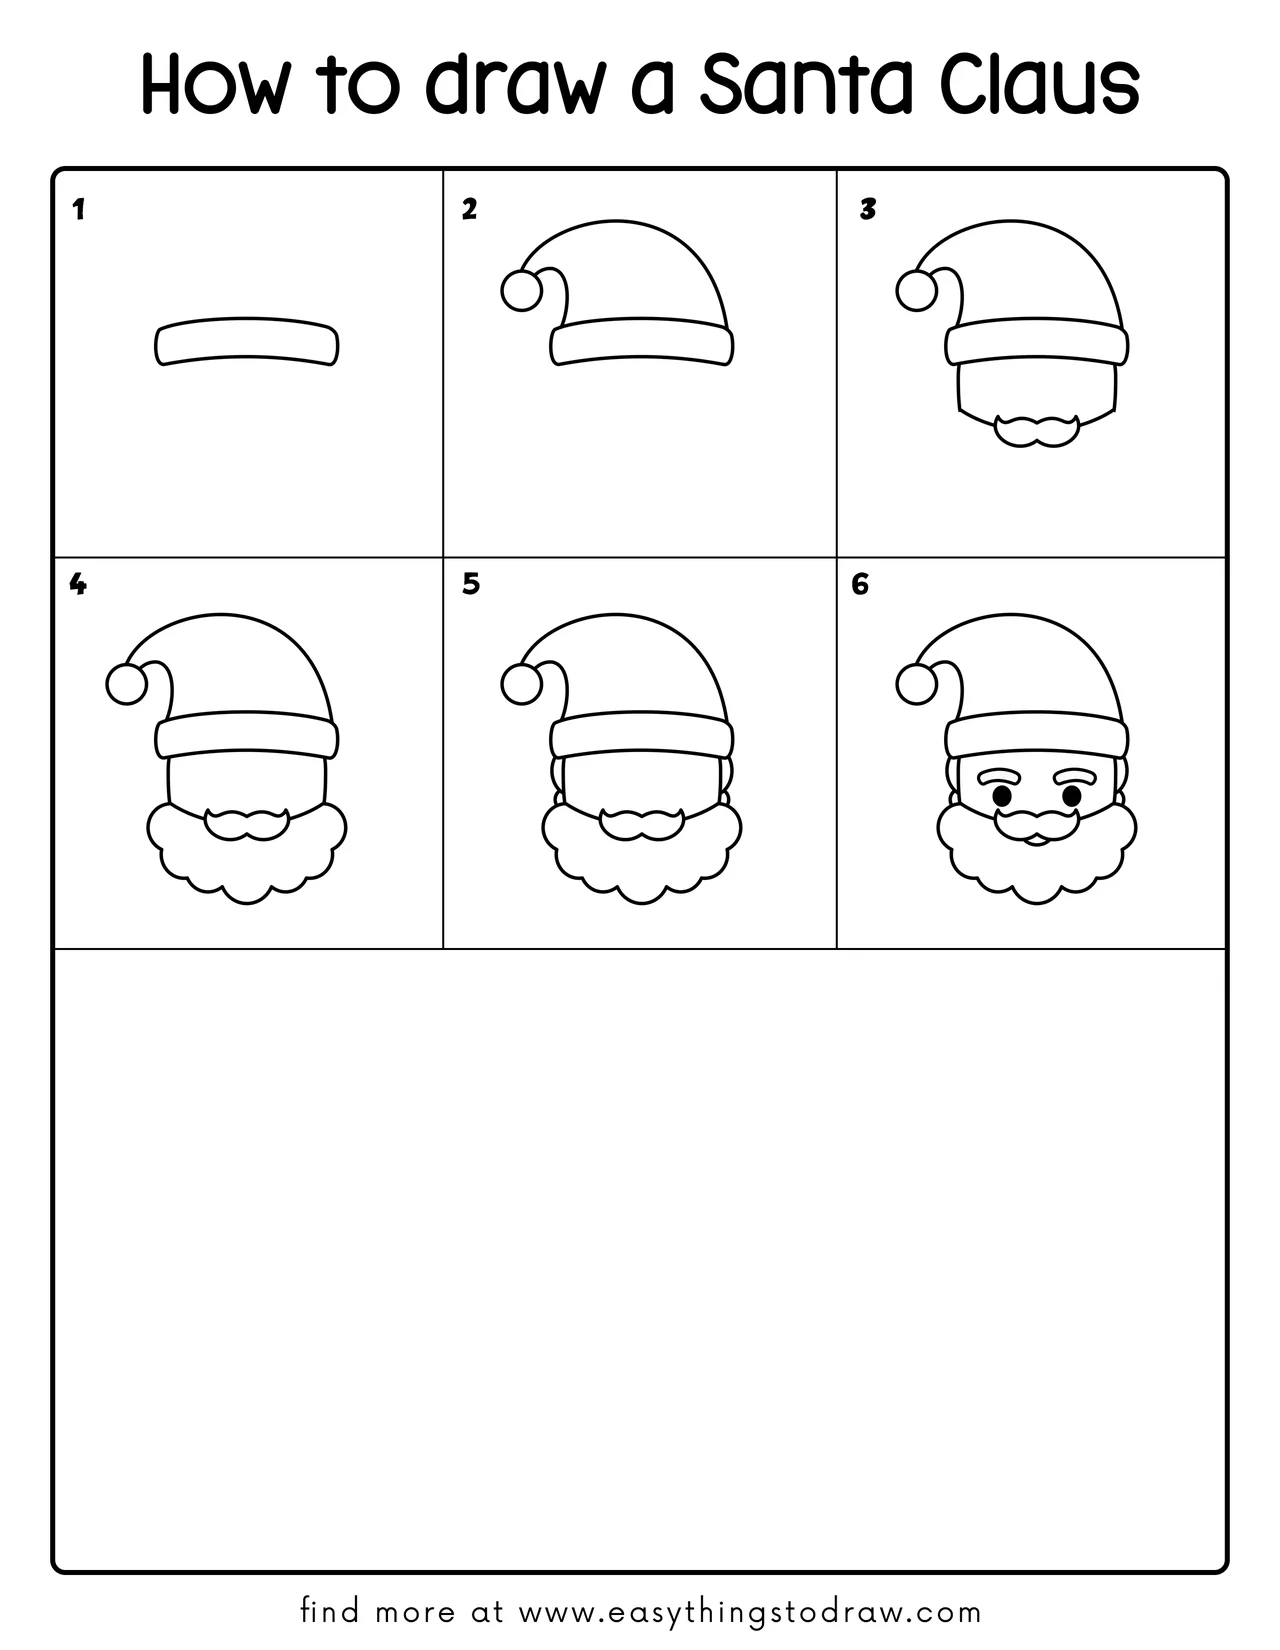
Step 1 – Draw the Hat Brim
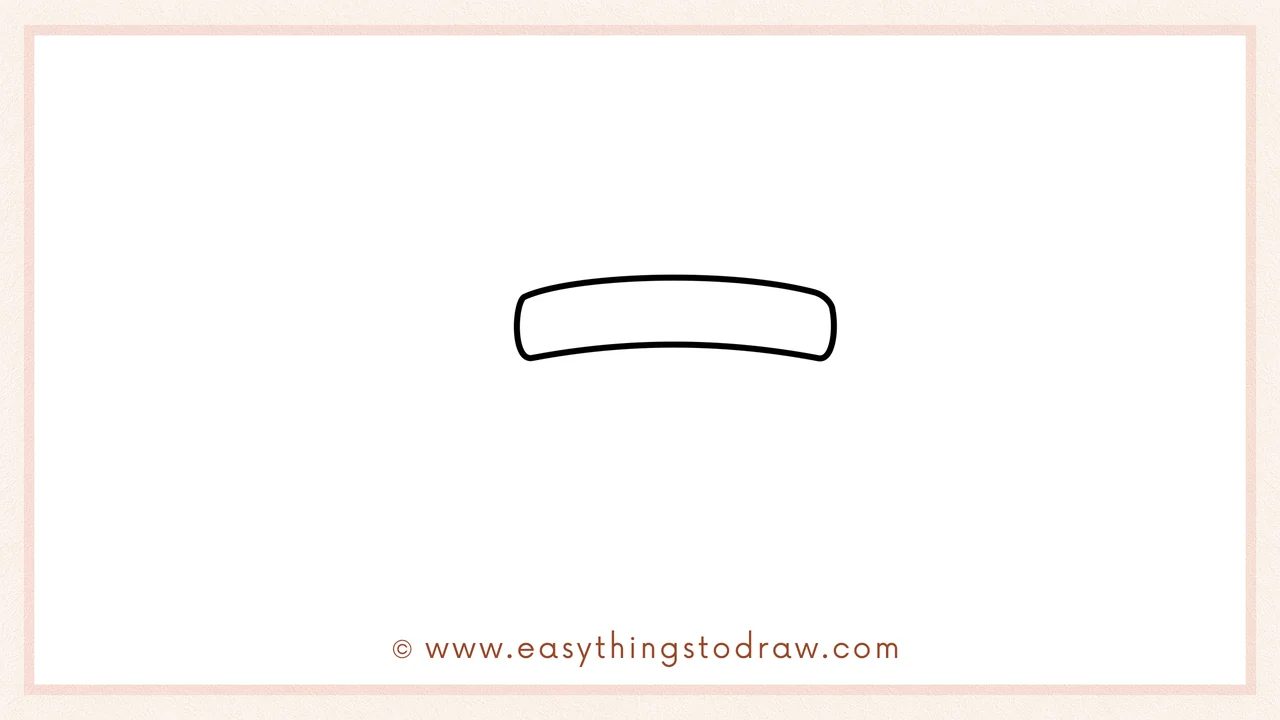
Start by drawing a slightly curved horizontal rectangle near the top-center of your page. This is the soft brim of Santa’s hat. Make the edges rounded to keep it cozy-looking.
Step 2 – Add the Santa Hat
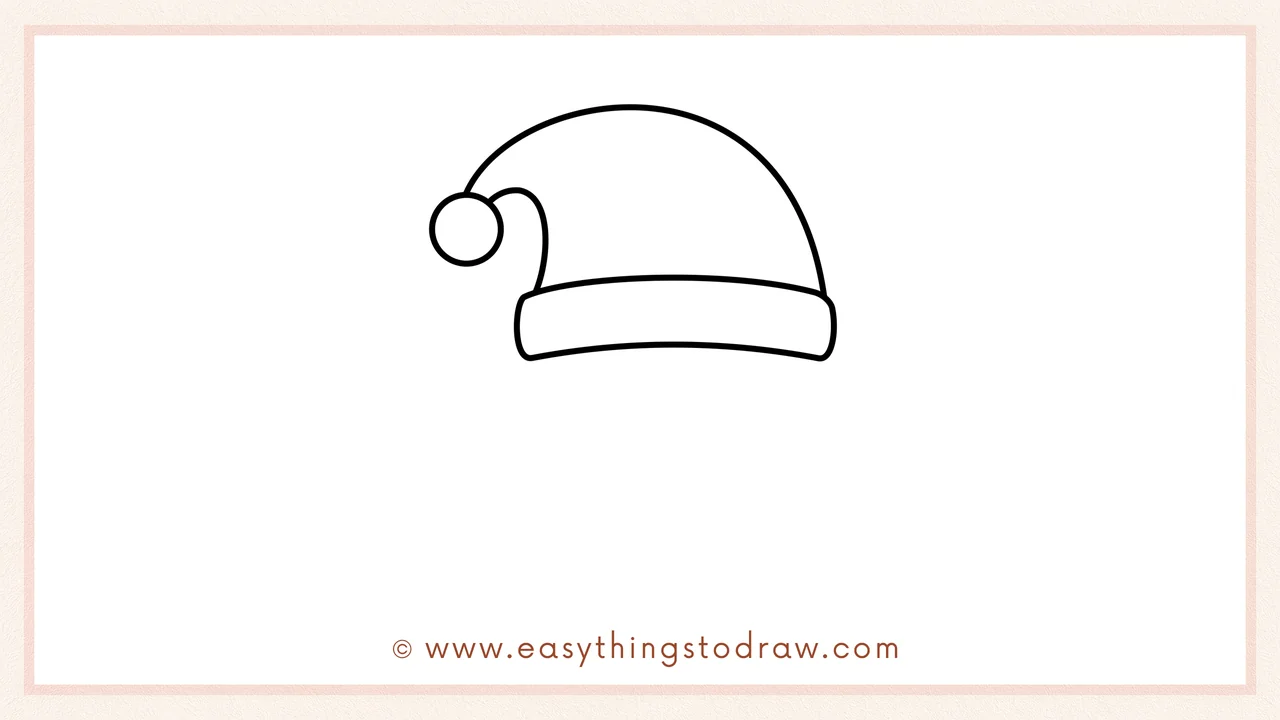
Above the brim, draw a large curved shape like a drooping triangle leaning to the left. Finish it off with a fluffy pom-pom — just draw a circle at the tip!
Step 3 – Outline the Face and Mustache
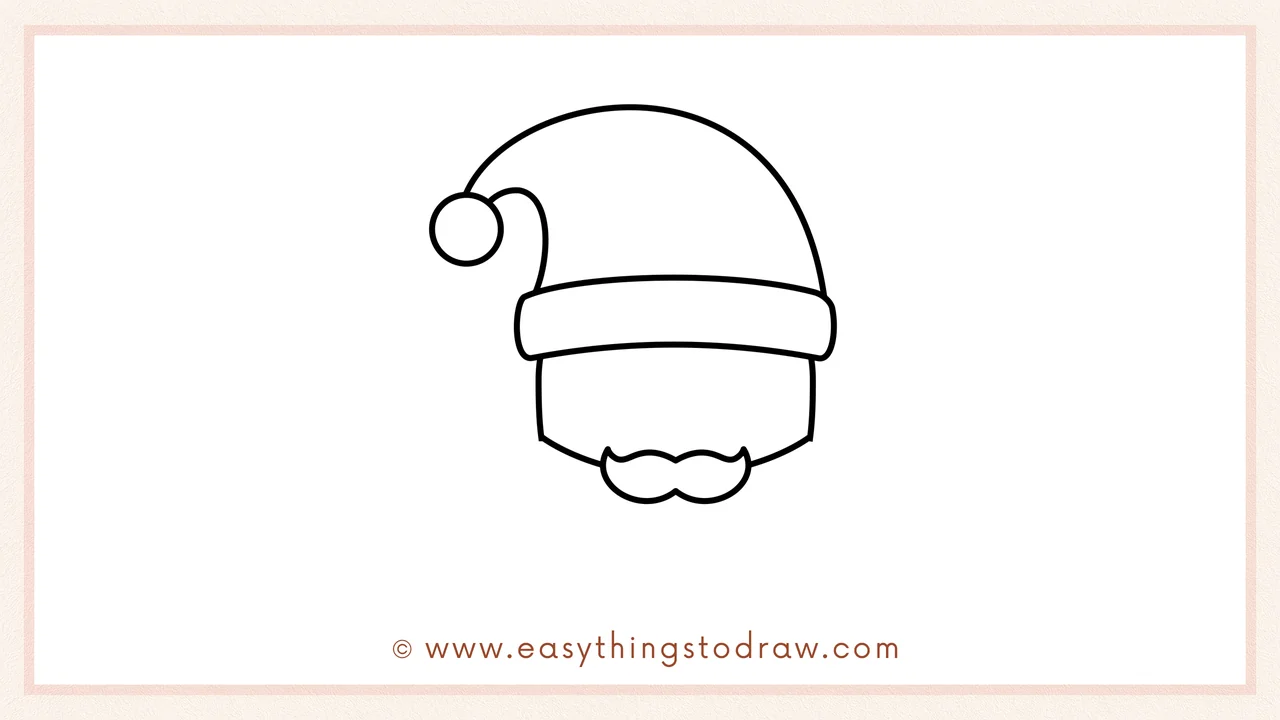
Beneath the hat brim, draw a rounded U-shape for Santa’s head. Then add his signature mustache by sketching two small cloud-like curves right under the face.
Step 4 – Draw the Big Fluffy Beard
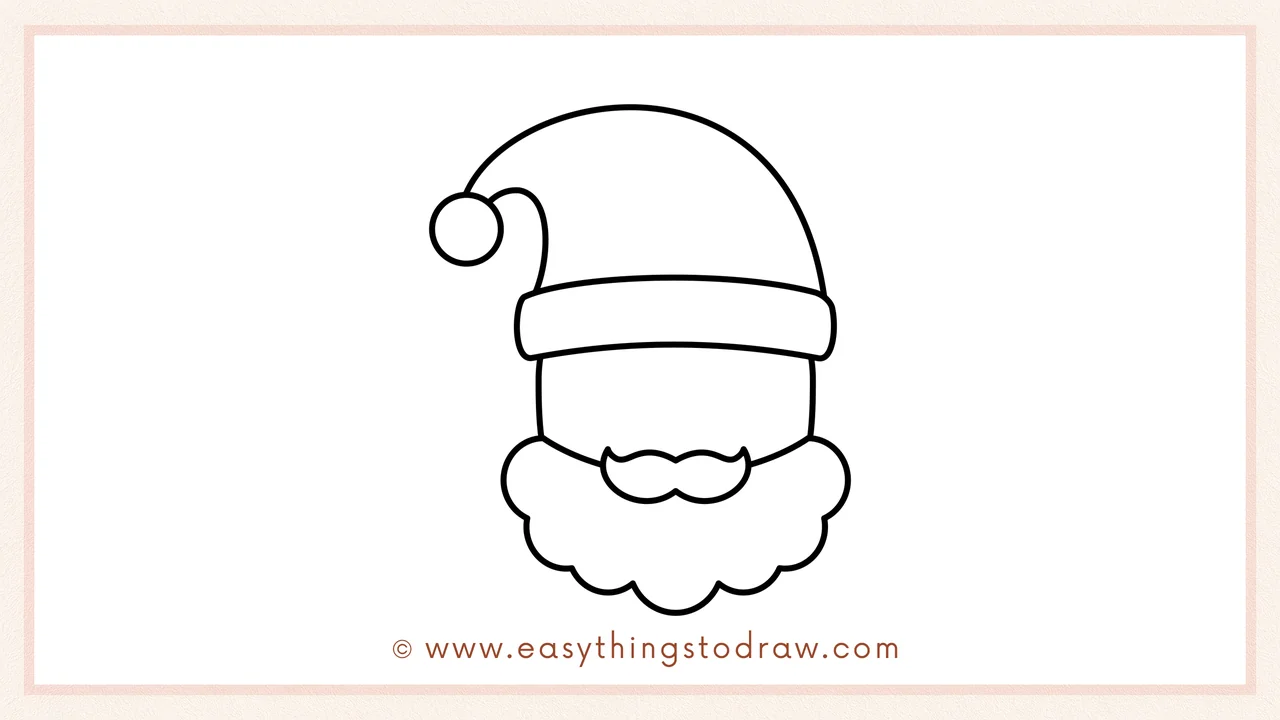
Now it’s time for Santa’s iconic beard! Use bumpy cloud curves that surround the bottom of the face. Let it bounce around his cheeks and chin to give it volume.
Step 5 – Add Ears and Cheeks
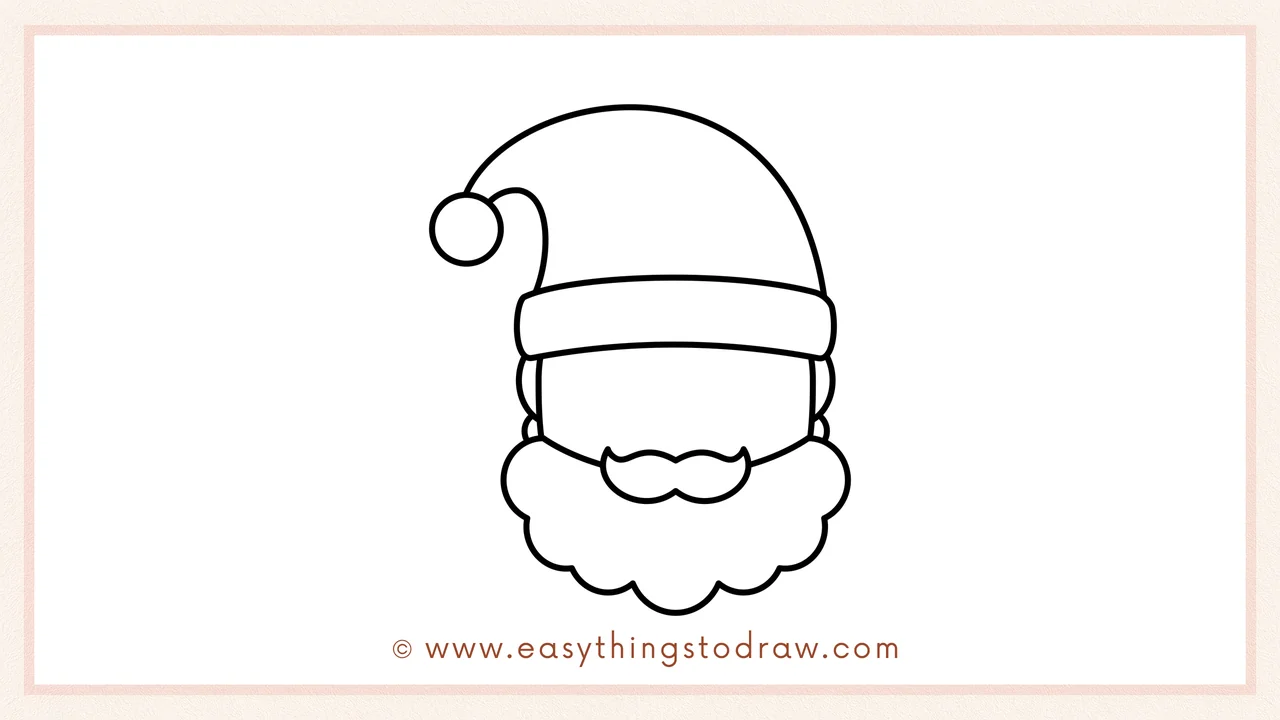
Draw half circles on both sides of Santa’s head for ears. Add two tiny circles just above the beard line — these are his rosy cheeks!
Step 6 – Draw the Eyes, Eyebrows, and Smile
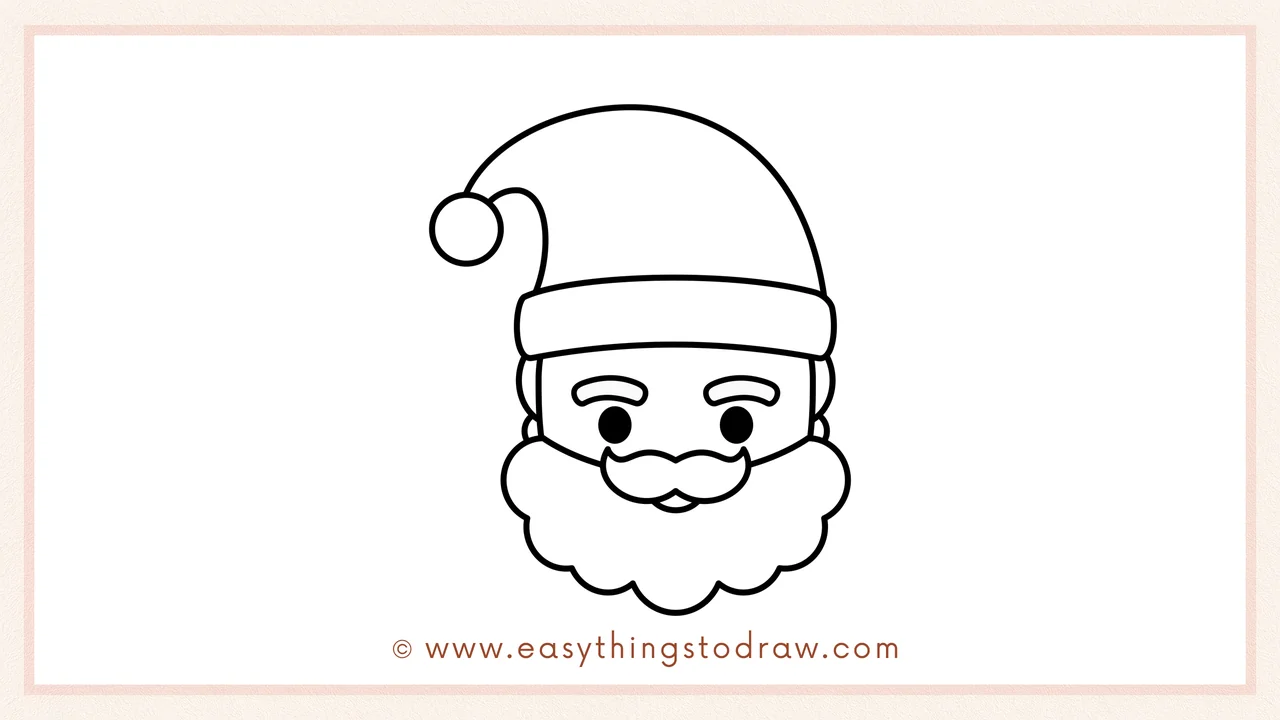
Add two small ovals for eyes, some curved lines above them for eyebrows, and a small smiling mouth right under the mustache. Now Santa is full of holiday cheer!
Frequently Asked Questions (FAQ)
What colors should I use to color Santa Claus?
Traditionally, use red for the hat, white for the brim and beard, pink or peach for the face, and black for the eyes. But feel free to get creative!
Can I add more Christmas elements to my drawing?
Absolutely! You can draw presents, snowflakes, reindeer, or even Santa’s sleigh in the background.
Is this tutorial good for school activities?
Yes! It’s classroom-safe, quick to follow, and great for group art projects around Christmas time.
I’m new to drawing. Is this too hard?
Not at all! This tutorial is made just for beginners. You’ll be surprised how easy it is once you start.
Printable Drawing Tutorials
Download Printable How to draw a Santa Claus Drawing Tutorials
You Did It!
Congratulations! You’ve just drawn your very own Santa Claus. Whether you followed along exactly or added your own twist, you should feel proud of your festive creation. Try coloring it in, hanging it up for decoration, or even making your own holiday cards!
👉 Want more easy drawing guides like this? Check out our full collection of beginner tutorials for every season and celebration.
Happy Drawing and Merry Christmas! 🎄🖍️
