What’s more magical than a Christmas tree twinkling with ornaments? In this fun and easy drawing tutorial, kids and beginners will learn how to draw a cute cartoon-style Christmas tree with a bright star, layered branches, and smiling charm.
This guide is perfect for:
– Children learning festive doodles 🎄
– Beginners practicing layered shapes and curves 🖍️
– Parents and teachers planning seasonal art activities 🌟
🎨 Why Learn From Us?
At Easy Things to Draw, we help kids turn imagination into art. Our certified art educators design each lesson with care, making it fun, approachable, and confidence-boosting—especially for first-time artists.
With 10+ years of children’s art instruction, we specialize in simplifying complex images into happy little steps!
✅ What Makes This Christmas Tree Tutorial Unique?
🌲 Layered Simplicity
The tree is broken into fun curved tiers that build upward✨ Fun Decorative Details
Includes a star, ornaments, and expressive options😄 Child-Friendly Personality
Optional cute face adds playful charm👩🏫 Educator-Approved Design
Safe, printable, and designed for both at-home and classroom use
🔒 Safe for Every Artist
– No ads or popups
– Great for classroom boards or family craft tables
– Printable and shareable for creative reuse
🎁 Let’s Draw This Magical Tree Together!
Grab your pencil, some paper, and let’s create a Christmas classic, step by step!
What You Need:
- A pencil
- An eraser
- A black marker (for outlining)
- Coloring tools (crayons, markers, or colored pencils)
- Drawing paper
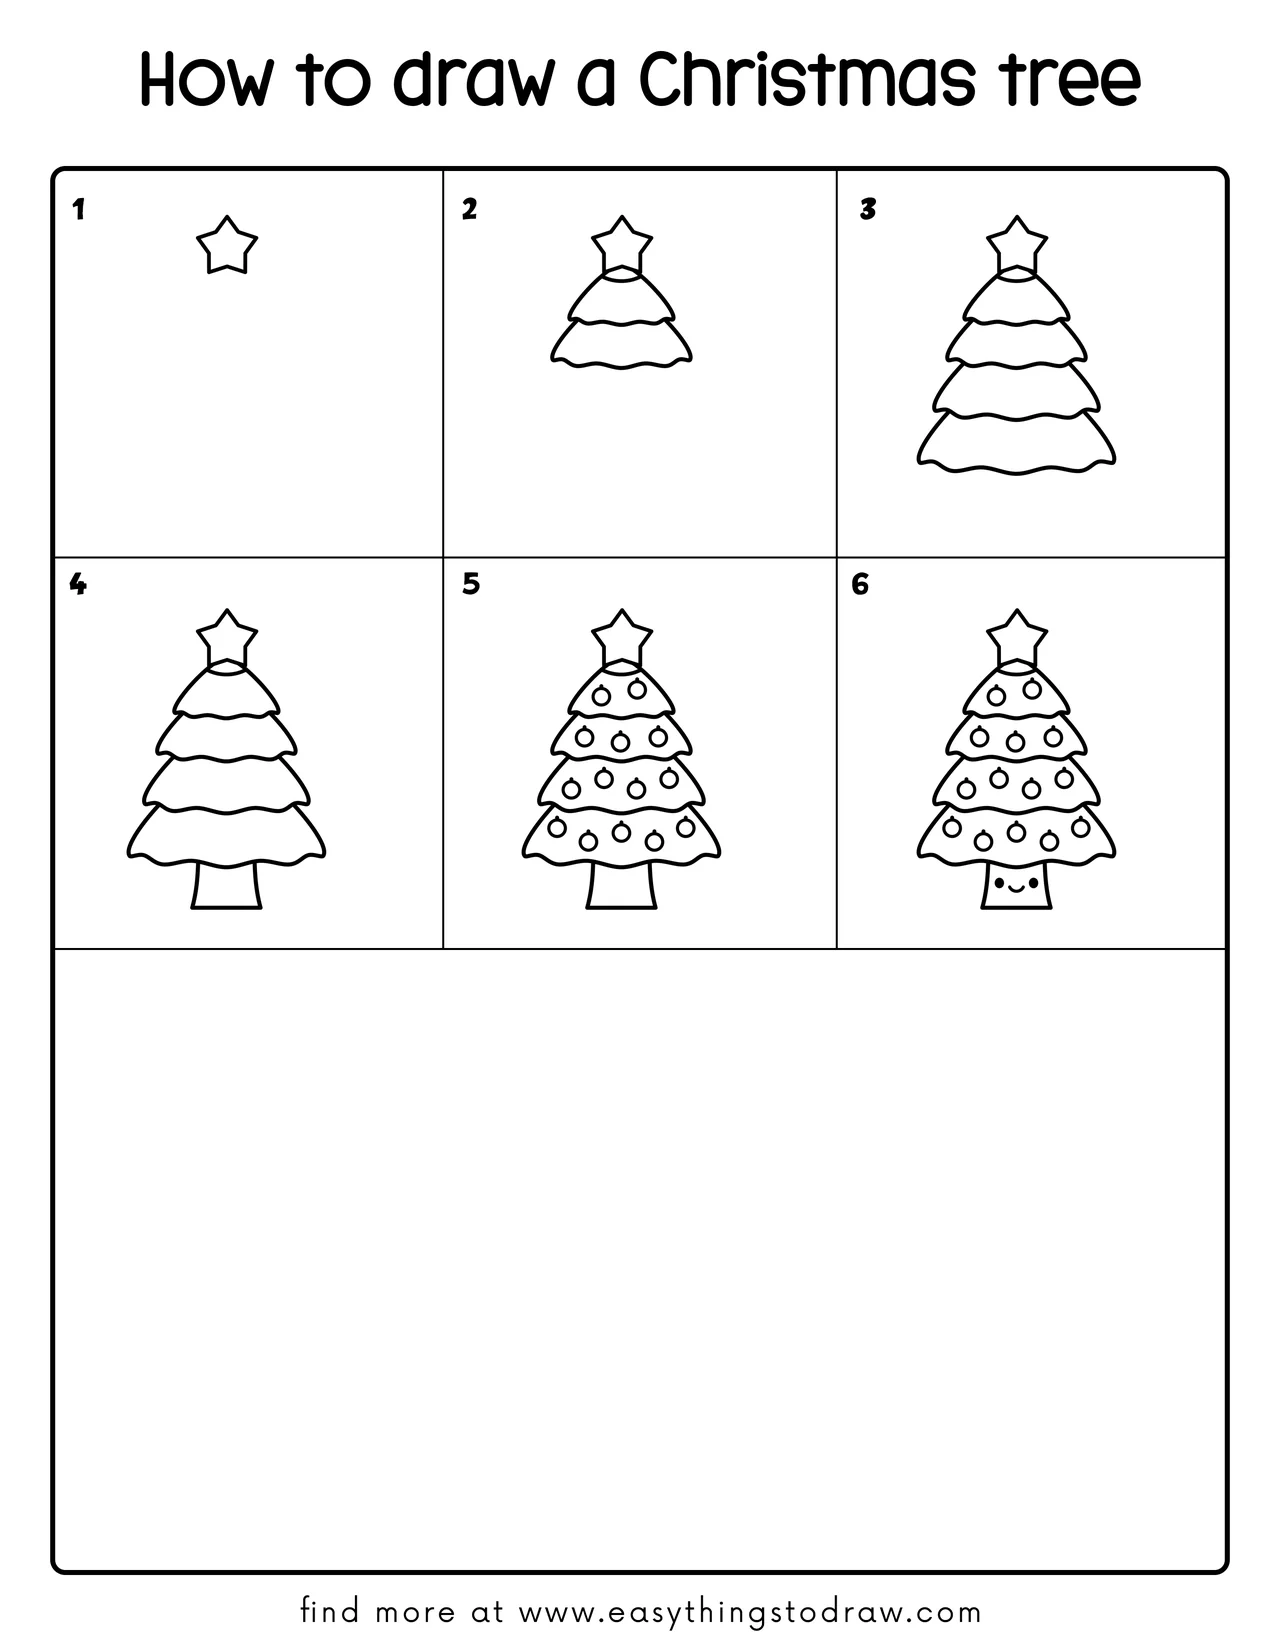
Step by Step Christmas Tree Drawing Instructions
Step 1 – Draw a Star on Top

Begin with a five-pointed star near the top of the page—this will be the tree’s topper!
Step 2 – Start the First Tree Layer
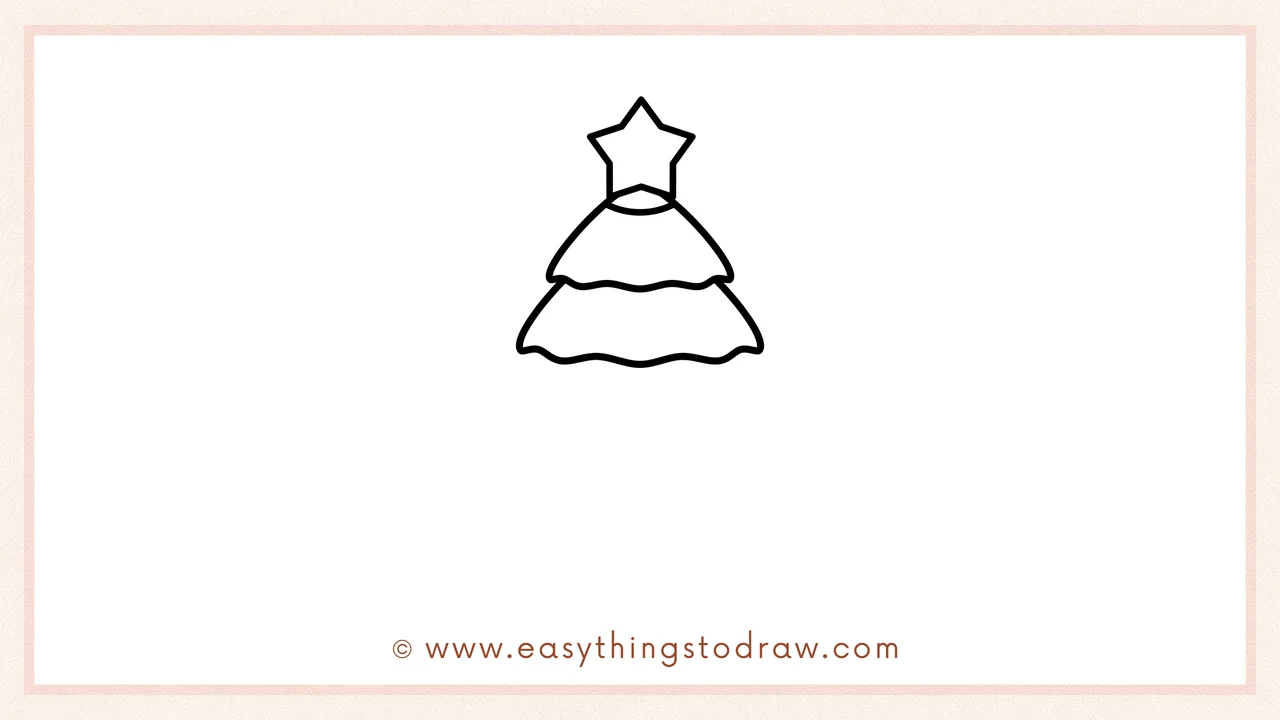
Under the star, draw a curved triangle-like shape with a wavy bottom edge—this forms the first branch layer.
Step 3 – Add More Branch Layers
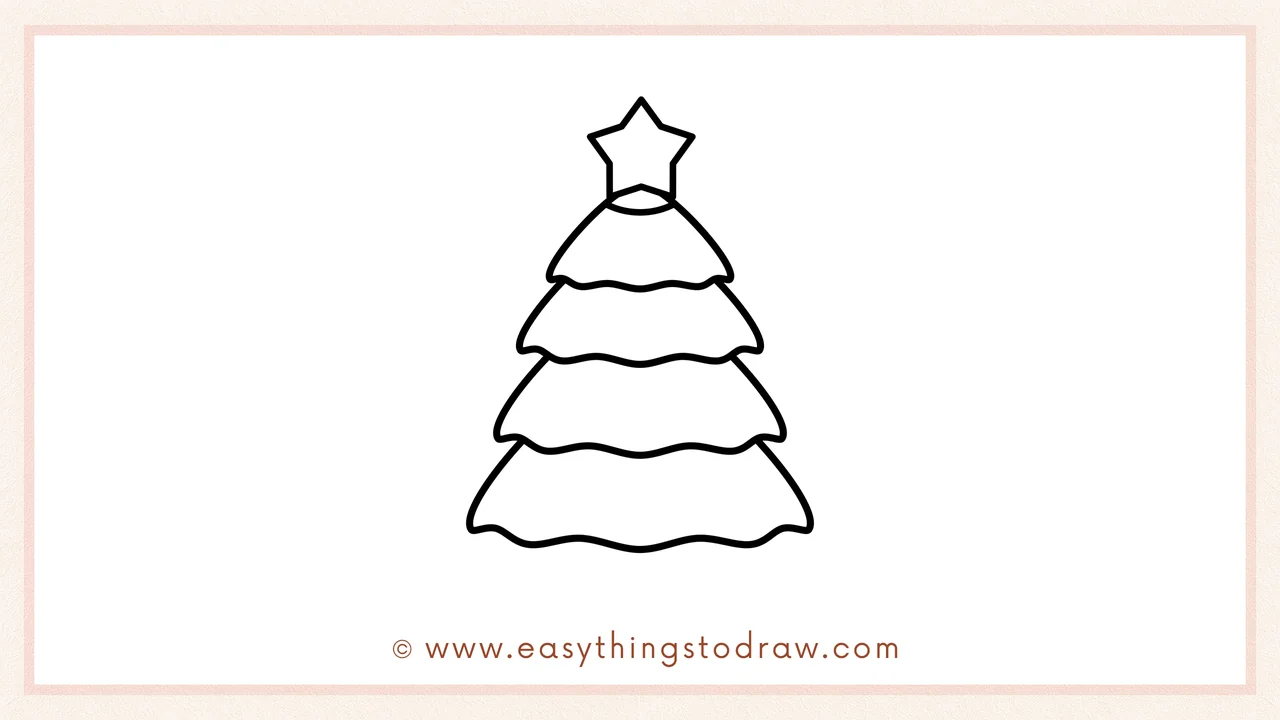
Stack three more similar shapes below the first, each one slightly wider than the one above. This builds the tree’s body.
Step 4 – Draw the Tree Trunk
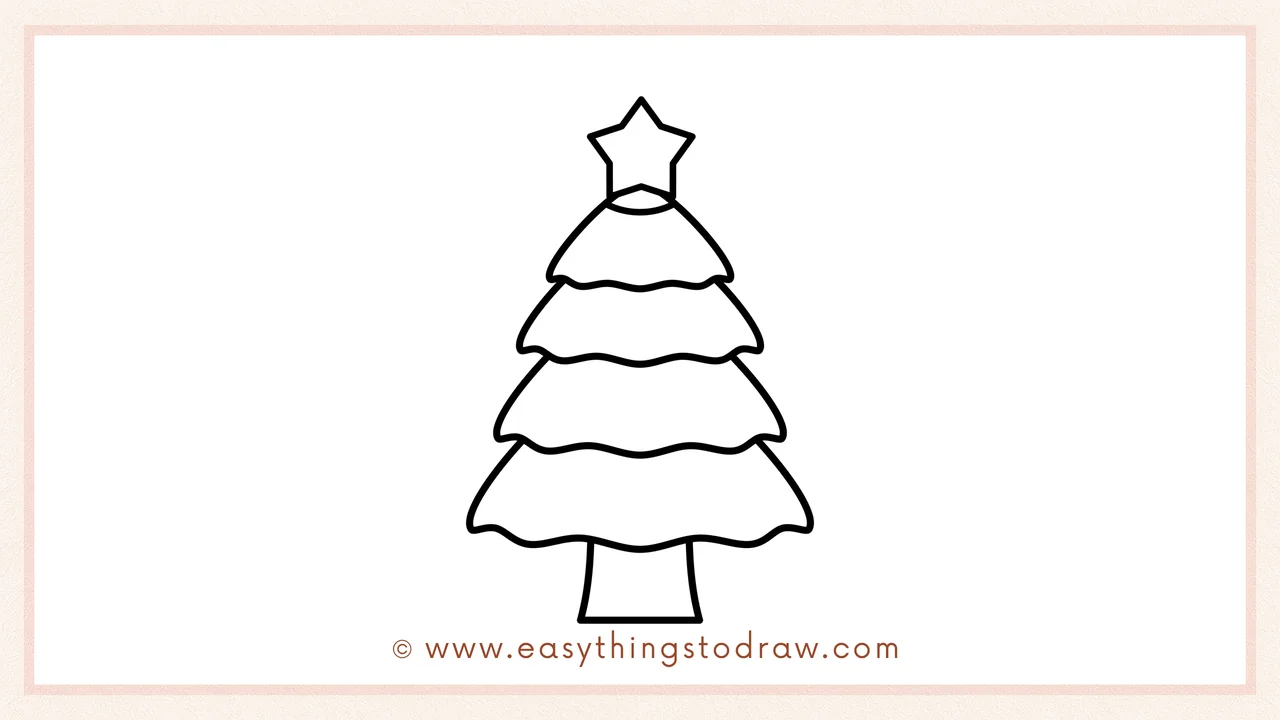
Add a small rectangle beneath the last layer to create the trunk.
Step 5 – Decorate with Ornaments
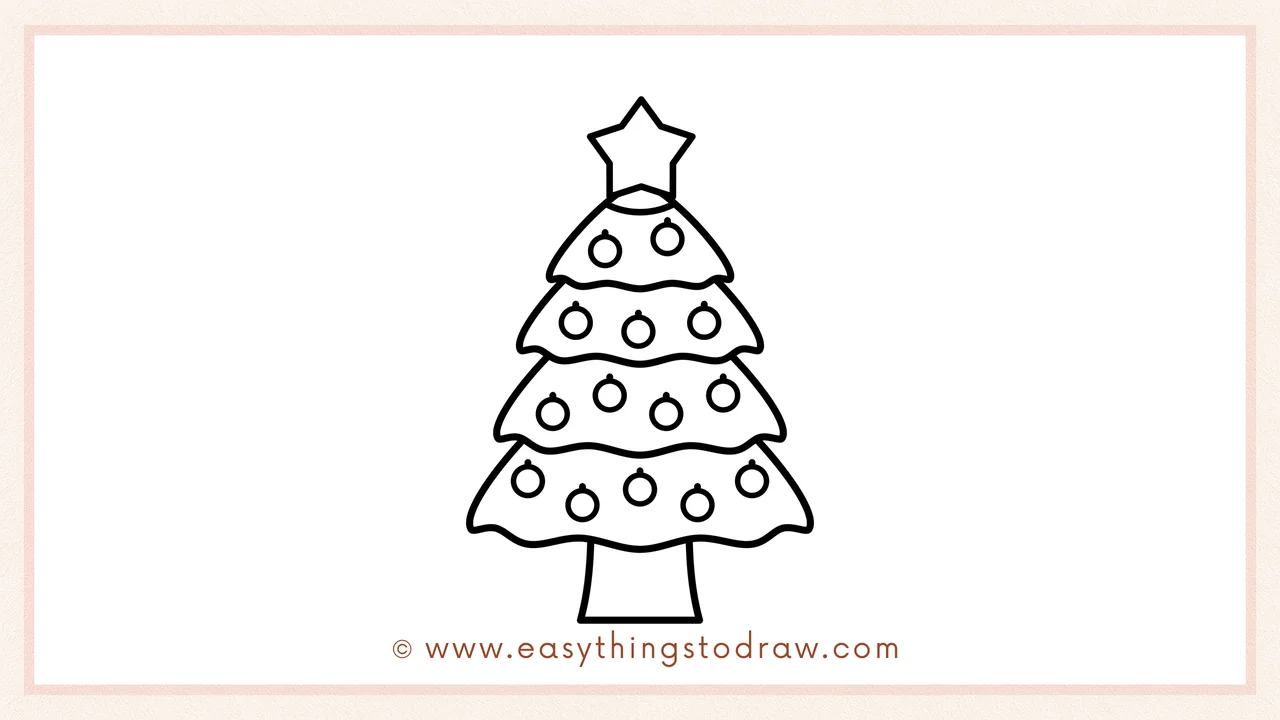
Draw small circles all over the tree branches to create holiday ornaments.
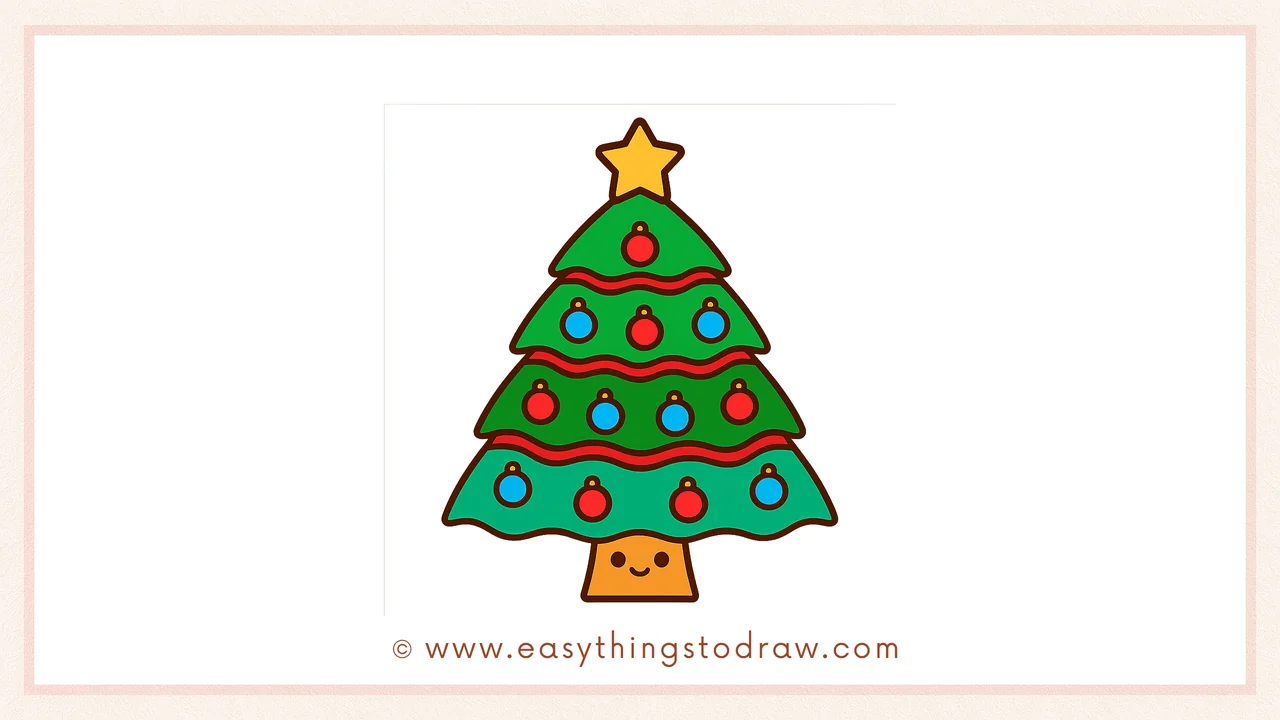
Step 6 – Add a Cute Face and Color!
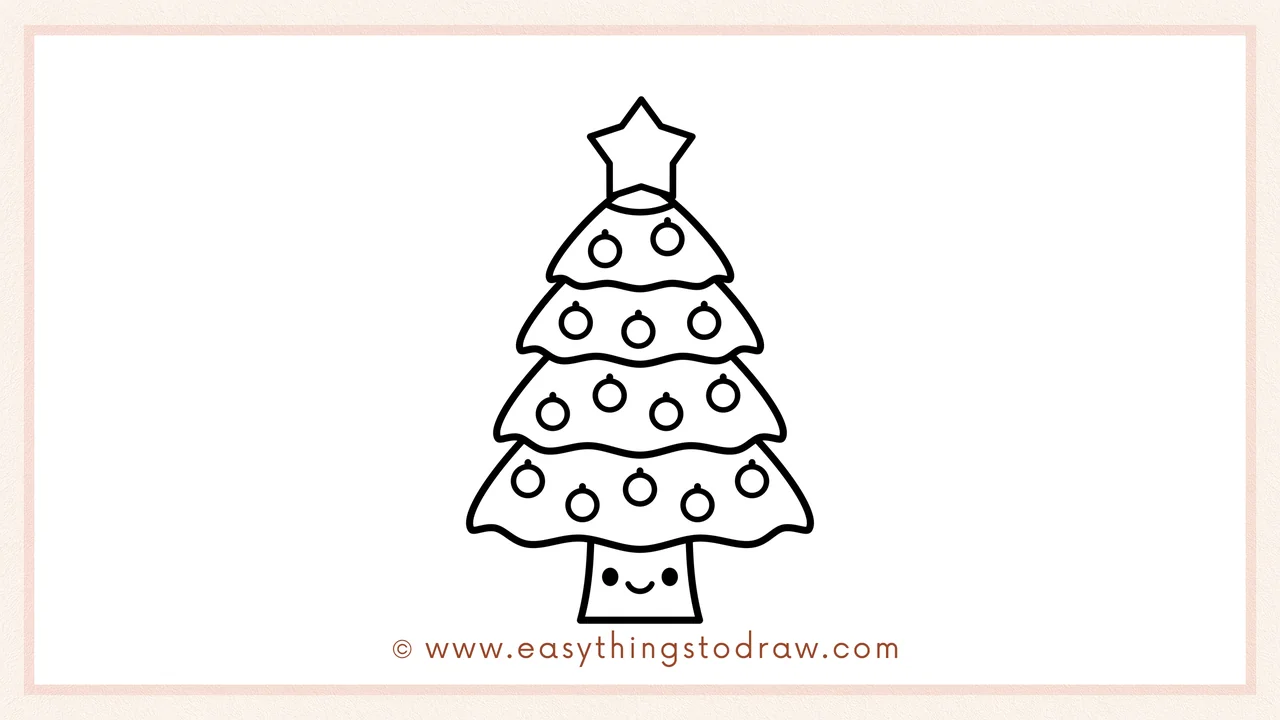
Give the tree a friendly face on the trunk and then start coloring! Use greens for the branches, yellow for the star, and bright reds, blues, and golds for the ornaments.
Frequently Asked Questions (FAQ)
Can I add presents under the tree?
Definitely! Draw small boxes with bows to complete your Christmas scene.
What colors should I use for ornaments?
Traditional red, gold, and silver work great—or go wild with rainbow decorations!
Is this tutorial suitable for kindergartners?
Yes! The shapes are simple, repetitive, and easy to follow, even for little learners.
Can I use this drawing for a holiday card?
Of course! Color it in, fold it, and write a cheerful message inside.
Printable Drawing Tutorials
Download Printable How to draw a Christmas tree Drawing Tutorials
You Did It!
Fantastic job—you’ve drawn your very own Christmas tree! Whether you keep it classic or decorate it your own way, your tree is ready to shine. Add presents underneath, snowfall in the background, or even draw a tiny Santa beside it!
Hang your artwork, give it as a card, or draw another version with lights and garlands. Keep the creativity glowing!
