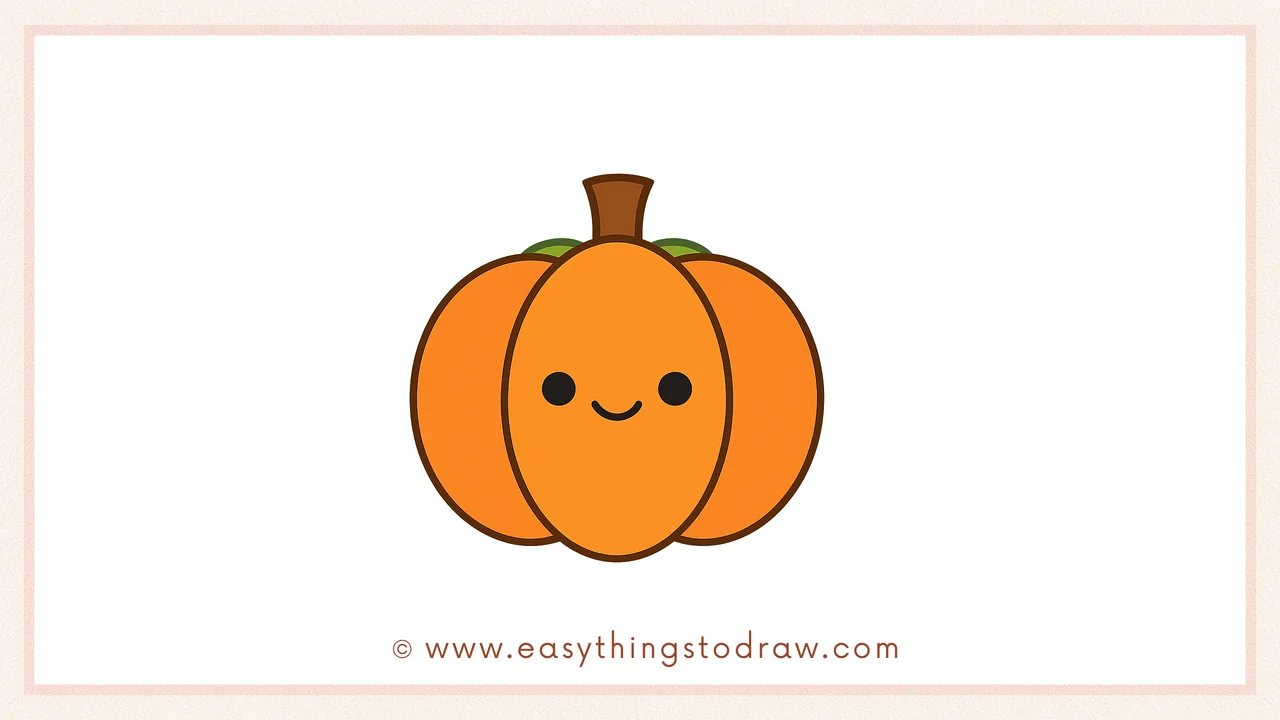
Let’s celebrate Thanksgiving with one of the most classic fall favorites — the pumpkin! In this easy drawing tutorial, you’ll learn how to draw a cheerful cartoon pumpkin step by step. It’s perfect for kids, preschoolers, and anyone who loves fun fall art. Ready to bring your pumpkin to life?
What You Need:
- A pencil
- An eraser
- A black marker (for outlining)
- Coloring tools (crayons, markers, or colored pencils)
- Drawing paper
Step by Step Pumpkin Drawing Instructions
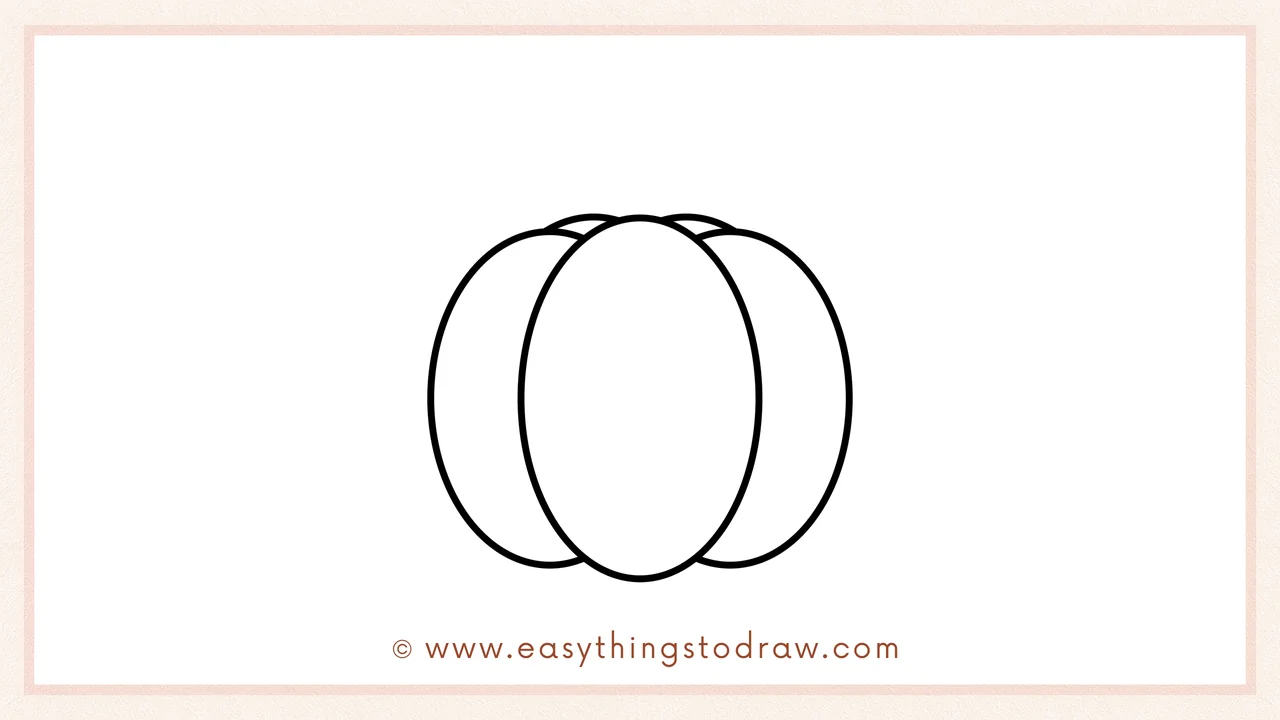
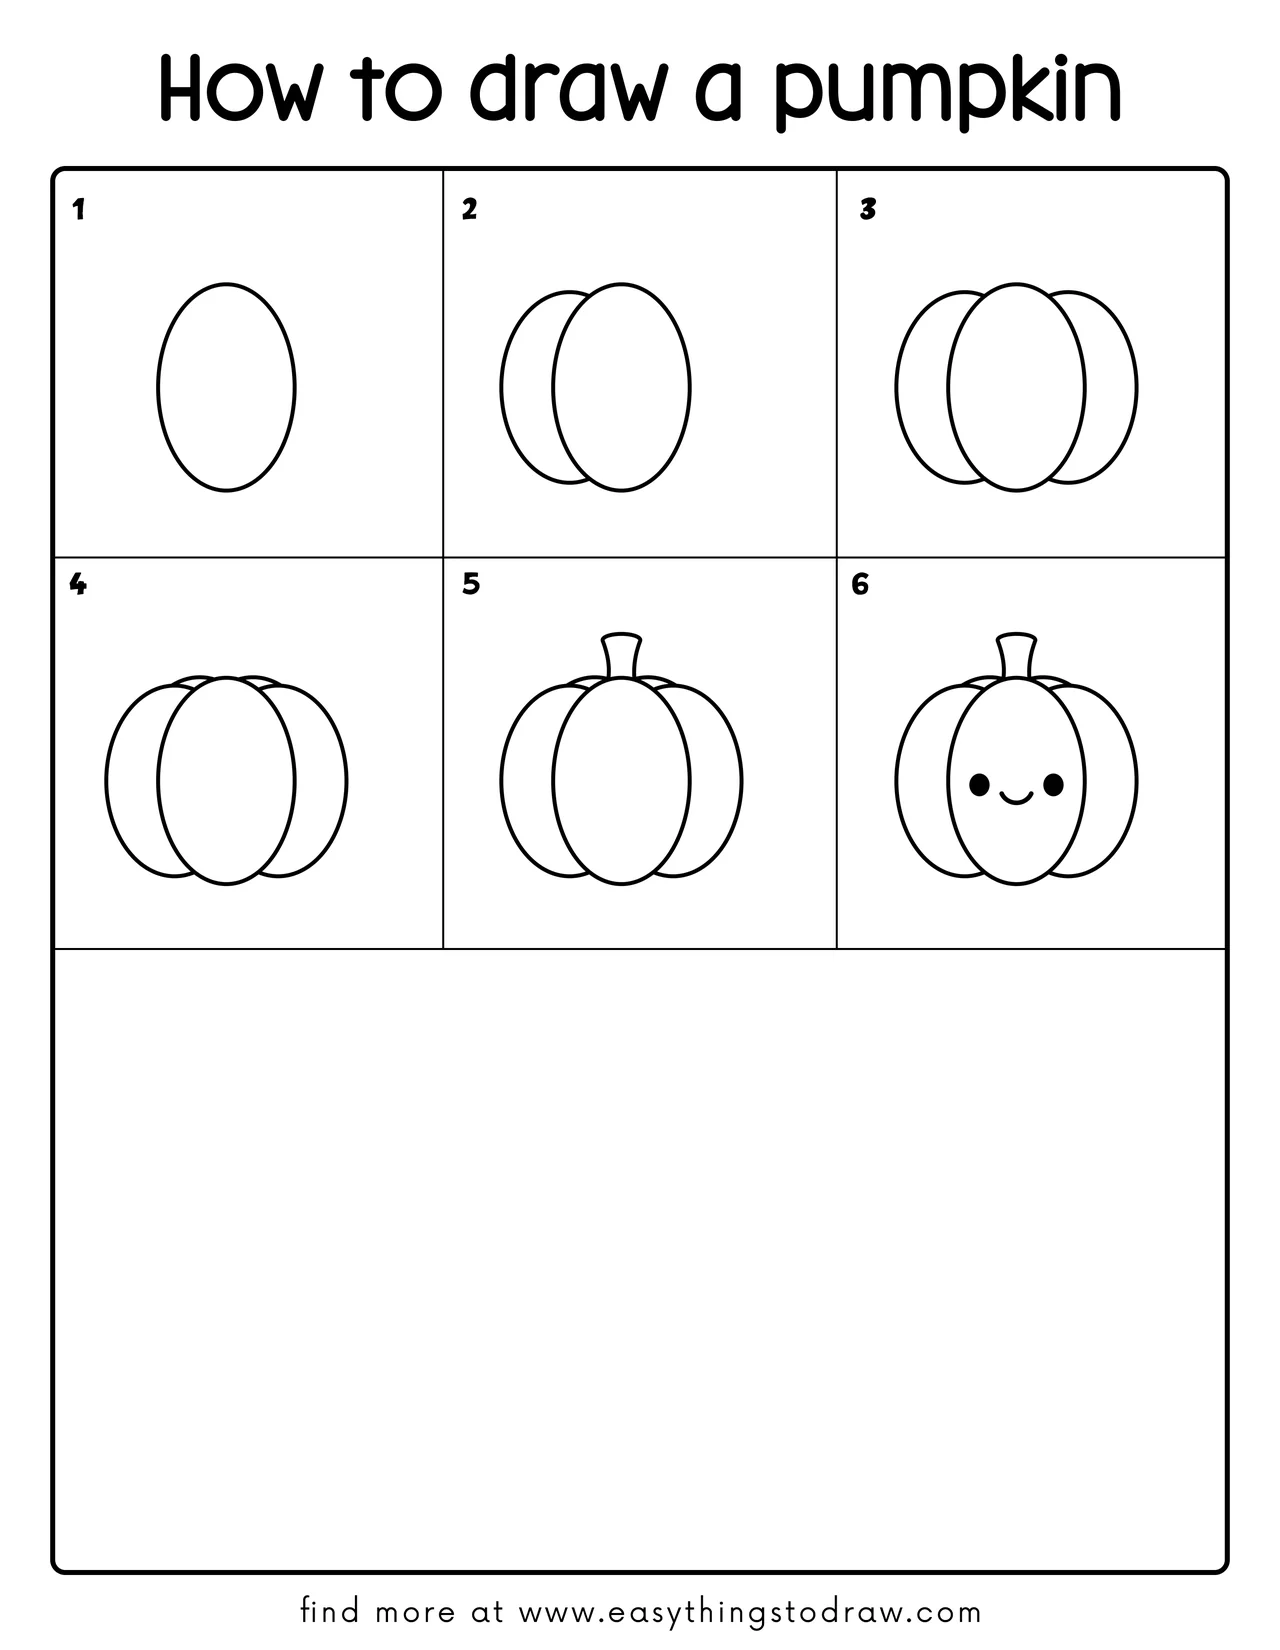
Step 1 – Draw the Center Oval
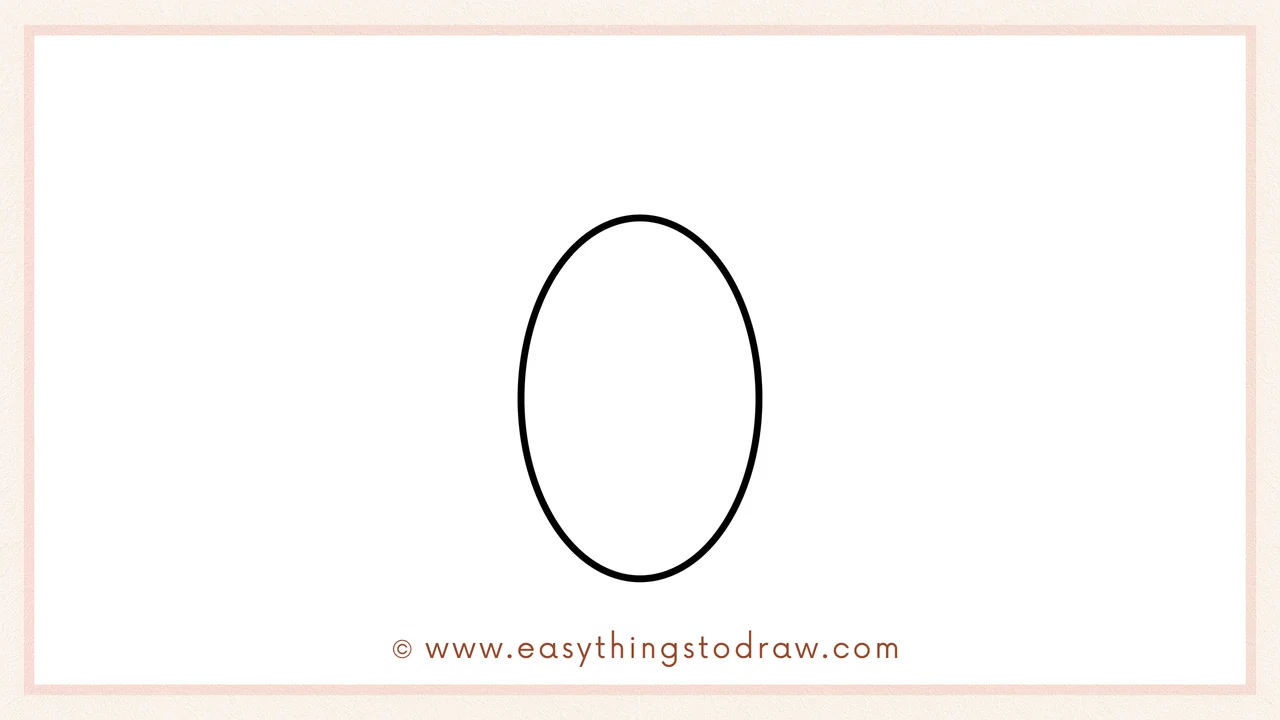
Start with a tall vertical oval in the center of your page. This will be the middle section of your pumpkin.
Step 2 – Add One Side Oval
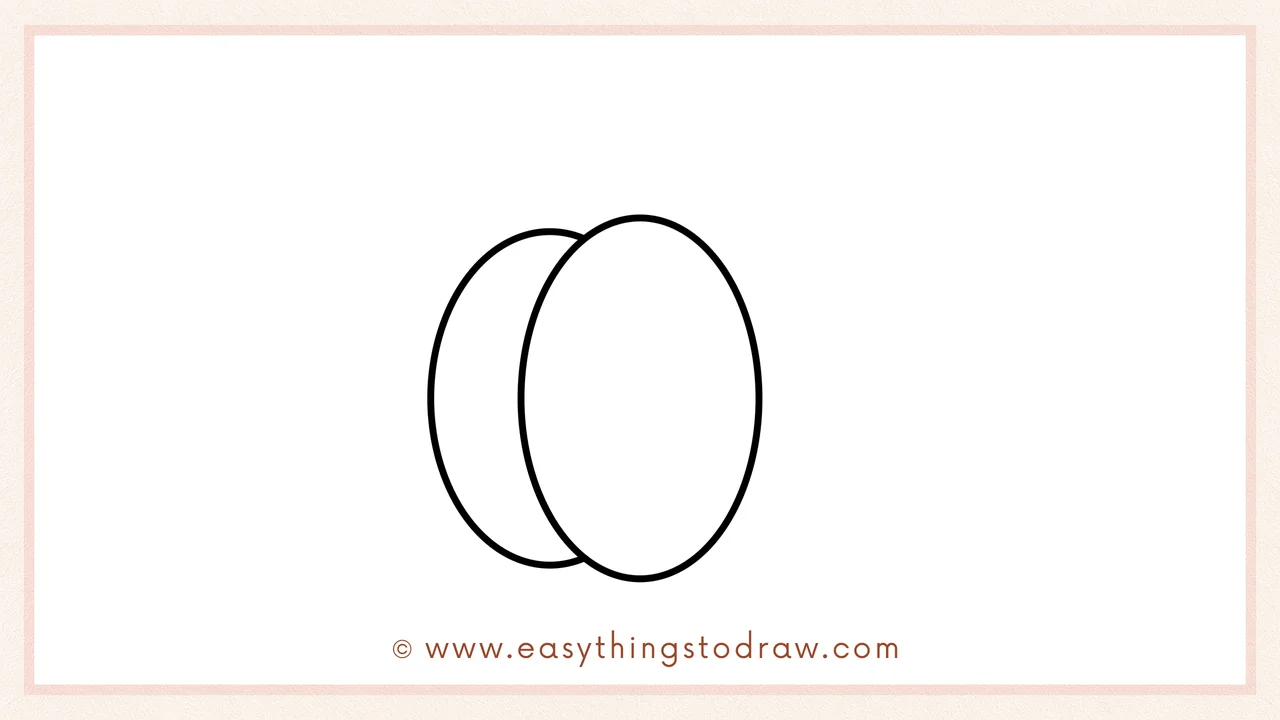
On the left side of the center, draw a slightly overlapping oval — this becomes one of the pumpkin’s outer sections.
Step 3 – Add the Other Side
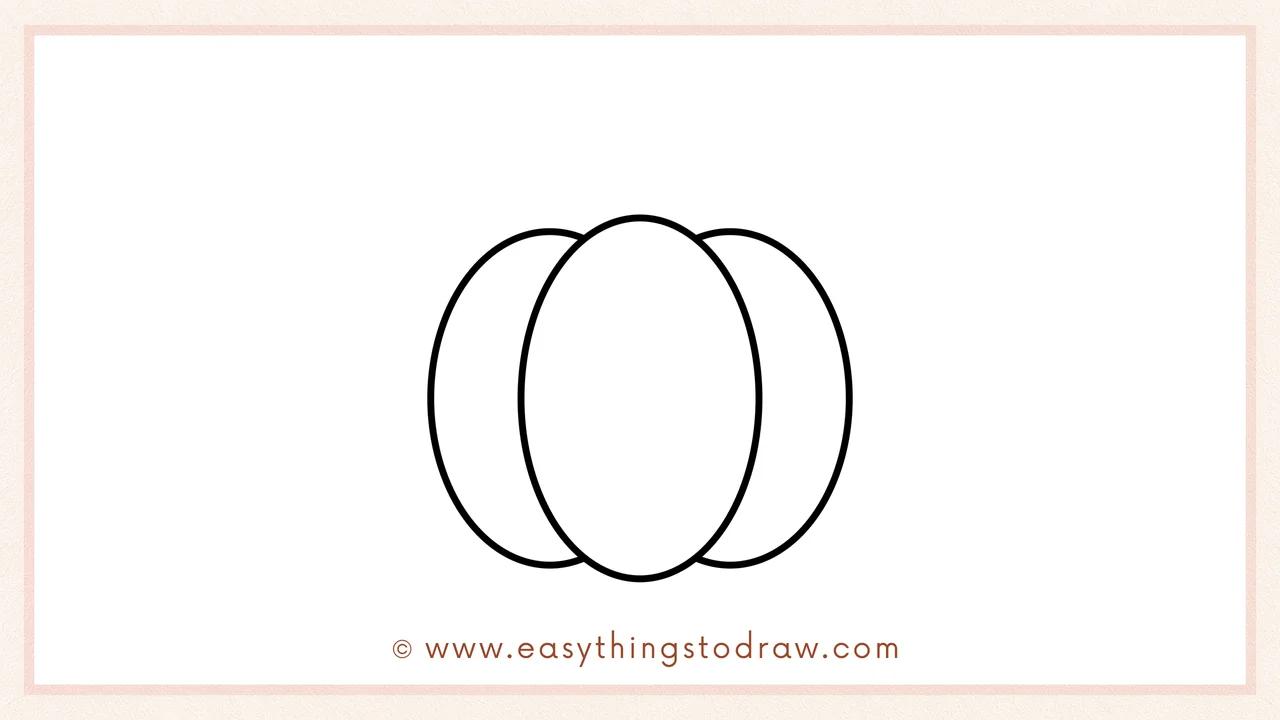
Now draw a matching oval on the right side of the center to complete the main pumpkin body with three rounded parts.
Step 4 – Draw the Top Curve Lines
Now add two curved lines on the top part of the pumpkin, one on each side of the stem area. These curves help define the sections of the pumpkin and make it look more three-dimensional.
Step 5 – Add the Stem
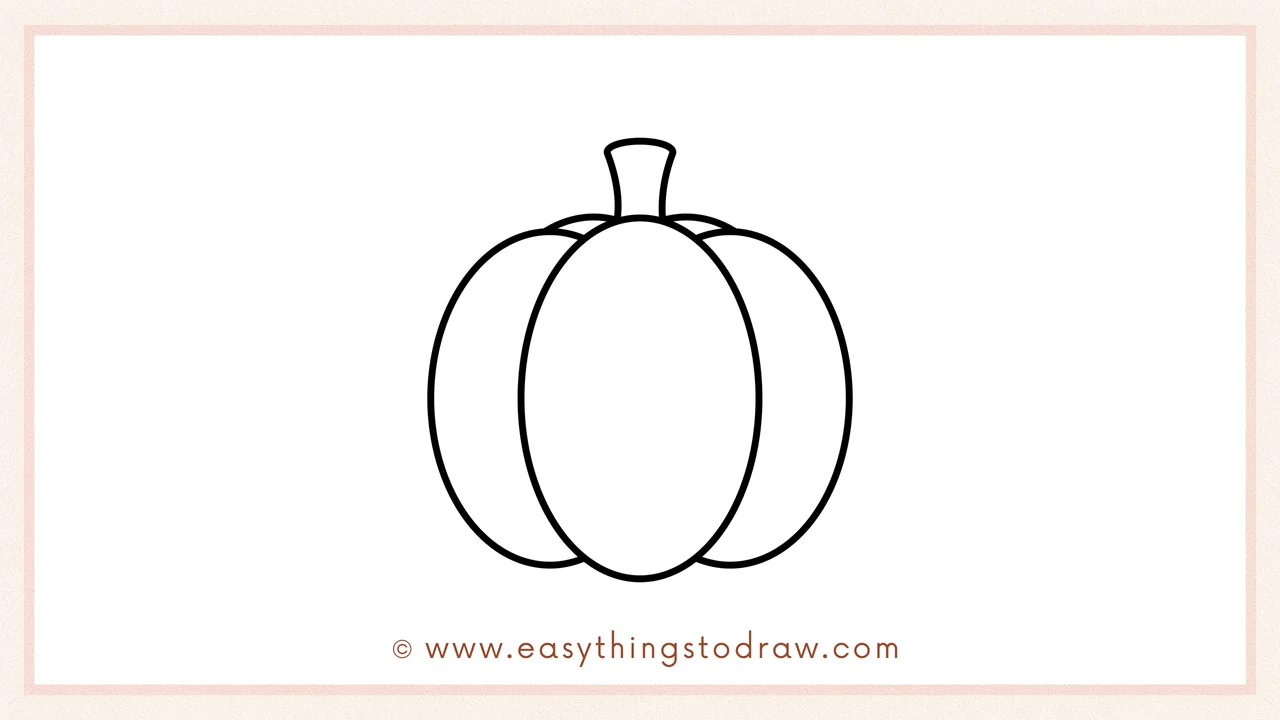
Draw a short stem at the top of the center oval. Make the edges curve out slightly like a little crown or hat!
Step 6 – Add a Smiling Face!
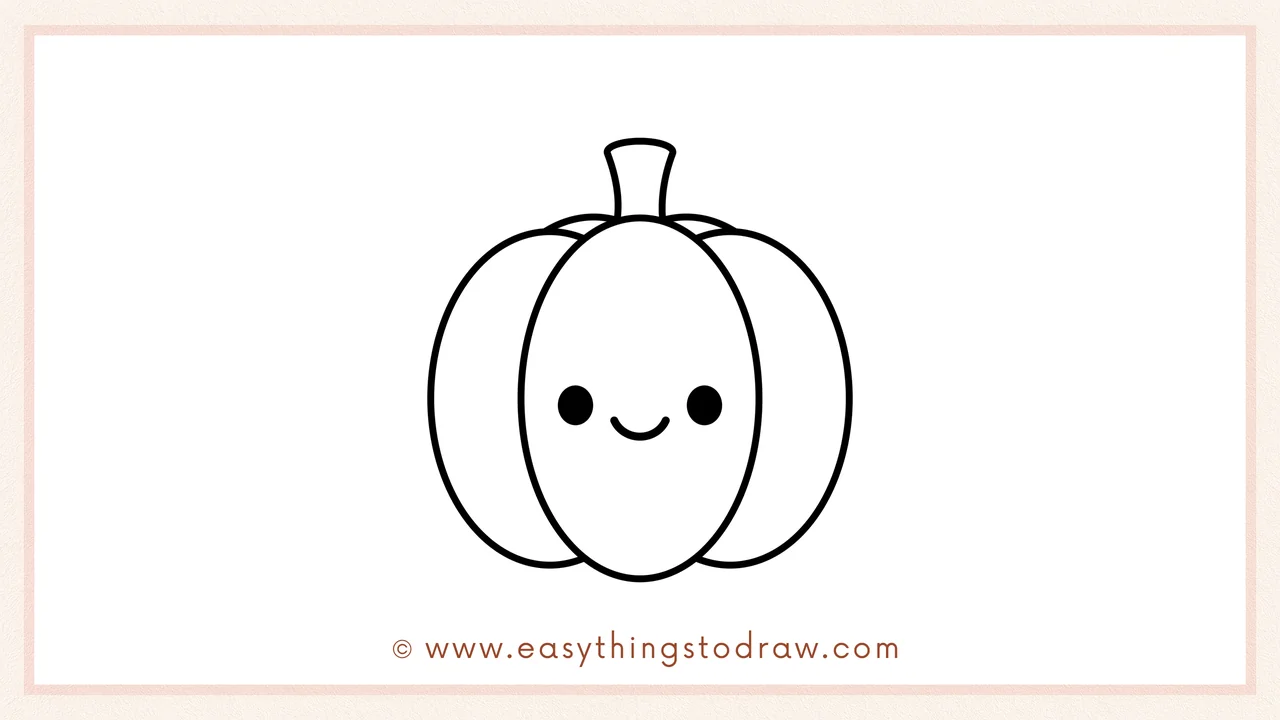
Give your pumpkin a happy personality by adding two black eyes and a curved smile near the center oval.
Frequently Asked Questions (FAQ)
Can I turn this pumpkin into a jack-o’-lantern?
Absolutely! Just draw triangle eyes and a zigzag mouth to give it a spooky face.
What color should I use for the stem?
Brown or green are perfect! You can even use a darker orange for a fun look.
Is this suitable for preschoolers?
Yes! The shapes are simple and easy to follow, perfect for kids ages 4 and up.
Can I add more sections to the pumpkin?
Definitely! Add more ovals behind the main body to create extra ridges.
Printable Drawing Tutorials
Download Printable How to draw a pumpkin Drawing Tutorials
You Did It!
Awesome job drawing your Thanksgiving pumpkin! It looks super cheerful and full of fall vibes. Want to decorate it more? Add some colorful leaves, a pumpkin patch background, or even a tiny squirrel nearby. Don’t forget to share your drawing with friends and family — or use it as decoration for your Thanksgiving celebration!
