Get ready to turn up the creativity! In this tutorial, you’ll learn how to draw a cool cartoon oven — the kind that bakes delicious treats and brings smiles to every kitchen. This easy oven drawing tutorial is perfect for kids, young artists, and anyone who loves learning how to sketch home objects. Follow along step by step and bring your kitchen to life with art!
What You Need:
- A pencil
- An eraser
- A black marker (for outlining)
- Coloring tools (crayons, markers, or colored pencils)
- Drawing paper
Step by Step Oven Drawing Instructions
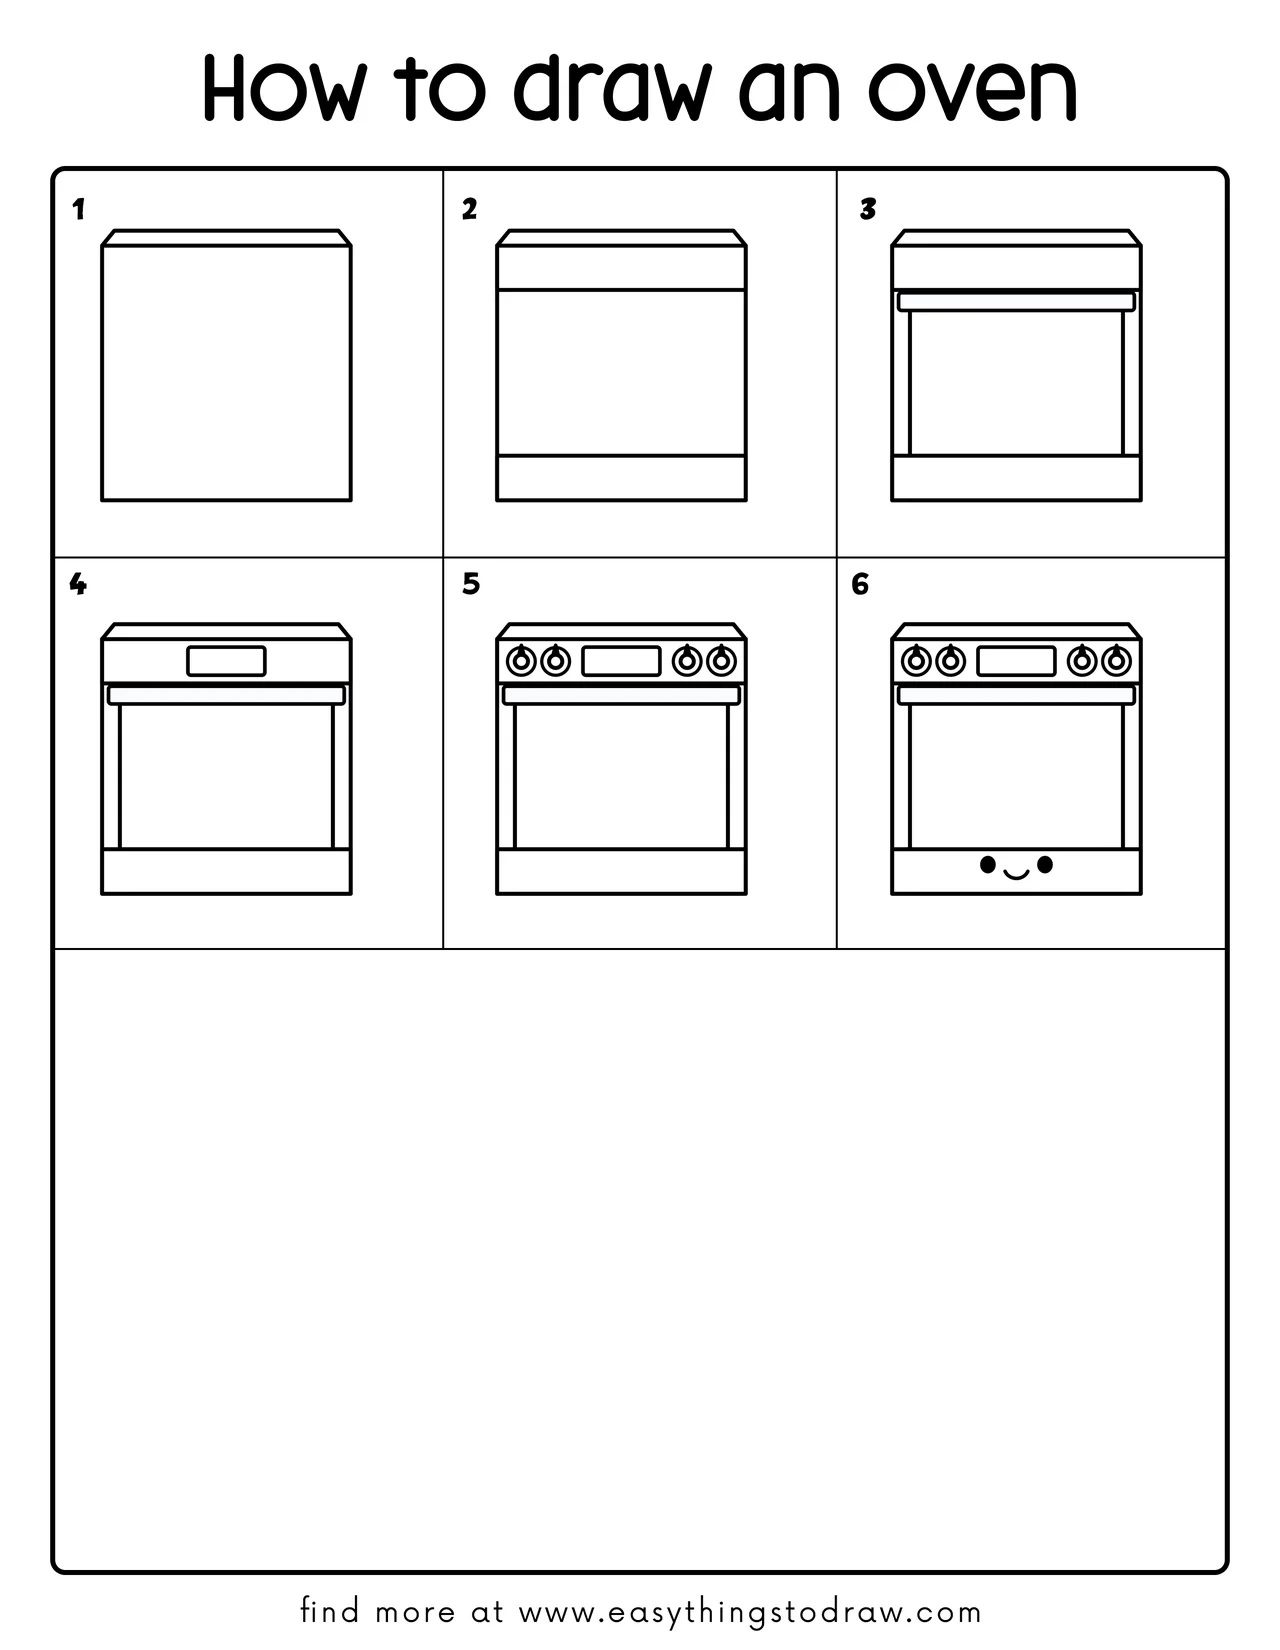
Step 1 – Draw the Oven’s Base Shape
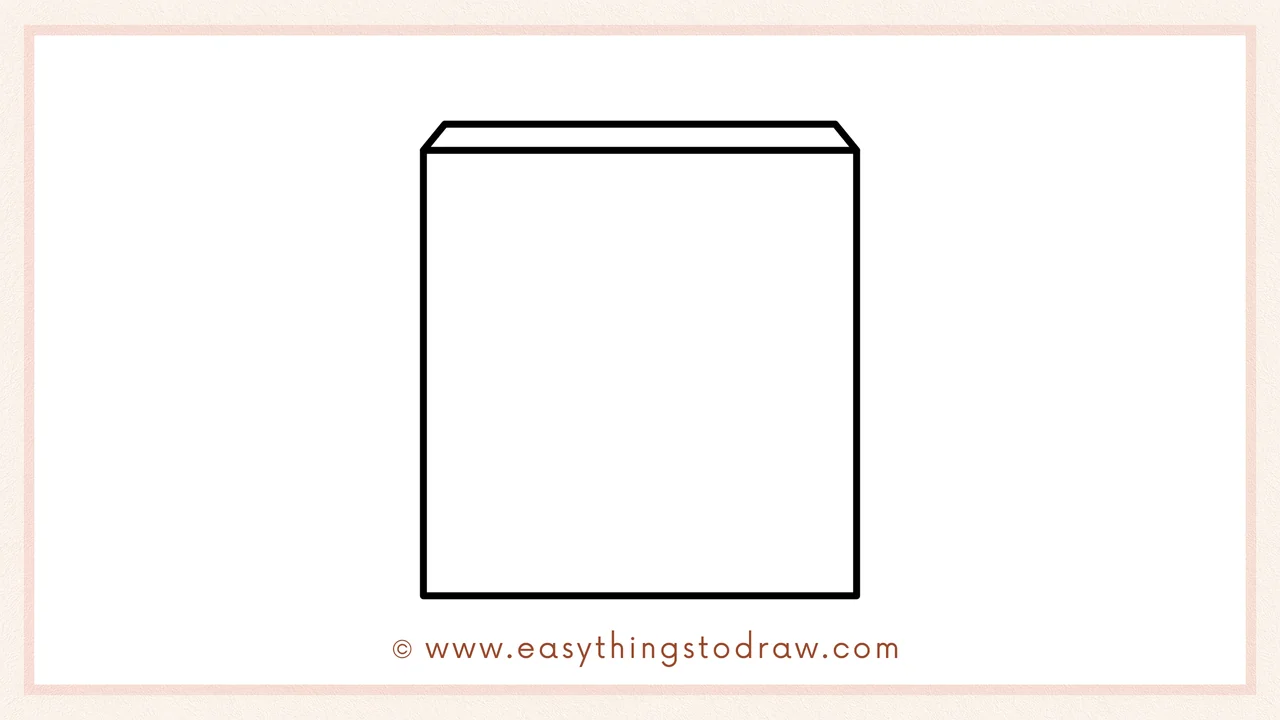
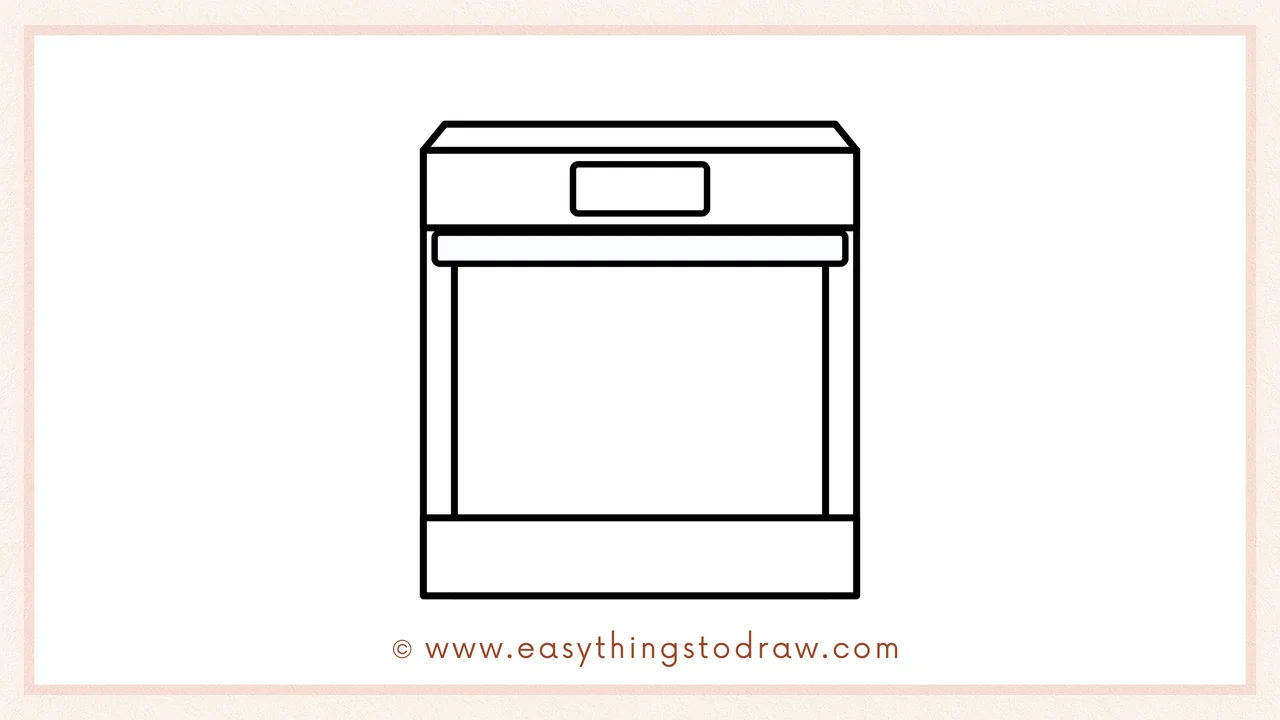
Start by drawing a large rectangle with a slightly angled top. This will be the main body of the oven, like a tall box standing upright.
Step 2 – Add Oven Panels
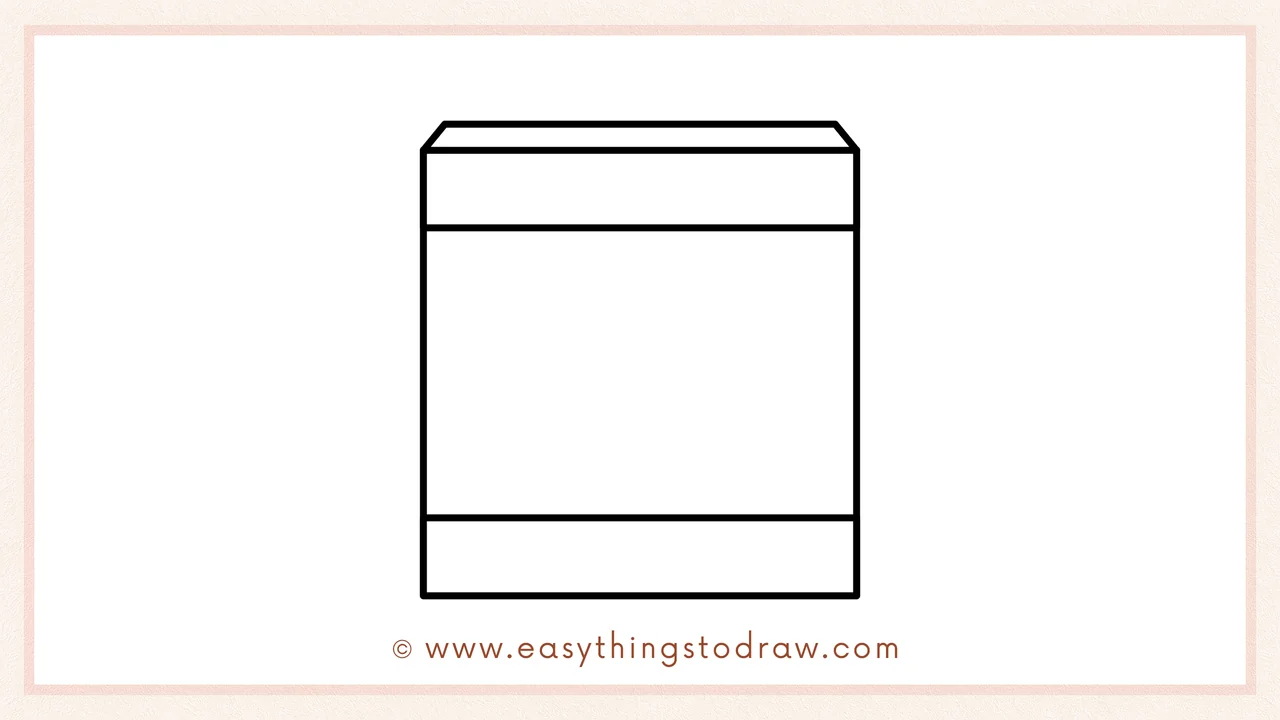
Now draw two horizontal lines — one near the top and one near the bottom. These will separate the control panel and base section of the oven.
Step 3 – Draw the Oven Door
Inside the rectangle, draw a smaller vertical section for the oven door. Add a horizontal handle near the top of this door section to make it look real.
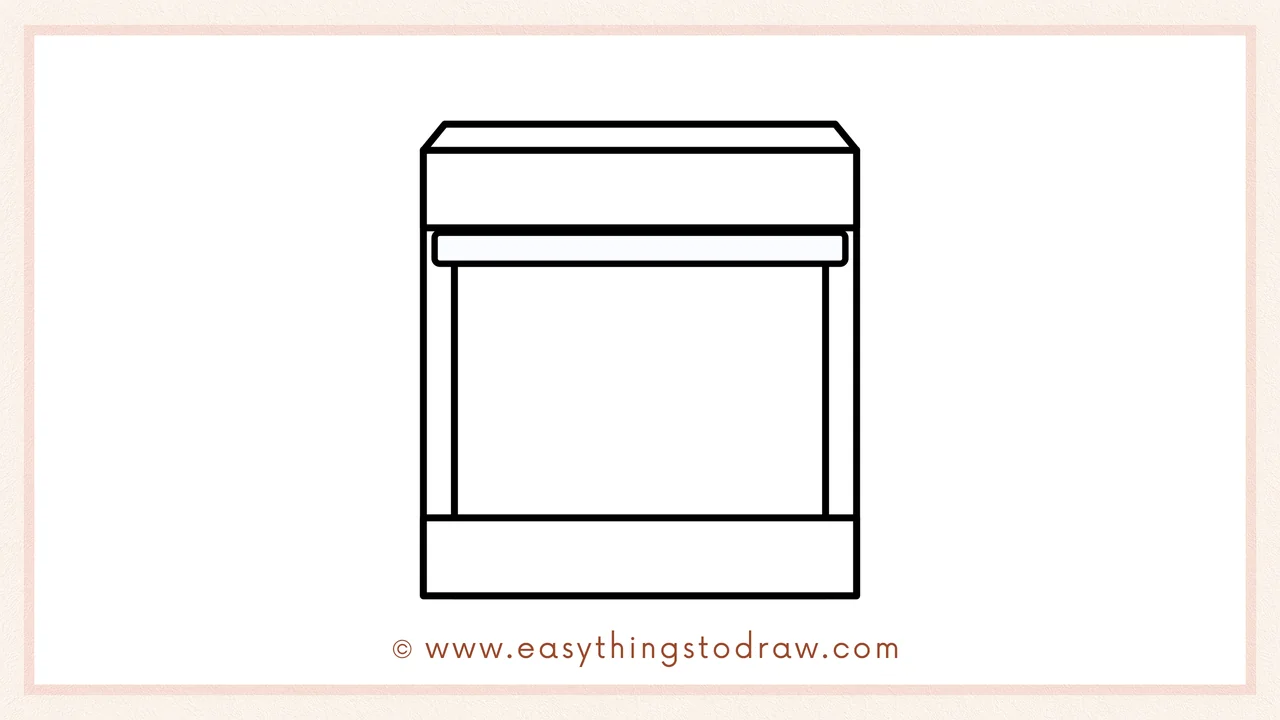
Step 4 – Add the Display Panel
On the top panel of the oven, draw a small rectangle in the center — this is the display screen or timer. Now your oven is starting to look high-tech!
Step 5 – Draw the Knobs
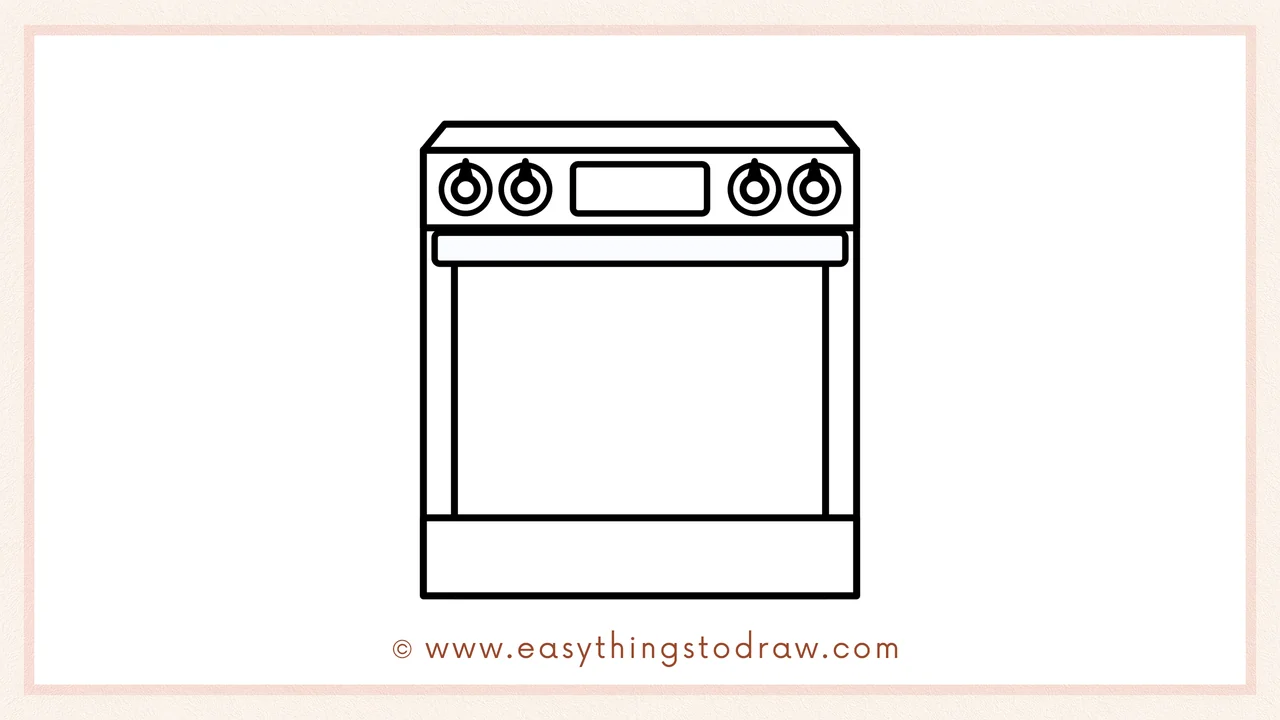
Add four round knobs along the top panel, two on each side of the display screen. These help control the heat — and they make your oven look super cool!
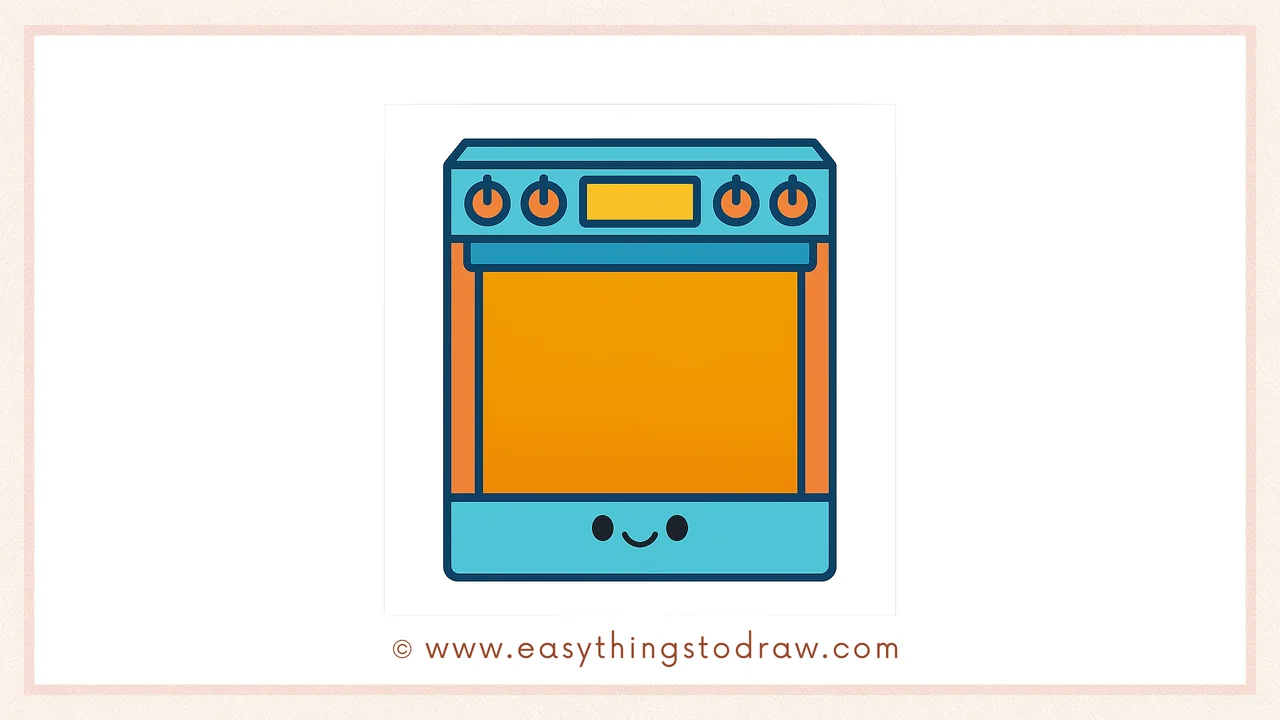
Step 6 – Give It a Smile!

Let’s finish with a friendly touch — draw two black circles near the bottom for eyes and a happy smile in between. Your oven is now alive and ready to bake with joy!
Frequently Asked Questions (FAQ)
Can I add something baking inside the oven?
Yes! You can draw cookies, a turkey, or even a pizza inside to make it even more fun.
What if I want to make it look older or fancier?
You can change the design! Add vintage-style knobs or a digital screen to match the oven you imagine.
Is this tutorial good for preschoolers?
Absolutely! It uses simple shapes and clear steps that are great for kids as young as 4 or 5.
What do I do if I mess up a line?
Just erase and try again — drawing is all about experimenting and learning with joy!
Printable Drawing Tutorials
Download Printable How to draw an oven Drawing Tutorials
You Did It!
Awesome work! You just finished drawing a super cool oven that’s ready to cook up creativity. Maybe it’s baking muffins or a surprise dinner — what will you imagine next? Add your own colors, personalize with stickers or patterns, and don’t forget to show it off to your family or classroom friends!
