Get ready for a sweet harvest-themed art project! In this beginner-friendly drawing tutorial, we’ll show kids and young artists how to draw a cute bucket full of apples—just right for Thanksgiving or fall fun. This easy cartoon apple bucket is great for building drawing confidence while celebrating seasonal fruits. Follow along to learn how to draw apples in a container step by step!
What You Need:
- A pencil
- An eraser
- A black marker (for outlining)
- Coloring tools (crayons, markers, or colored pencils)
- Drawing paper
Step by Step Apple Bucket Drawing Instructions
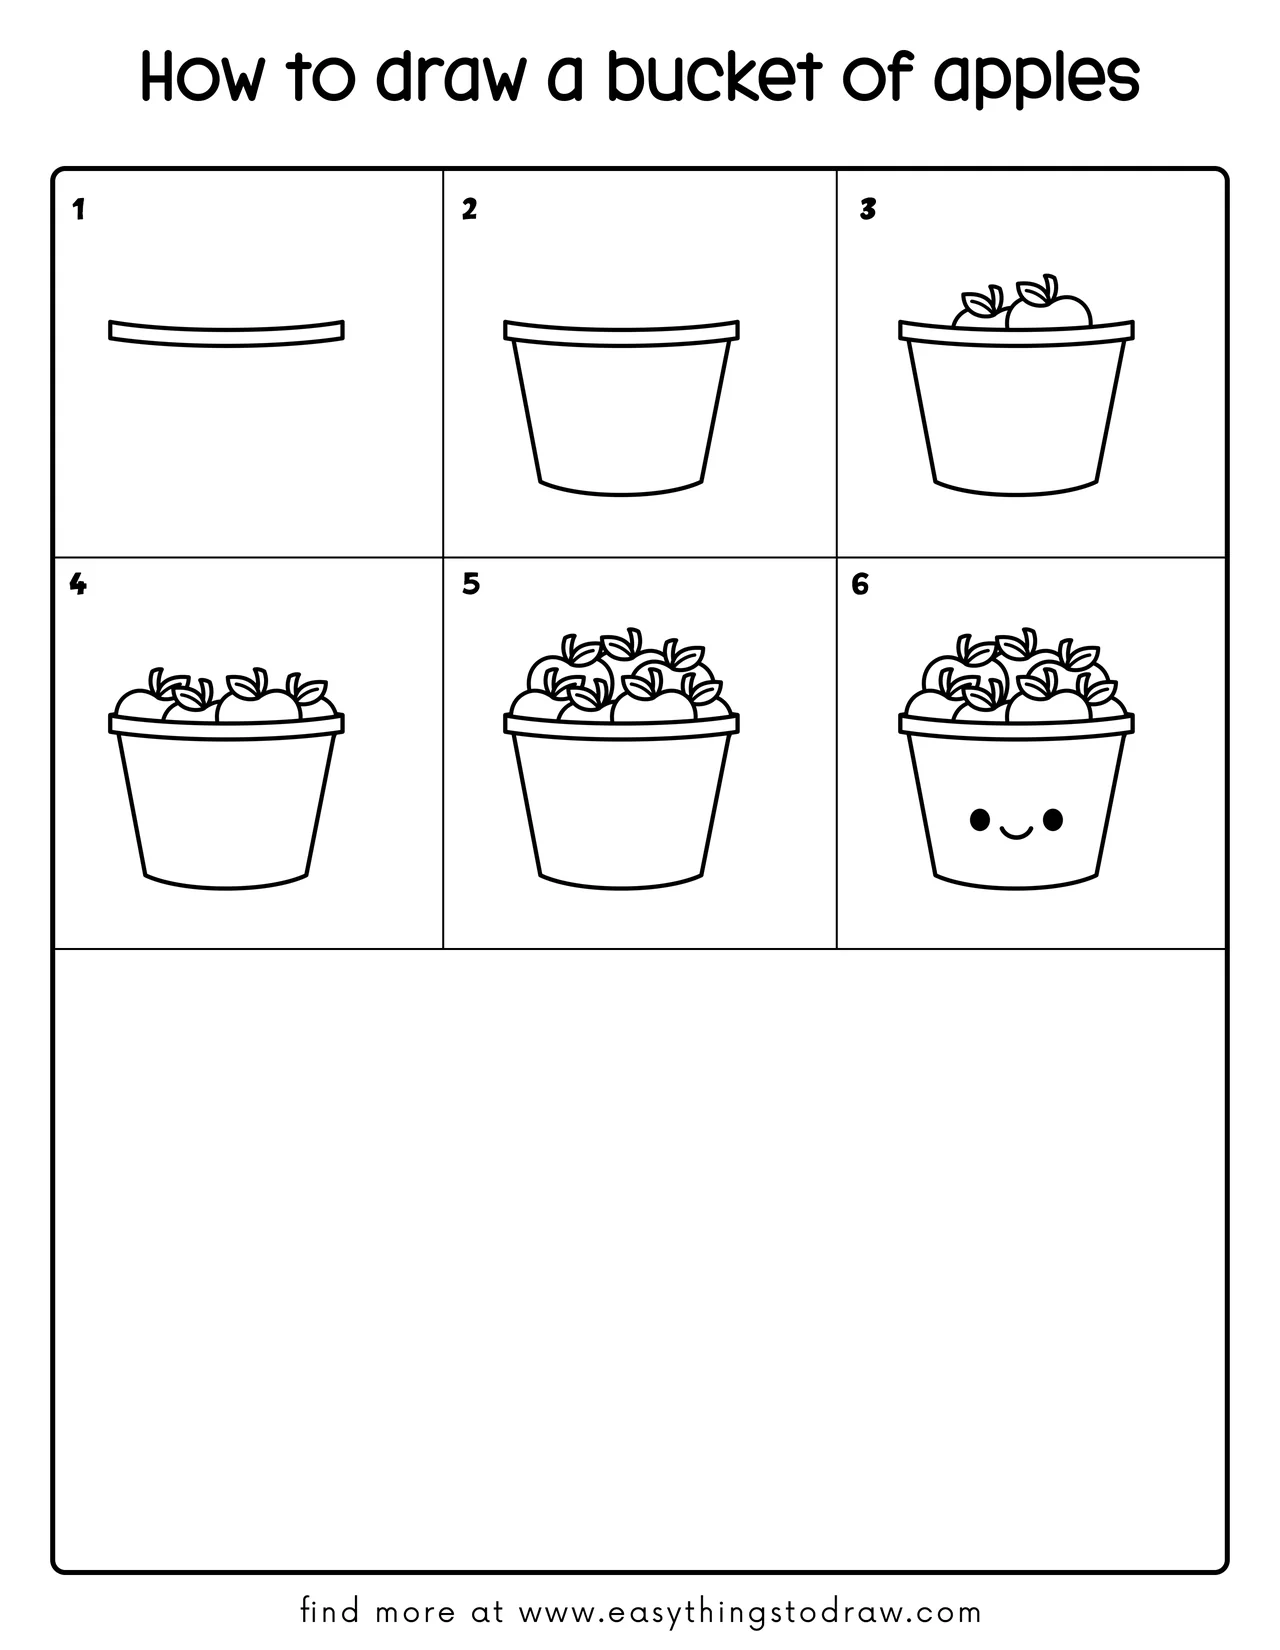
Step 1 – Draw the Bucket Rim

Start with a long, slightly curved rectangle near the top of your page. This will become the rim of your apple bucket.
Step 2 – Add the Bucket Body
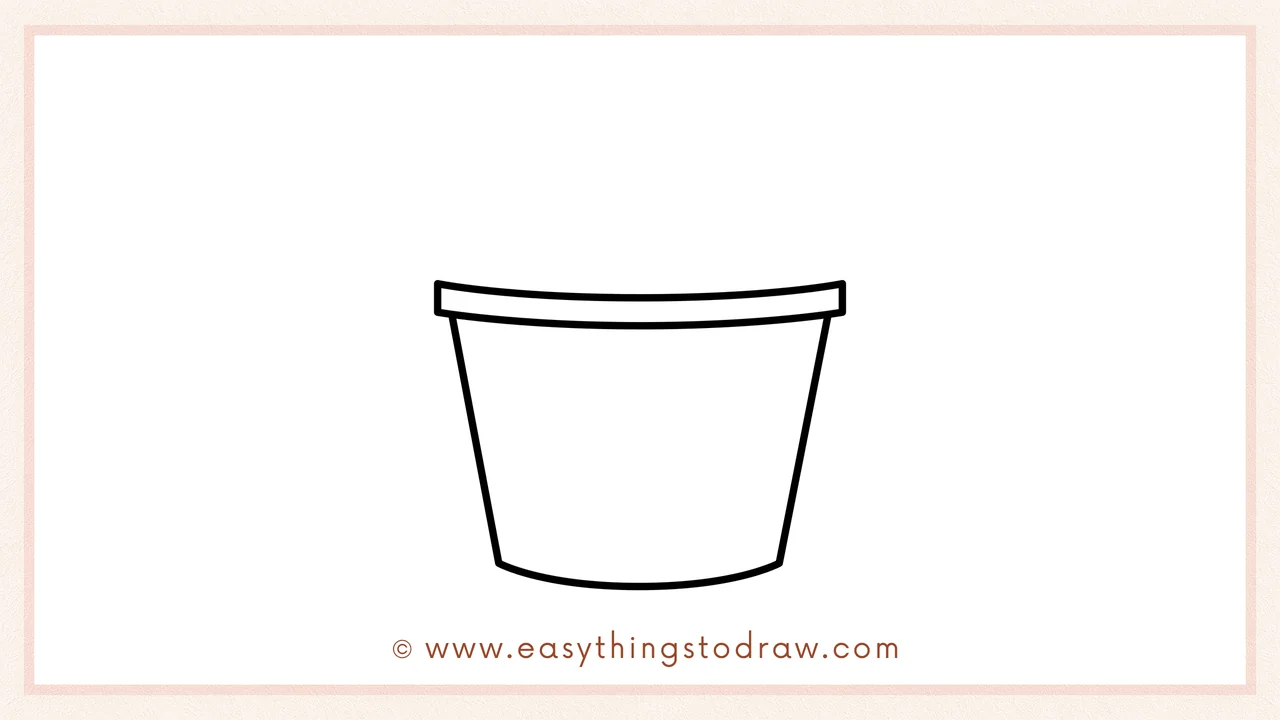
From the sides of the rim, draw two slanted lines going downward. Connect them with a curved line at the bottom. Now you have the bucket’s full shape!
Step 3 – Draw the First Apples
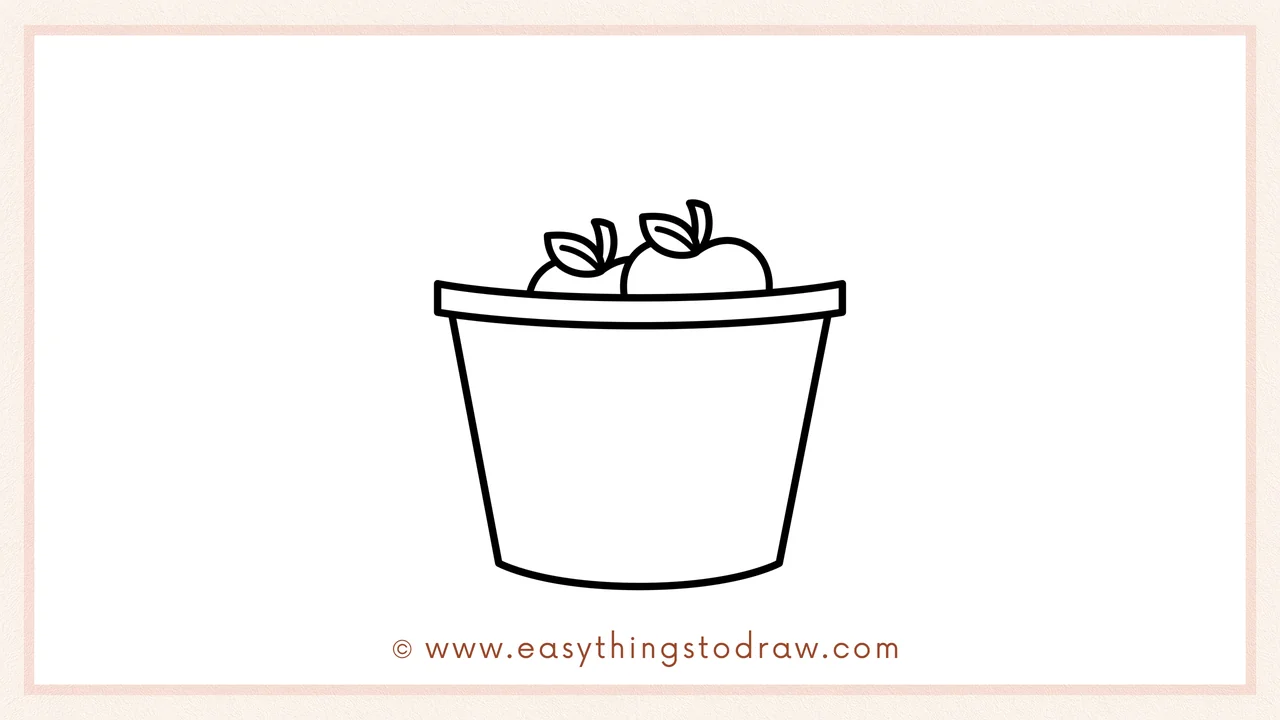
Inside the rim, sketch two round apples peeking out, each with a little stem and a leaf. These are your front apples!
Step 4 – Add More Apples
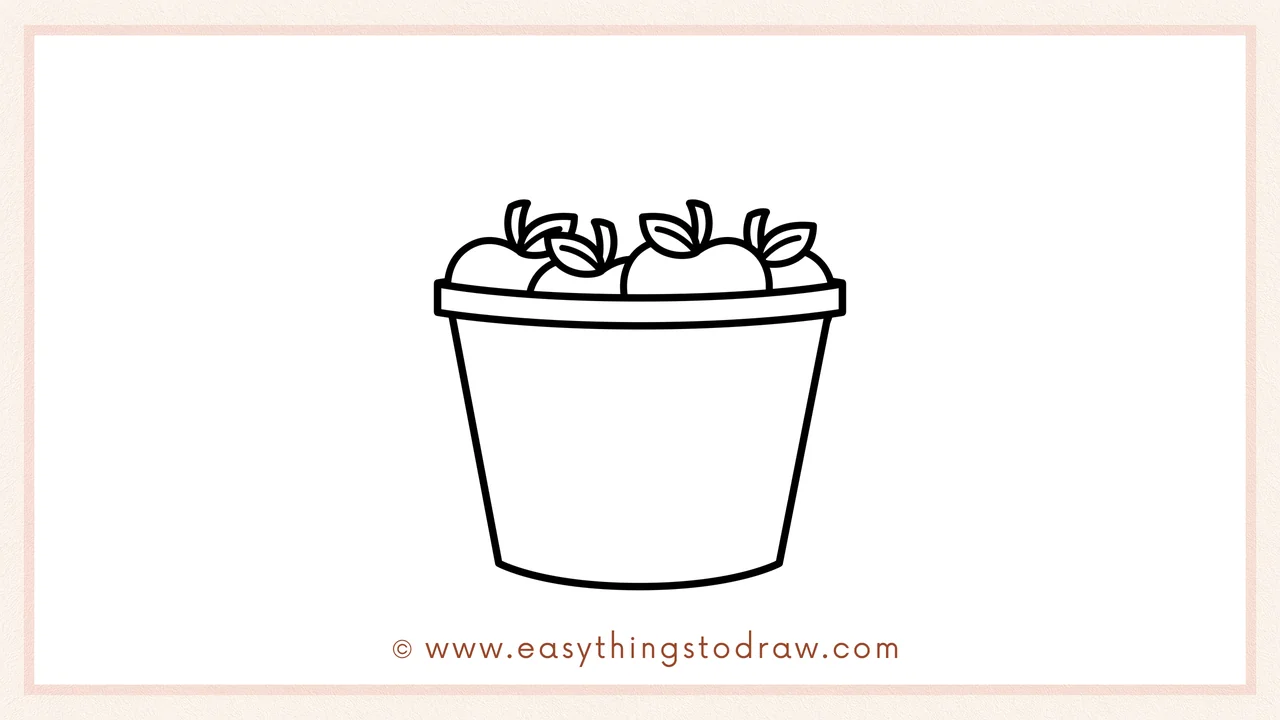
Behind the first two apples, draw a few more round shapes with leaves to fill the bucket halfway. They can overlap a little to look natural.
Step 5 – Fill the Bucket with Apples
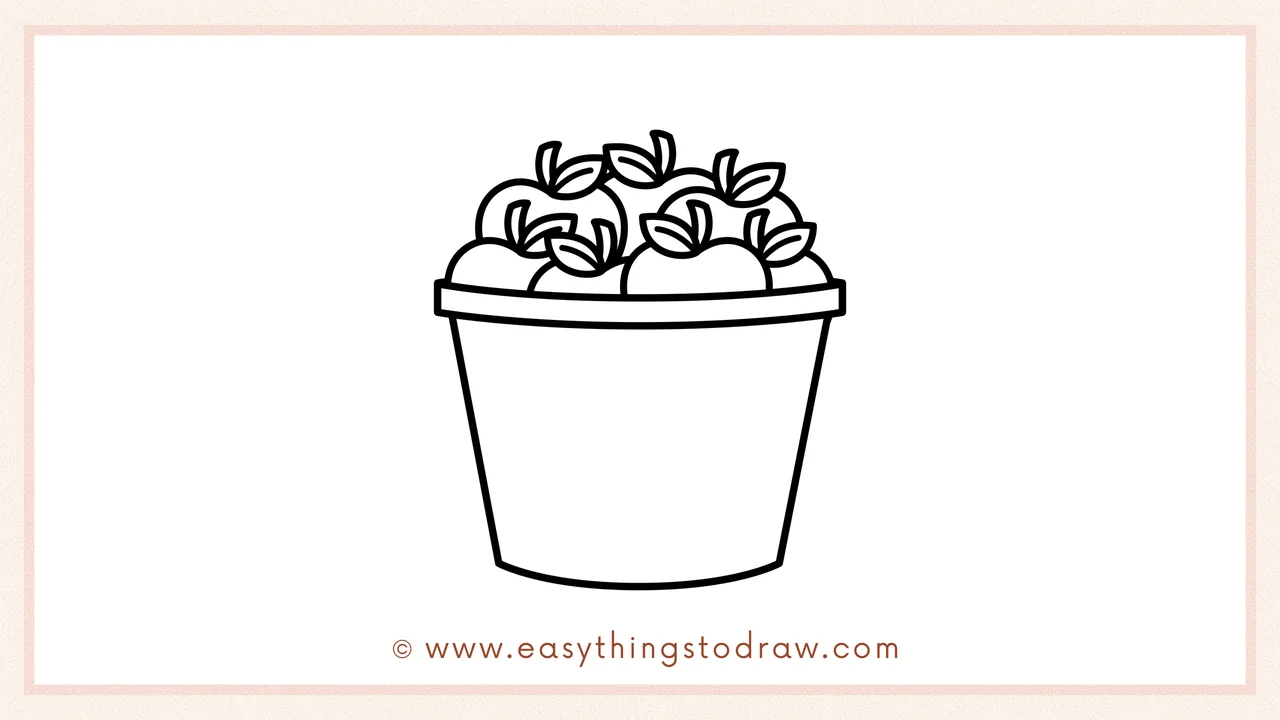
Add even more apples until the top of the bucket is full and overflowing with fruit! Use round shapes and leaves to create a full look.
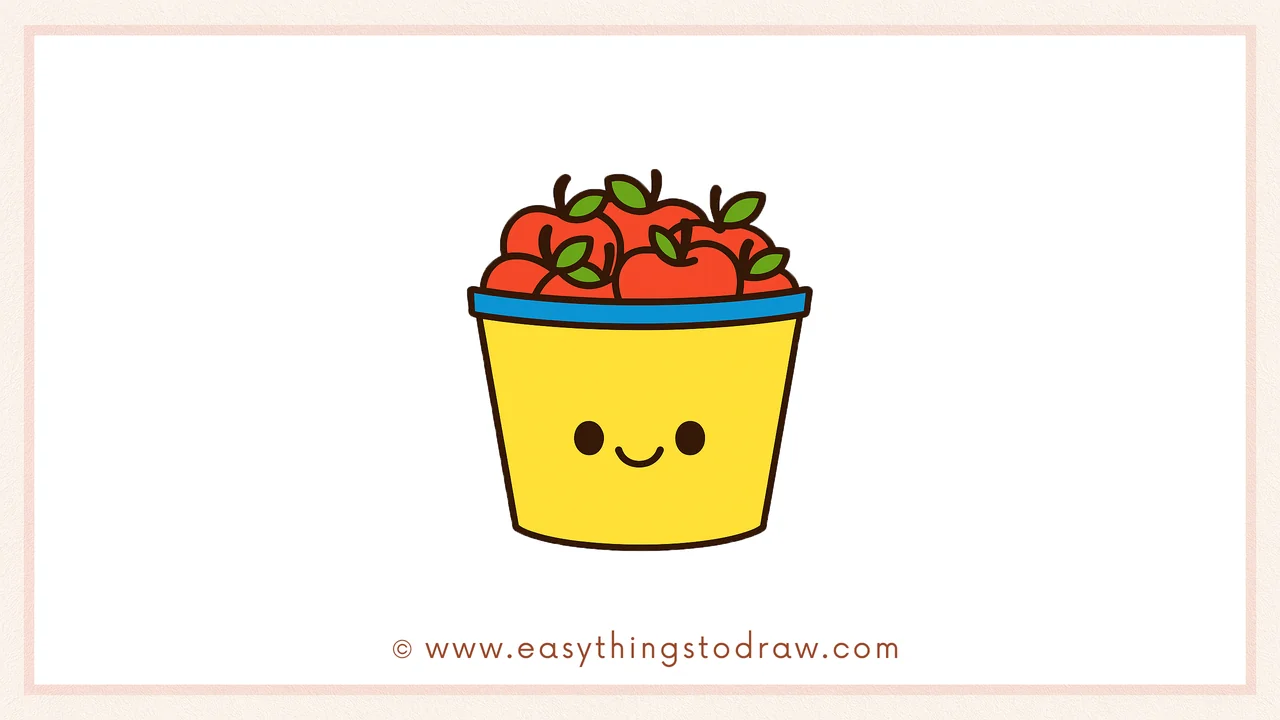
Step 6 – Give It a Happy Face
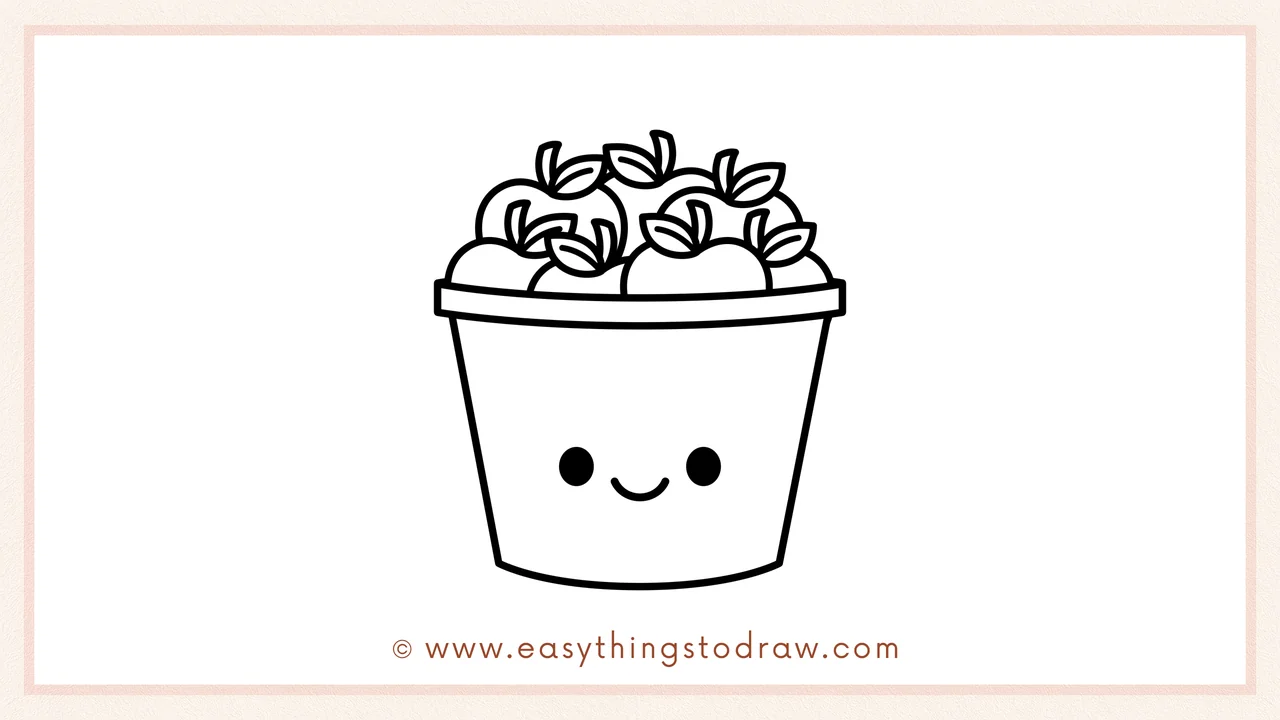
Finish your drawing by adding a happy face to the front of the bucket: two little round eyes and a smiling mouth. Now it looks cheerful and cute!
Frequently Asked Questions (FAQ)
Can I draw different fruits in the bucket?
Yes! You can replace apples with oranges, peaches, or even pumpkins for variety.
Is this drawing good for Thanksgiving crafts?
Absolutely! It’s perfect for fall decorations, cards, or art class during harvest season.
What if my apples look different sizes?
That’s totally fine! Real apples come in all shapes and sizes—yours will look more natural that way.
Can younger kids try this too?
Yes! This tutorial is great for ages 4 and up with adult guidance. The shapes are simple and repetitive.
Printable Drawing Tutorials
Download Printable How to draw a bucket of apples Drawing Tutorials
You Did It!
Bravo, artist! You just finished your very own cute bucket of apples—how festive and fun! This cheerful drawing is perfect for Thanksgiving, autumn, or any fruity celebration. Want to make it extra unique? Try adding a pumpkin beside the bucket, or a little squirrel nibbling on an apple. Don’t forget to share your art or hang it up to celebrate your creative harvest!
