Want to create a web of Halloween fun? In this easy step-by-step art tutorial, you’ll learn how to draw a spooky (but friendly!) spider web with a smiling face in the center. It’s perfect for kids, beginners, or anyone who wants to practice their curved lines and geometric shapes. Let’s spin some creativity!
What You Need:
- A pencil
- An eraser
- A black marker (for outlining)
- Coloring tools (crayons, markers, or colored pencils)
- Drawing paper
Step by Step Spider Web Drawing Instructions
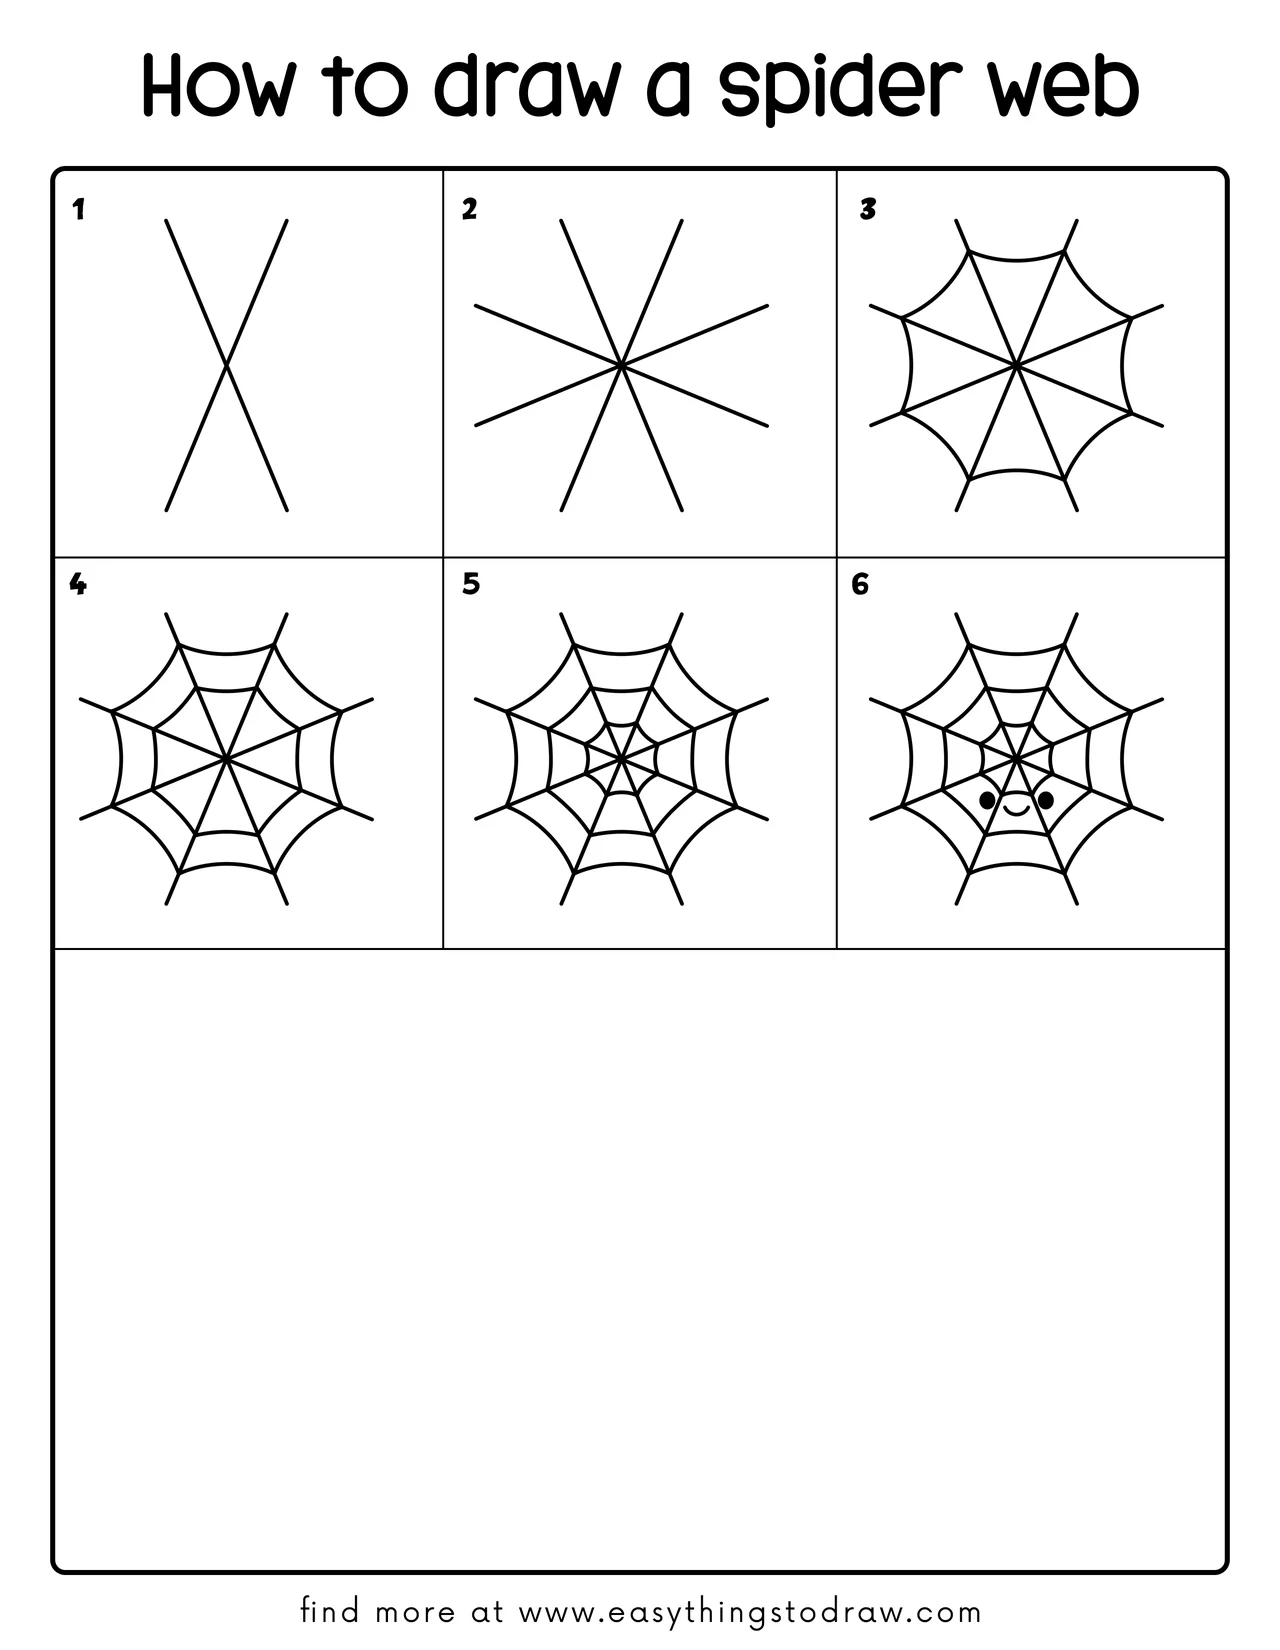
Step 1 – Draw a Giant X
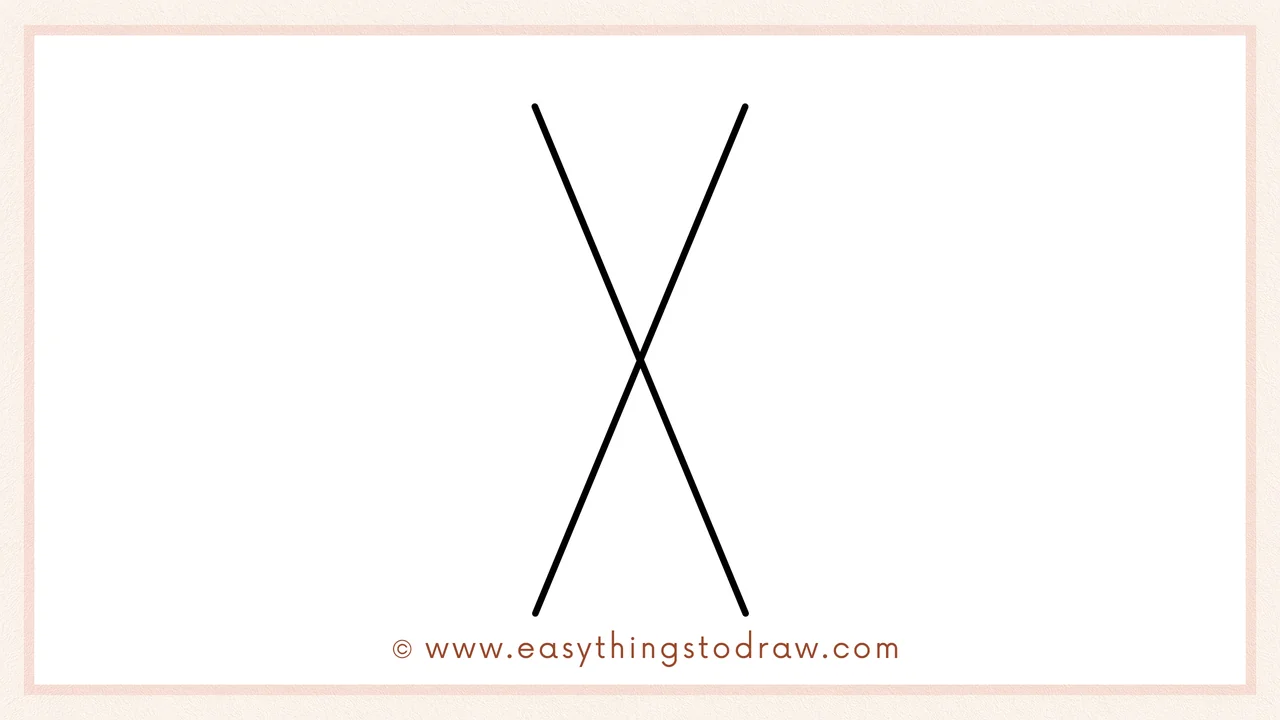
Start with two long diagonal lines crossing each other like a big “X” in the center of your page. This is the base of your web.
Step 2 – Add Two More Lines

Now draw one vertical and one horizontal line across the X. You’ll end up with 8 evenly spaced lines that all meet in the center—just like a real spider web.
Step 3 – Connect the Ends with Curved Lines
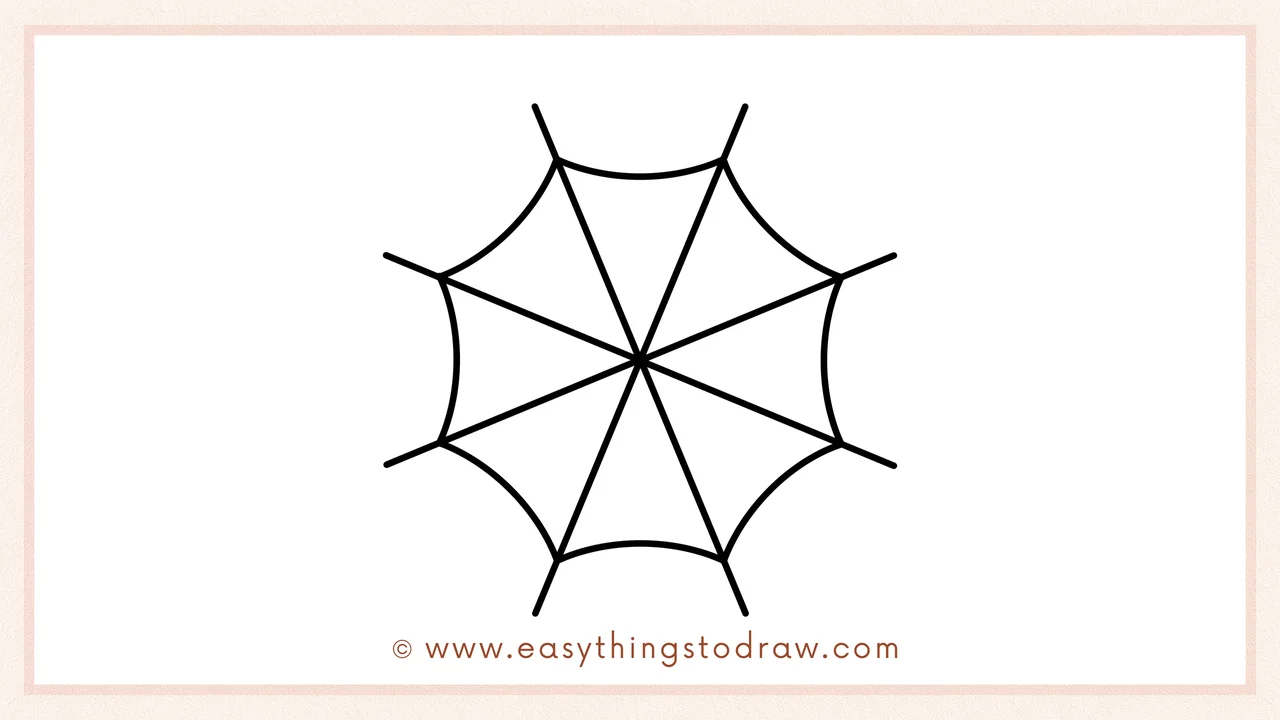
Between each pair of lines, draw a curved line connecting them like little rainbows. This makes the outer edge of your web wavy and natural.
Step 4 – Add a Second Layer of Web
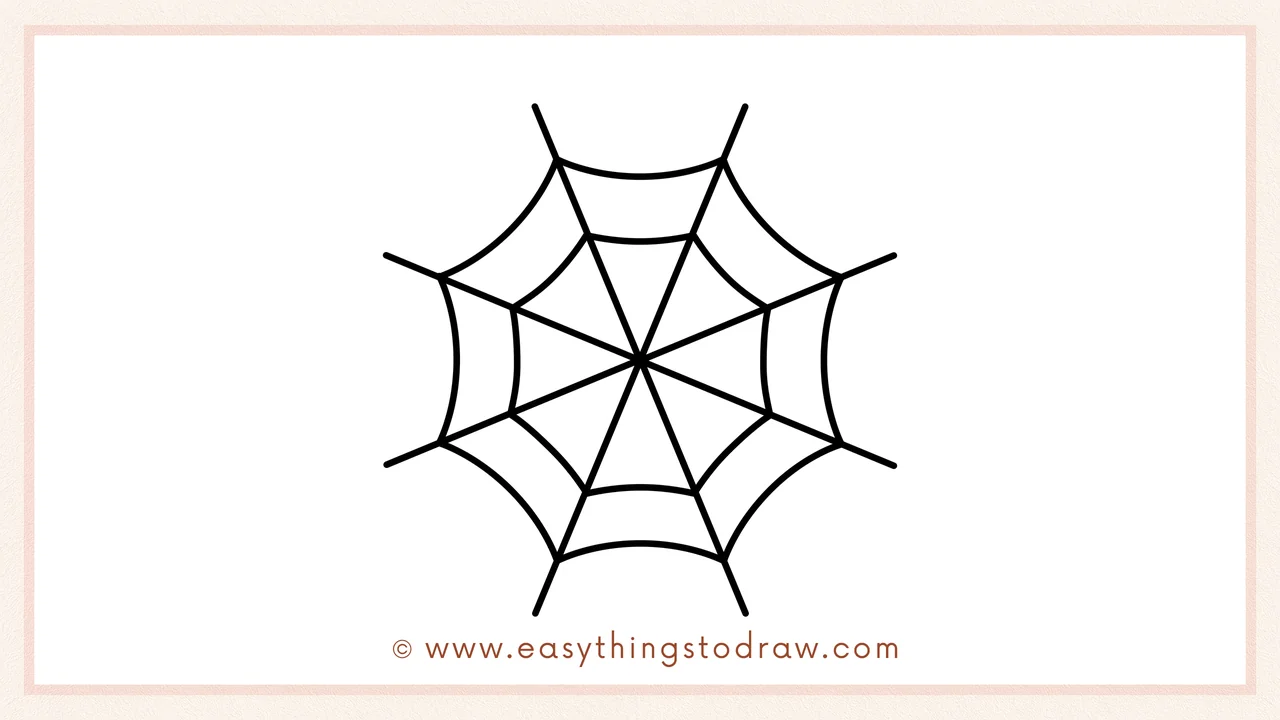
Draw another set of curved lines inside the first layer, following the same pattern but a little smaller. Now your web has more depth!
Step 5 – Add a Third Inner Ring
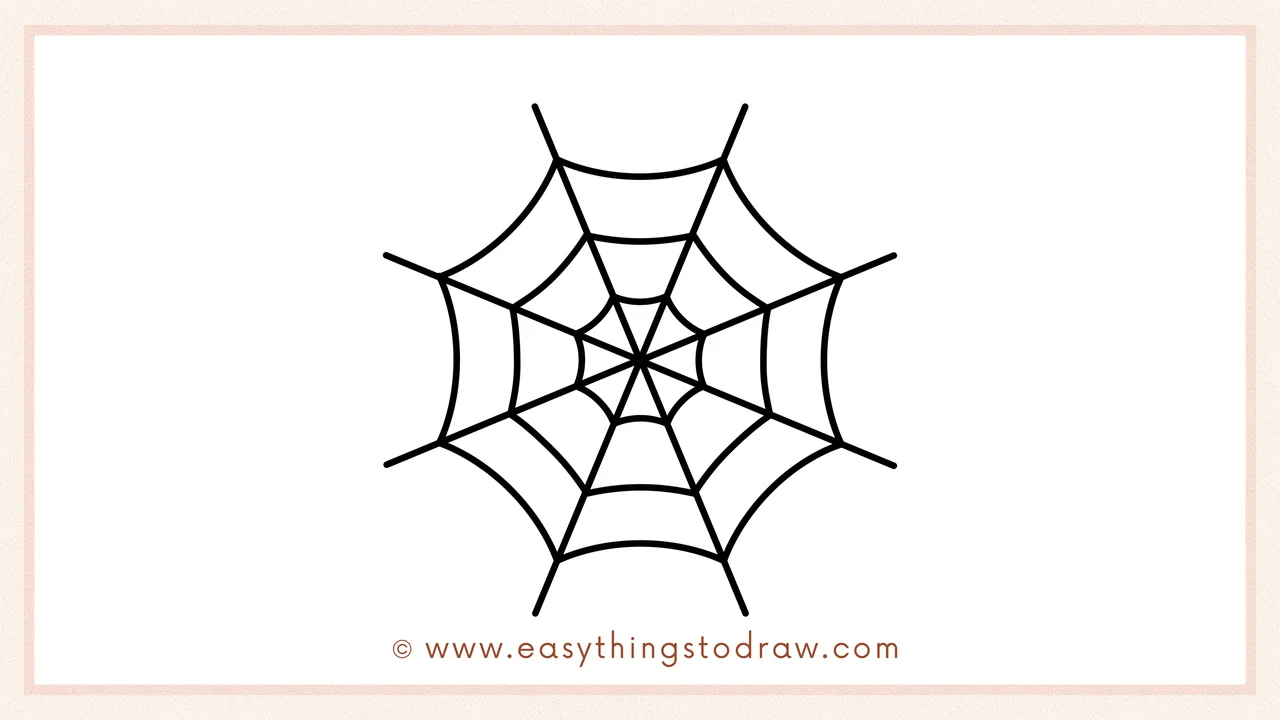
Add a third smaller set of curved lines in the center of the web. This completes your beautiful spiral spider web design.
Step 6 – Add a Cute Face in the Middle
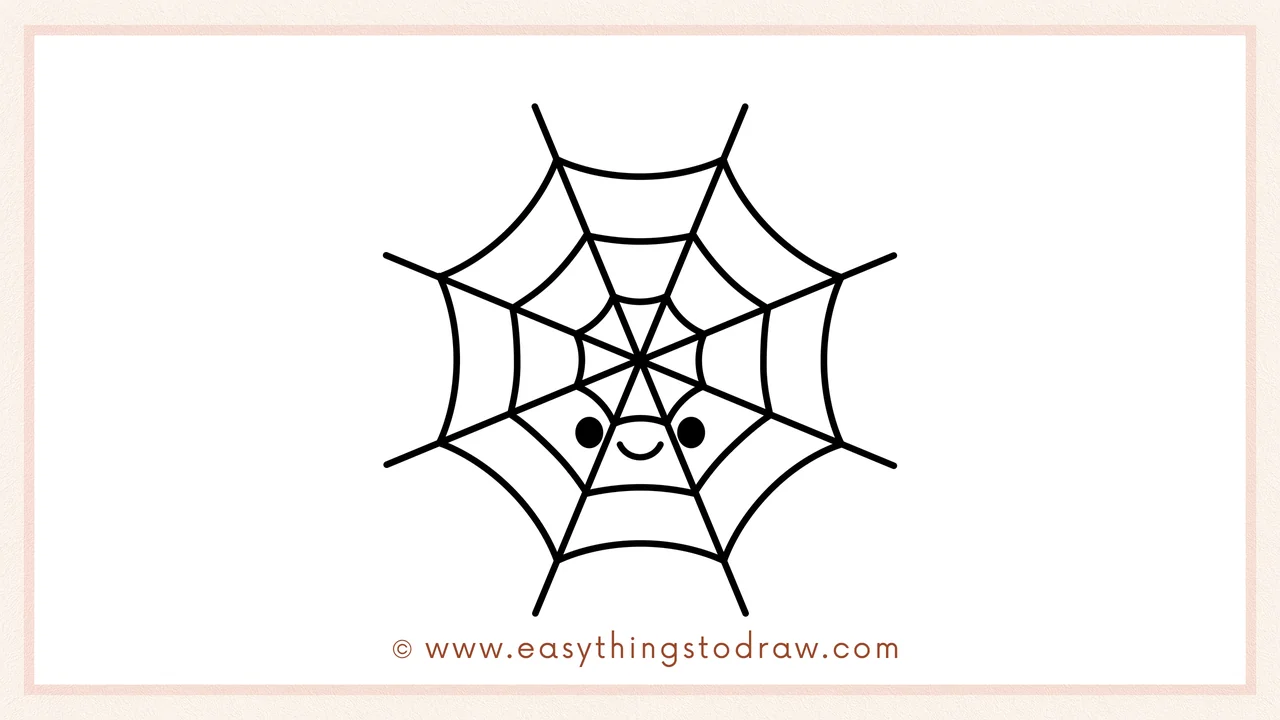
Let’s make it extra fun! In the center of the web, draw two round eyes and a smiley mouth. Now your spider web is friendly and full of Halloween cheer!
Frequently Asked Questions (FAQ)
Can I draw a spider hanging from the web?
Yes! Try adding a small spider hanging down from the center or crawling up the web.
How many layers can I add to the web?
As many as you like! 3 is great for beginners, but you can add more for extra detail.
Can I color the web in fun ways?
Absolutely! Try purple, silver, orange, or add glitter to make a magical web.
Is this a good Halloween drawing for classrooms?
Yes! It’s great for Halloween-themed lessons, bulletin boards, or activity sheets.
Printable Drawing Tutorials
Download Printable How to draw a spider web Drawing Tutorials
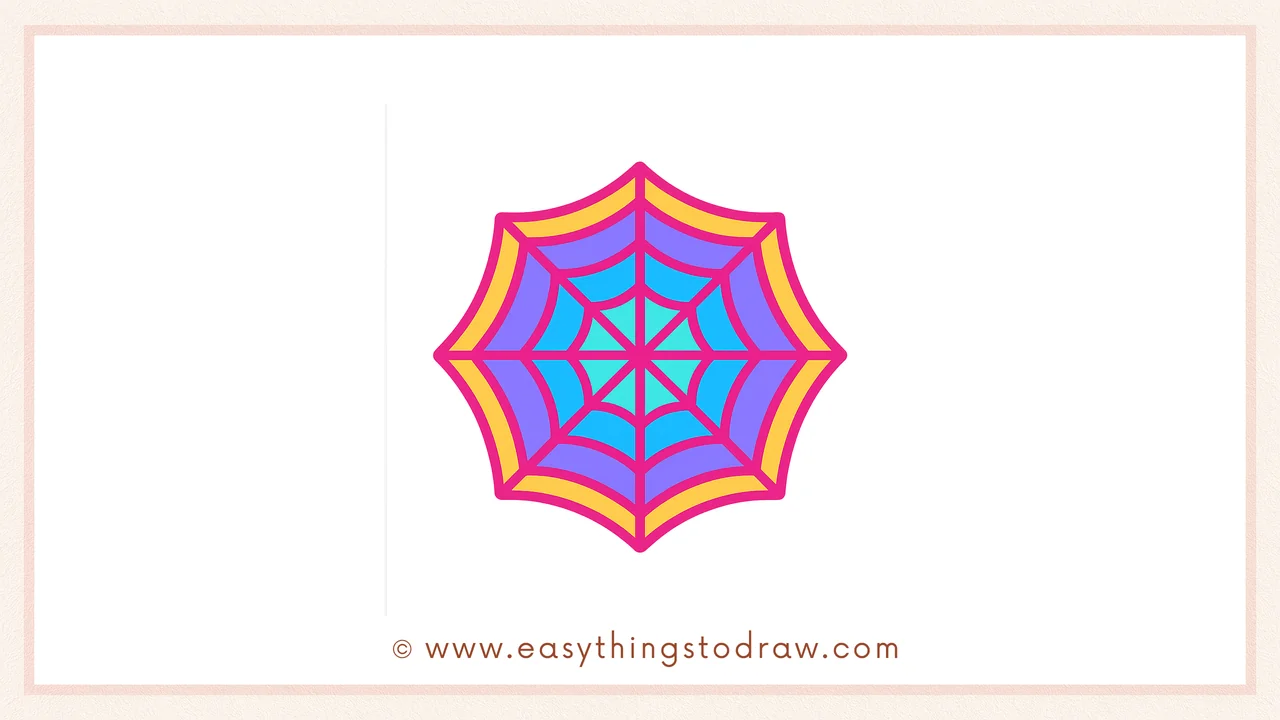
You Did It!
You did it! Great job drawing your adorable Halloween spider web. Want to add more magic? You can draw stars in the background, a spooky moon, or a curious spider peeking from the side. Whether you make it spooky or sparkly, your web is full of creativity. Be sure to share your art and come back to try another Halloween doodle!
