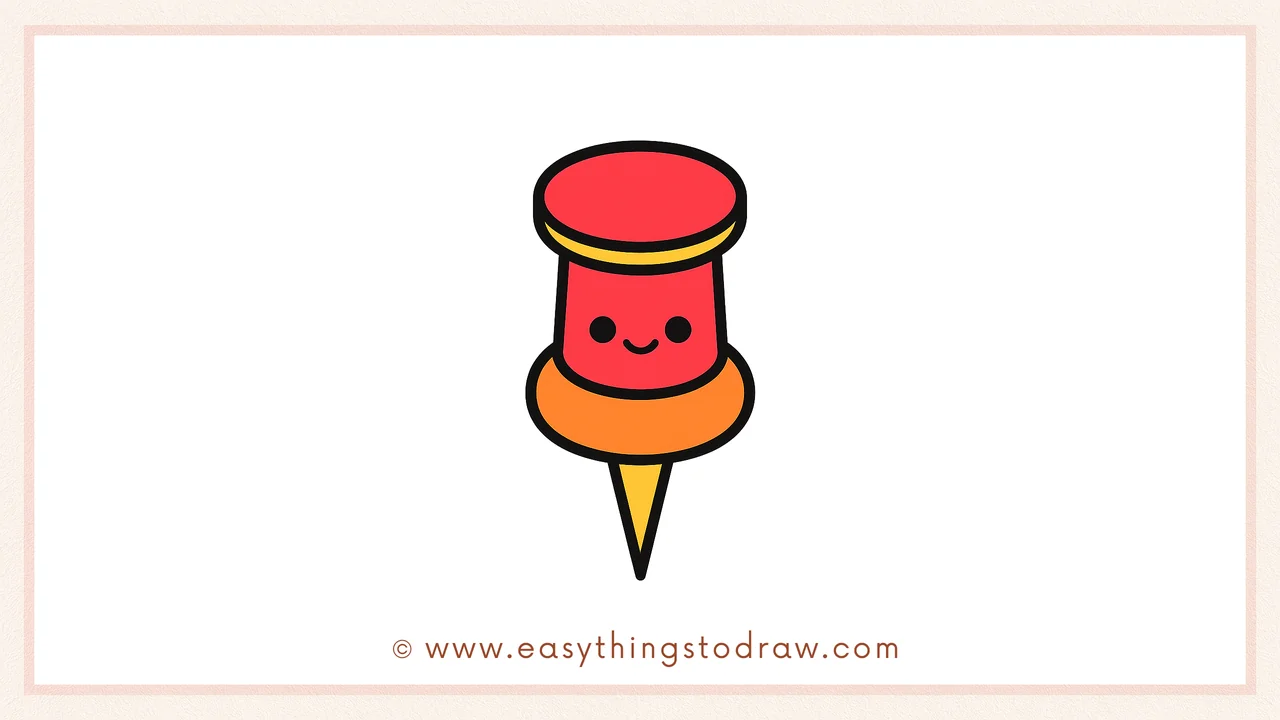
Pushpins might be small, but they’re super fun to draw—especially when we add a cute little face! This beginner-friendly guide is perfect for kids, preschoolers, or anyone looking to try a simple cartoon pushpin drawing. With just a few shapes and a smile, you’ll create an adorable pushpin sketch that’s full of personality. Follow along with this easy cartoon pushpin drawing for beginners and let’s get started!
What You Need:
- A pencil
- An eraser
- A black marker (for outlining)
- Coloring tools (crayons, markers, or colored pencils)
- Drawing paper
Step by Step Pushpin Drawing Instructions
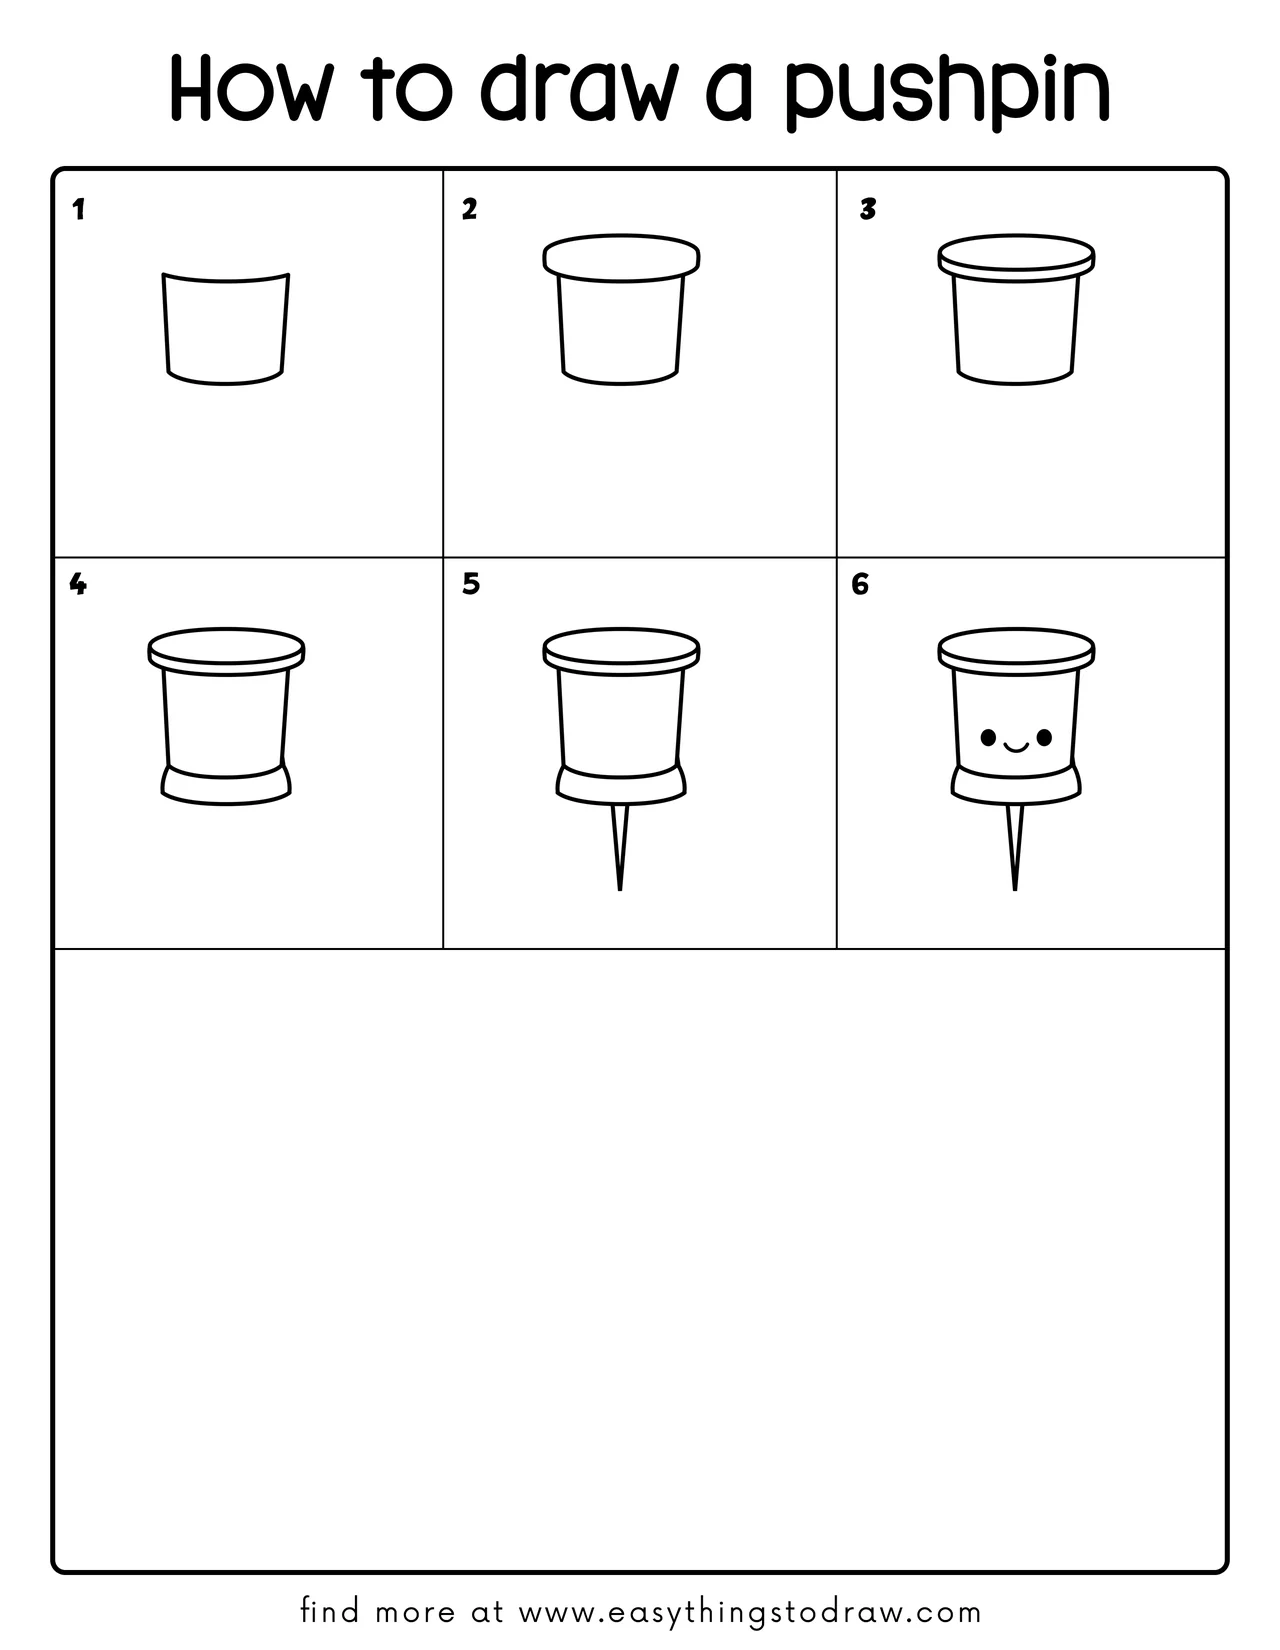
Step 1 – Draw the Rounded Bottom of the Pushpin
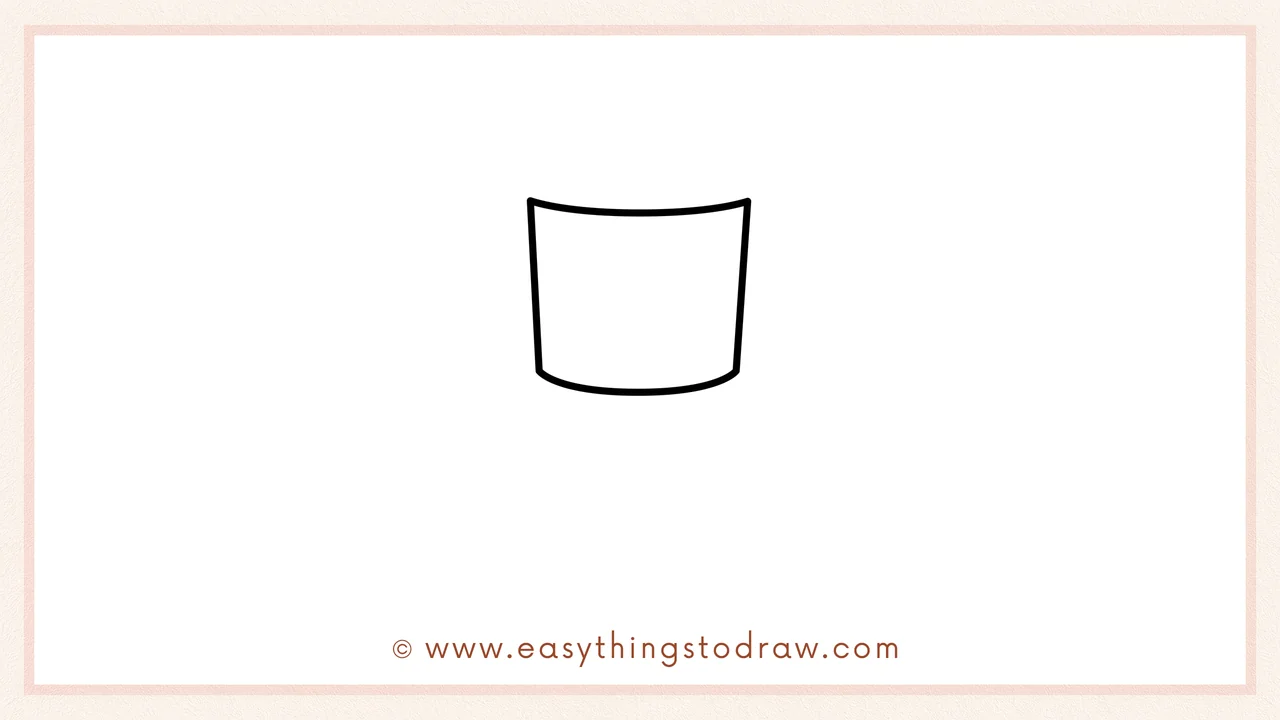
Start by sketching a tall, narrow “bucket” shape. Draw a curved line at the bottom and two slightly slanted vertical lines going up. The top should be open for now—it looks like a little cup!
Step 2 – Add the Top Circle of the Pushpin

Now, draw a wide oval resting right on top of the shape. This creates the round top of the pushpin. Make sure the oval overlaps a bit, so it looks connected.
Step 3 – Create the Pushpin Rim
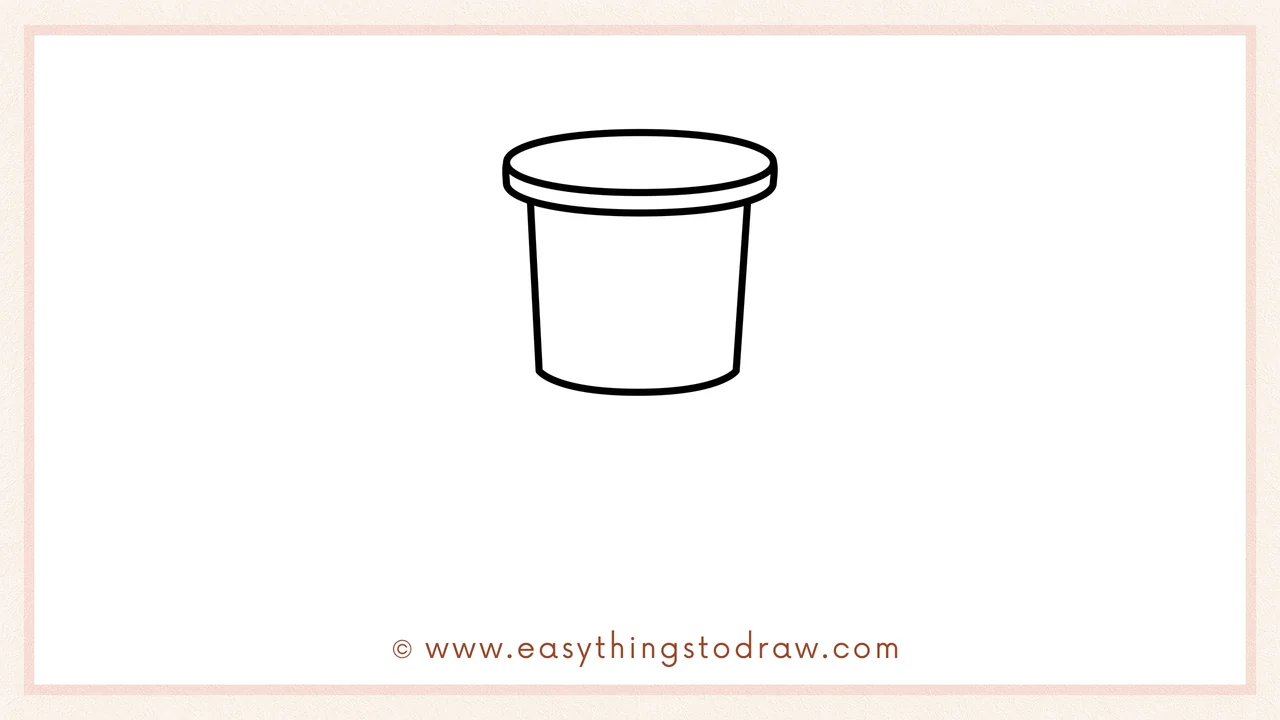
Add a second, slightly smaller oval just under the first one. This forms the rim of the pushpin’s top and gives it a more 3D look.
Step 4 – Draw the Base Shape of the Pin
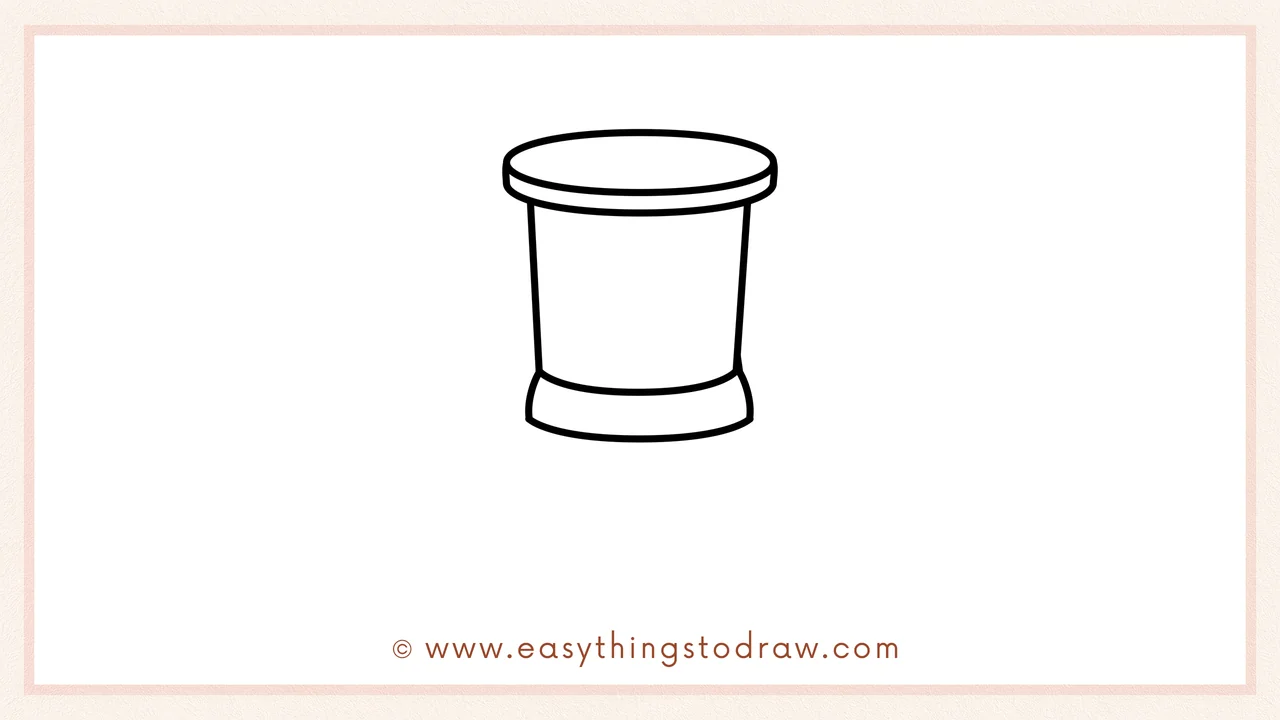
Now, let’s add the pushpin’s base. At the bottom, draw two curved lines that widen slightly outward, then curve back in to meet another oval. This part helps the pin hold its shape!
Step 5 – Add the Pointy Metal Tip
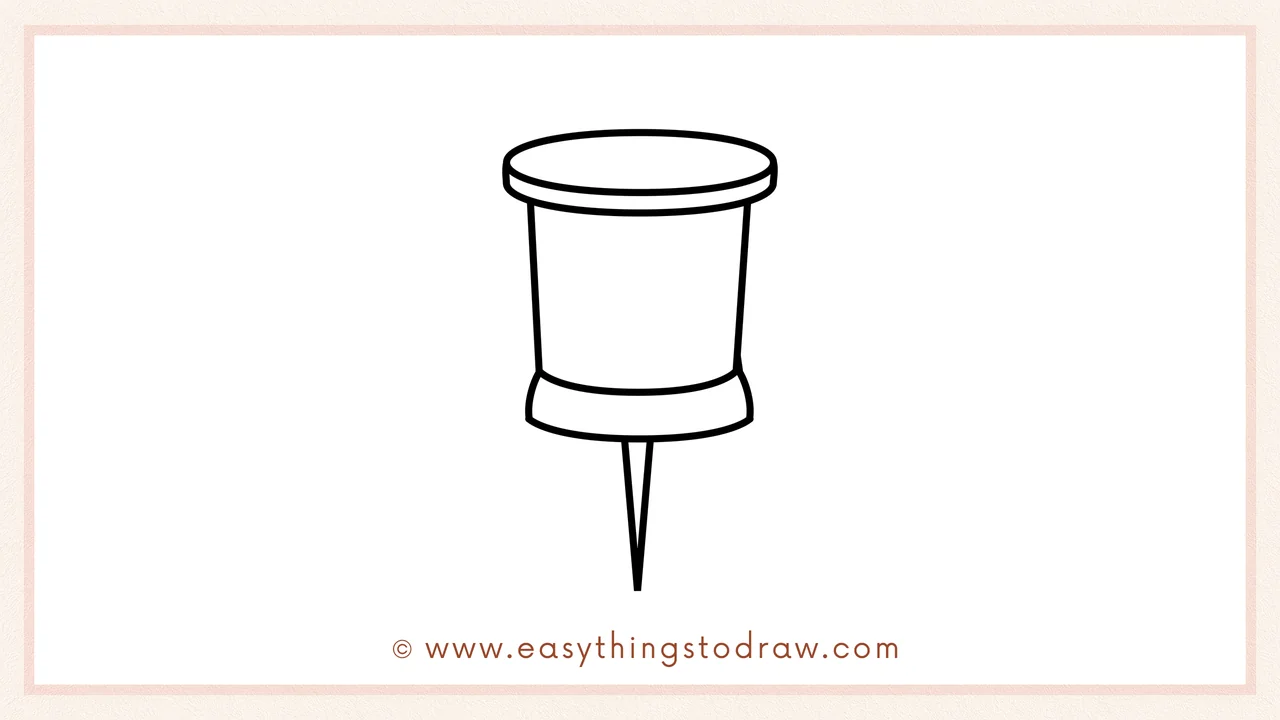
Time for the sharp part! Below the base, draw a long, thin triangle pointing downward. This is the metal pin that sticks into things. Be careful—it’s only pretend sharp!
Step 6 – Add a Cute Face to Your Pushpin
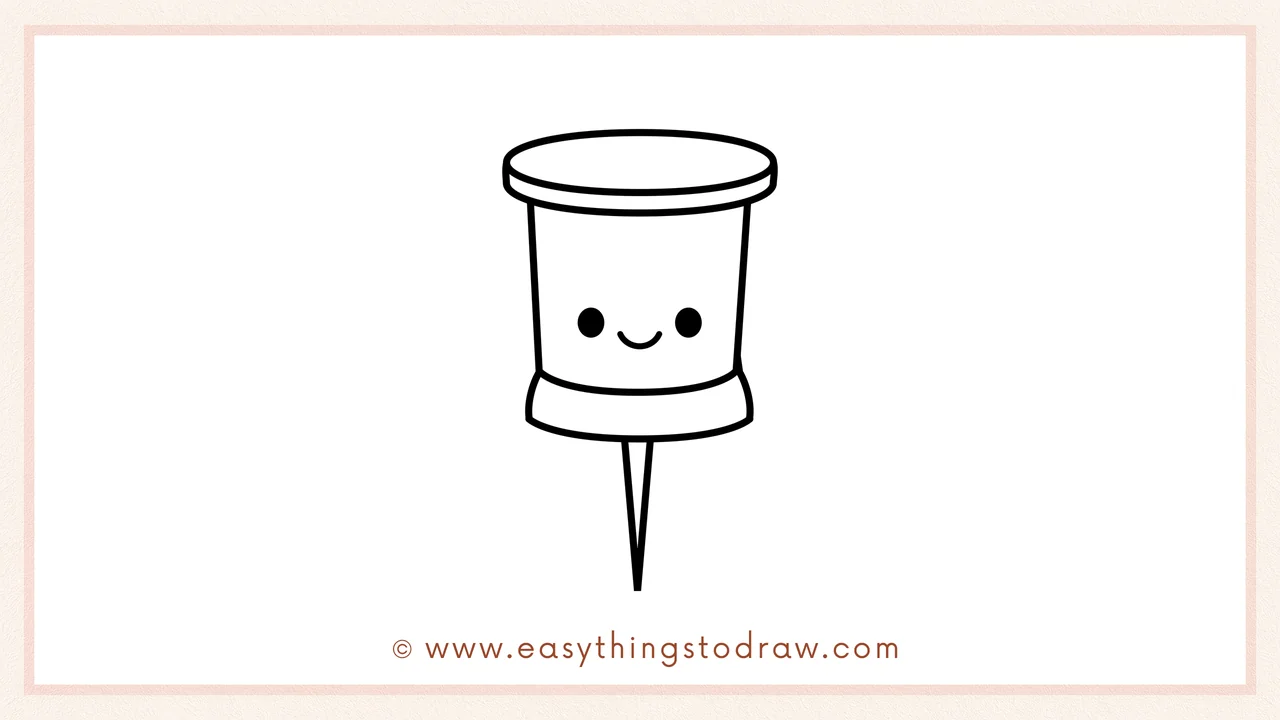
Now let’s give our pushpin some personality! Add two tiny circles for eyes and a curved line in the middle for a smile. Yay! Your pushpin is now a happy little helper!
Frequently Asked Questions (FAQ)
Can I make the pushpin look more realistic instead of cute?
Yes! Skip the cartoon face and use sharp edges or shading for a more lifelike style.
What colors should I use to color my pushpin?
Classic red or yellow are great, but feel free to use rainbow colors, patterns, or metallic shades!
What if my shapes aren’t perfect?
That’s okay! Every drawing is unique, and practice makes progress. Just have fun and keep sketching.
What age is this drawing guide best for?
It’s great for kids aged 4 and up, and even adults who want a quick creative break!
Printable Drawing Tutorials
Download Printable How to draw a pushpin Drawing Tutorials
You Did It!
Amazing work drawing your very own cartoon pushpin! Doesn’t it look cheerful and helpful? Feel free to personalize it—give it a speech bubble, a funky background, or even tiny arms! You can also make a whole set of pushpin pals in different colors. Don’t forget to share your masterpiece, print this guide to use again later, and come back soon for more fun drawing ideas!
